140
Scanning
Scanning Overview
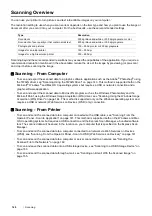
You can use your printer to turn pictures and text into editable images on your computer.
The resolution setting to use when you scan an item depends on the item type and how you plan to use the image or
document after you scan it into your computer. For the best results, use these recommended settings.
Scanning beyond these recommended resolutions may exceed the capabilities of the application. If you require a
recommended resolution mentioned in the above table, reduce the size of the image by previewing (or pre-scan)
and crop it before scanning the image.
Scanning - From Computer
•
To scan and export the scanned data to a graphic software application such as the Adobe
®
Photoshop
®
using
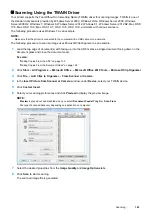
the TWAIN driver, see "Scanning Using the TWAIN Driver" on page 143. This method is supported both on the
Microsoft
®
Windows
®
and Mac OS X operating systems but requires a USB or network connection and a
graphic software application.
•
To scan and export the scanned data to Microsoft's program such as the Windows Photo Gallery and the
Microsoft Paint, using the Windows Image Acquisition (WIA) driver, see "Scanning Using the Windows Image
Acquisition (WIA) Driver" on page 144. This method is supported only on the Windows operating system and
requires a USB or network (Web Services on Devices (WSD) only) connection.
Scanning - From Printer
•
To scan and send the scanned data to a computer connected with a USB cable, see "Scanning From the
Operator Panel - Scan to Application" on page 141. This method is supported both on the Windows and Mac
OS X operating systems but requires a USB connection and the Express Scan Manager, a bundled software
tool. The scanned data will be saved in the location on your computer that is specified on the Express Scan
Manager.
•
To scan and send the scanned data to a computer connected to a network via Web Services on Devices
(WSD), see "Scanning From the Operator Panel - Scan to WSD (Web Services on Devices)" on page 141.
•
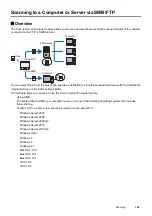
To scan and send the scanned data to a computer or server connected to a network, see "Sending the
Scanned File to the Network" on page 162.
•
To scan and save the scanned data onto a USB storage device, see "Scanning to a USB Storage Device" on
page 163.
•
To scan and send the scanned data through e-mail, see "Sending an E-mail With the Scanned Image" on
page 165.
Type
Resolution
Documents
300 dpi black-and-white or 200 dpi grayscale or color
Documents of poor quality or that contain small text
400 dpi black-and-white or 300 dpi grayscale
Photographs and pictures
100 – 200 dpi color or 200 dpi grayscale
Images for an inkjet printer
150 – 300 dpi
Images for a high-resolution printer
300 – 600 dpi
Содержание DocuPrint CM225FW
Страница 1: ...DocuPrint CM225 fw User Guide ...
Страница 10: ...10 Contents Technical Support 338 Online Services 339 Index 340 ...
Страница 157: ...Scanning 157 5 Select any unused number and click Add The Add Network Scan Address page appears 9 8 7 6 5 4 3 2 1 ...
Страница 260: ...260 Digital Certificates 11 Digital Certificates Using Digital Certificates on page 261 ...
Страница 272: ...272 Troubleshooting 4 Lower the levers to their original position 5 Close the rear cover ...
Страница 337: ...Contacting Fuji Xerox 337 14 Contacting Fuji Xerox Technical Support on page 338 Online Services on page 339 ...
Страница 344: ...DocuPrint CM225 fw User Guide ME6939E2 1 Edition 1 July 2014 Fuji Xerox Co Ltd Copyright 2014 by Fuji Xerox Co Ltd ...


