134
v
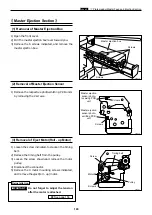
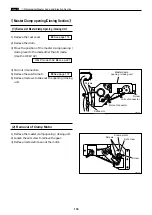
Paper Feed Section
chap.3
Before power off, press the feed tray
descend switch until the paper feed
tray is at its lower most position.
IMPORTANT :
440144
440145
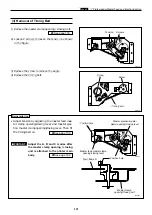
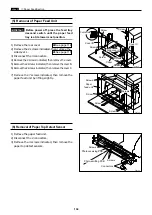
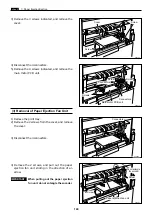
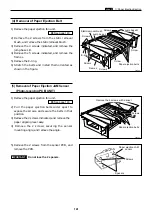
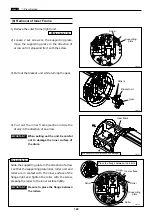
(5) Removal of Paper Feed Unit
Cover B
Screws
Screw
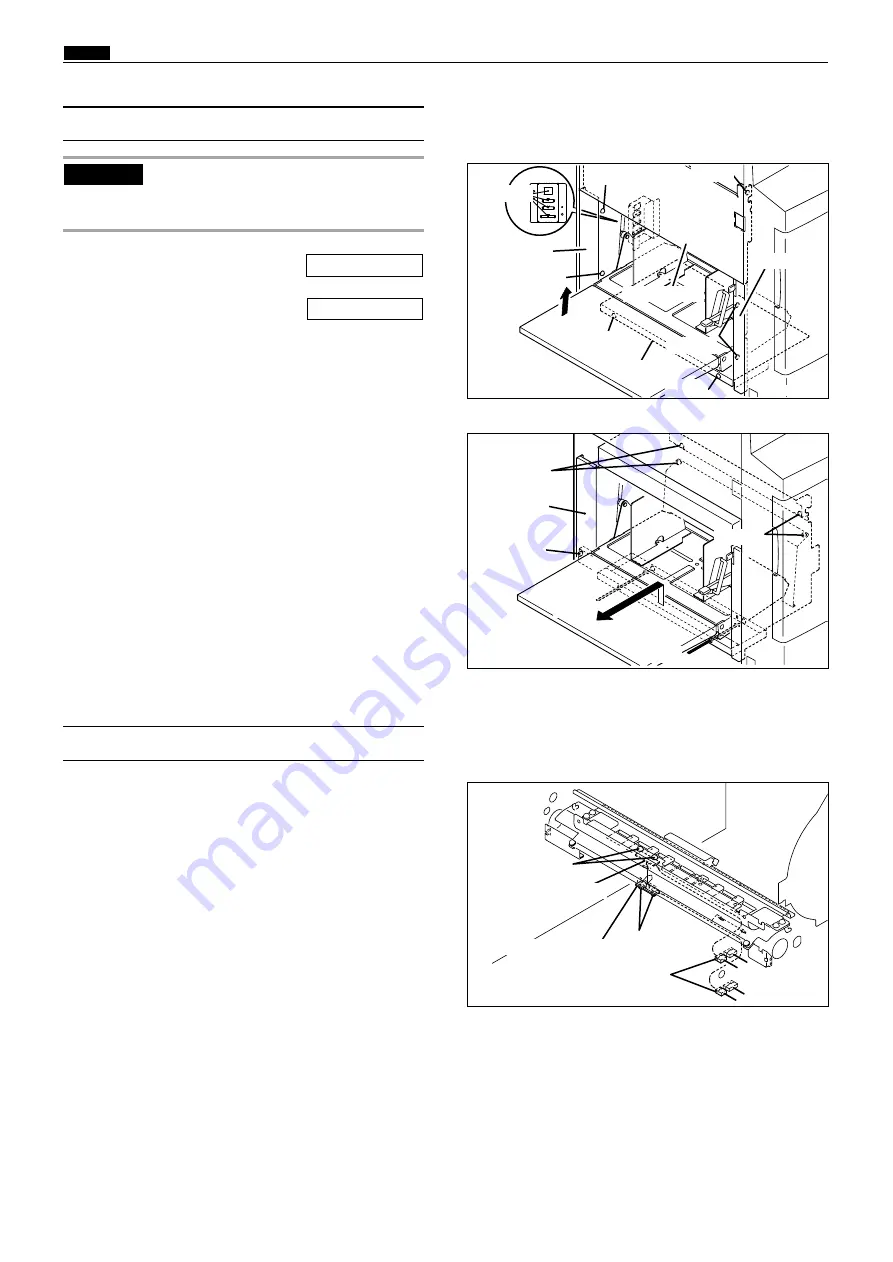
7) Remove the 7 screws indicated, then remove the
paper feed unit by lifting slightly.
1) Remove the rear cover.
2) Remove the 2 screws indicated, then remove the
side cover L.
3) Disconnect the 4 connectors.
4) Remove the 2 screws indicated, then remove the cover.
5) Remove the 2 screws indicated, then remove the cover B.
6) Remove the 2 screws indicated, then remove the cover C.
\
See page 115
\
See page 114
Side cover L
Connectors
Screw
Screw
Paper
feed unit
Screw
Screws
Screw
Screw
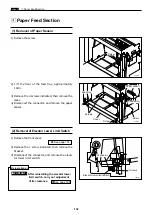
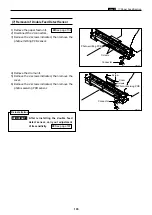
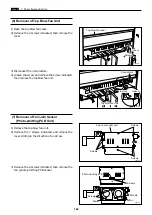
1) Remove the paper feed unit.
2) Disconnect the 2 connectors.
3) Remove the 4 screws indicated, then remove the
paper top detect sensors.
(6) Removal of Paper Top Detect Sensor
440148
Screws
Photo-receiving PCB
Connectors
Screws
Photo-emitting PCB
Screw
Screw
Cover
Cover C
Screws
Содержание Duprinter DP-330
Страница 9: ......
Страница 11: ......
Страница 18: ...c Dimensions chap 1 17 MEMO...
Страница 24: ...4 8 2A 2B 2C 44000A1e b Part Names and Their Functions chap 1 23...
Страница 152: ...151 MEMO...
Страница 193: ...192 MEMO...
Страница 328: ...327 x Overall Wiring Layout chap 8 14 2 Overall Wiring Layout 2 Overall Wiring Layout 2 Drive PCB 1 2 O...
Страница 329: ...328 x Overall Wiring Layout chap 8 15 Overall Wiring Layout 2 Drive PCB 2 2...

