Canon i-SENSYS LBP5300 Series Скачать руководство пользователя страница 74

2-35

Installing the Pr

inter

2

Turning the Printer ON/OFF
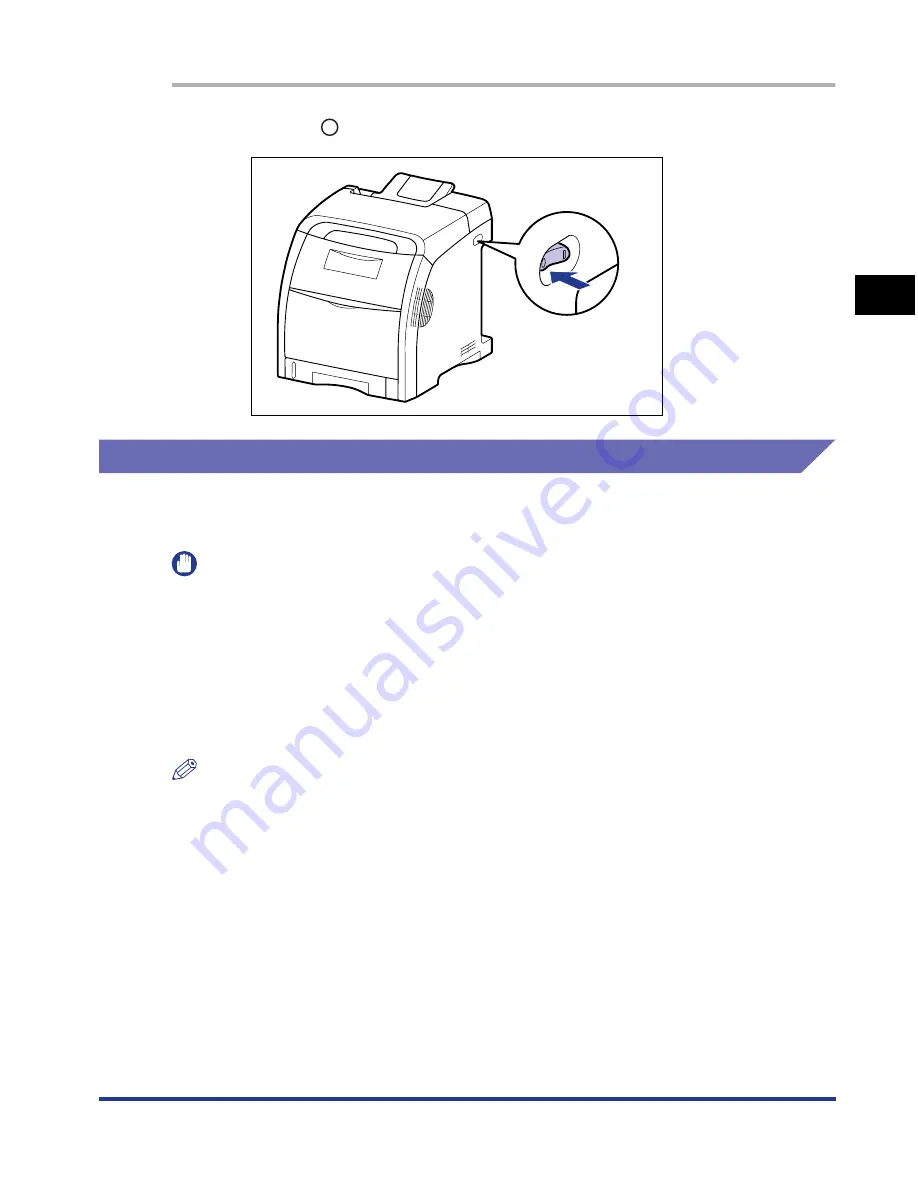
1

Press "

" of the power switch on the printer.

Power Saving (Sleep Mode)

You can reduce power consumption efficiently by using the sleep mode when the 
printer is idle or not in use. Use the sleep mode using the following procedure.

IMPORTANT

Even if the power switch is turned OFF, power is consumed only slightly while the power 
plug is inserted into the AC power outlet. To cut the power consumption completely, 
unplug the power plug from the AC power outlet.

Since calibration or correction of a phenomenon of "Out-of-Register Colors" is not 
performed automatically during the sleep state, you may not obtain appropriate printout 
results when printing immediately after the sleep state is released. In this case, perform 
calibration manually (See p. 6-18) or correction of the phenomenon of "Out-of-Register 
Colors" (See p. 6-23).

NOTE

You can select [5], [10], [15], [30], [60], [90], [120], [150], or [180] minutes for [Time to 
Enter Sleep Mode]. The default value is [30] minutes. You can also configure the printer 
not to enter the sleep mode.

The sleep mode is cleared in the following circumstances:
- Printing is performed
- Calibration is performed
- Correction of a phenomenon of "Out-of-Register Colors" is performed
- Cleaning is performed

Содержание i-SENSYS LBP5300 Series

Страница 1: ...User s Guide User s Guide ENG IMPORTANT Read this manual carefully before using your printer Save this manual for future reference ...

Страница 2: ...LBP5300 Laser Printer User s Guide ...

Страница 3: ...eshooting User s Guide This Manual CD ROM Setting Up the Network Environment for Printing Managing the Printer in the Network Environment Network Guide CD ROM Operating Setting the Printer from the Web Browser Remote UI Guide CD ROM To view the manual in PDF format Adobe Reader Adobe Acrobat Reader is required If Adobe Reader Adobe Acrobat Reader is not installed on your system please download it ...

Страница 4: ...ntenance Troubleshooting Installing the Optional Accessories Appendix Chapter 1 Chapter 2 Chapter 3 Chapter 4 Chapter 5 Chapter 6 Chapter 7 Chapter 8 Chapter 9 Considerable effort has been made to ensure that this manual is free of inaccuracies and omissions However as we are constantly improving our products if you need an exact specification please contact Canon ...

Страница 5: ... xiii International Energy Star Program xiv WEEE Directive xv Trademarks xv Copyright xvi Disclaimers xvi Legal Limitations on the Usage of Your Product and the Use of Images xvi Important Safety Instructions xviii Installation xviii Power Supply xx Handling xxi Maintenance and Inspections xxii Consumables xxiv Chapter 1 Before You Start Features and Benefits 1 2 CD ROM 1 4 CD ROM Setup 1 5 Parts ...

Страница 6: ...ord 2 26 Connecting to a Computer 2 28 Using a USB Cable 2 28 Using a LAN Cable 2 30 Setting Up the Printing Environment 2 32 Turning the Printer ON OFF 2 33 Turning the Printer ON 2 33 Turning the Printer OFF 2 34 Power Saving Sleep Mode 2 35 Chapter 3 Loading and Outputting Paper Paper Requirements 3 2 Usable Paper 3 2 Paper Size 3 2 Paper Type 3 3 Abbreviations of Paper Sizes 3 6 Printable Area...

Страница 7: ...T Software 4 4 Installing from CD ROM Setup 4 5 Installing with Plug and Play 4 13 For Windows Vista 4 13 For Windows XP Server 2003 4 19 For Windows 2000 4 24 For Windows 98 Me 4 29 Installing from the Printers and Faxes Folder or the Printers Folder 4 38 For Windows Vista 4 38 For Windows XP Server 2003 4 44 For Windows 2000 4 51 For Windows 98 Me 4 57 After Completing Installation 4 62 For Wind...

Страница 8: ...ob Using the Cancel Job Key 5 18 Using the Various Printing Functions 5 19 Utilizing a Variety of Options for Printing 5 19 Various Pages in the Printer Driver 5 26 Page Setup Sheet 5 27 Finishing Sheet 5 32 Paper Source Sheet 5 37 Quality Sheet 5 39 Configuration Device Settings Sheet 5 44 Profile Sheet Windows 2000 XP Server 2003 Vista only 5 45 Preview 5 48 Printing Multiple Pages on One Sheet ...

Страница 9: ...s Counters Menu 5 96 Utility Menu 5 97 Device Settings Menu 5 97 Refresh 5 99 Resolve Error 5 99 Displaying Printer Status When Using a Print Server 5 100 Chapter 6 Routine Maintenance Replacing Toner Cartridges 6 2 When a Message Appears 6 2 Replacing Toner Cartridges 6 4 Precautions for Handling Toner Cartridges 6 15 Storing Toner Cartridges 6 17 Calibrating the Printer 6 18 Performing Calibrati...

Страница 10: ...installation Fails 7 55 Uninstalling the USB Class Driver 7 57 When Data is Not Sent to the Printer 7 61 When the Printer and Computer are Connected by a USB Cable 7 61 When the Printer is Shared on a Network 7 63 Miscellaneous Problems 7 65 Confirming the Printer Features 7 67 Chapter 8 Installing the Optional Accessories Paper Feeder 8 2 Moving the Printer 8 3 Removing the Packing Materials and ...

Страница 11: ...s Firewall to Unblock Communication with the Client Computers 9 16 Configuring Windows Firewall to Block Communication with the Client Computers 9 18 Configuring Windows Firewall to Unblock Communication with the Print Server 9 19 Index 9 21 Location of the Serial Number 9 26 ...

Страница 12: ...y always pay attention to these warnings CAUTION Indicates a caution concerning operations that may lead to injury to persons or damage to property if not performed correctly In order to use the printer safely always pay attention to these cautions IMPORTANT Indicates operational requirements and restrictions Be sure to read these items carefully in order to operate the printer correctly and to av...

Страница 13: ...ttons can be pressed on the screen shot of computer operation screen all buttons are marked Select the button which suits your needs Illustrations Used in This Manual Although the names of the indicator and key are not indicated in the illustrations of the control panel used in this manual the names are indicated above the respective icons depending on the country or region Click Next Click this b...

Страница 14: ...eviated as follows Microsoft Windows 95 operating system Windows 95 Microsoft Windows 98 operating system Windows 98 Microsoft Windows Millennium Edition operating system Windows Me Microsoft Windows 2000 operating system Windows 2000 Microsoft Windows XP operating system Windows XP Microsoft Windows ServerTM 2003 operating system Windows Server 2003 Microsoft Windows VistaTM operating system Wind...

Страница 15: ... accordance with the instructions may cause harmful interference to radio communications However there is no guarantee that interference will not occur in a particular installation If this equipment does cause harmful interference to radio or television reception which can be determined by turning the equipment off and on the user is encouraged to try to correct the interference by one or more of ...

Страница 16: ...Hz Laser Safety This product complies with 21 CFR Chapter 1 Subchapter J as a Class I laser product under the U S Department of Health and Human Services DHHS Radiation Performance Standard according to the Radiation Control for Health and Safety Act of 1968 Also this product is certified as a Class 1 laser product under IEC60825 1 1993 and EN60825 1 1994 This means that the product does not produ...

Страница 17: ...that this product meets the ENERGY STAR Program for energy efficiency The International ENERGY STAR Office Equipment Program is an international program that promotes energy saving through the use of computers and other office equipment The program backs the development and dissemination of products with functions that effectively reduce energy consumption It is an open system in which business pr...

Страница 18: ...e WEEE Directive 2002 96 EC and your national law This product should be handed over to a designated collection point e g on an authorized one for one basis when you buy a new similar product or to an authorized collection site for recycling waste electrical and electronic equipment EEE Improper handling of this type of waste could have a possible negative impact on the environment and human healt...

Страница 19: ...NY NATURE OR LOSSES OR EXPENSES RESULTING FROM THE USE OF THIS MATERIAL Legal Limitations on the Usage of Your Product and the Use of Images Using your product to scan print or otherwise reproduce certain documents and the use of such images as scanned printed or otherwise reproduced by your product may be prohibited by law and may result in criminal and or civil liability A non exhaustive list of...

Страница 20: ...apers Bonds or Other Certificates of Indebtedness Checks or Drafts Issued by Governmental Agencies Stock Certificates Motor Vehicle Licenses and Certificates of Title Copyrighted Works Works of Art without Permission of Copyright Owner ...

Страница 21: ...e covered under your Limited Warranty Installation WARNING Do not install the printer near alcohol paint thinner or other flammable substances If flammable substances come into contact with electrical parts inside the printer it may result in a fire or electrical shock Do not place the following items on the printer If these items come into contact with a high voltage area inside the printer it ma...

Страница 22: ... this may result in a fire or electrical shock A damp or dusty location A location exposed to smoke and steam such as cookeries and humidifiers A location exposed to rain or snow A location near water faucets or water A location exposed to direct sunlight A location subject to high temperatures A location near open flames When installing the printer gently lower the printer onto the floor or other...

Страница 23: ...he following points on user s own authority If you use extension cords improperly this may result in a fire or electrical shock Do not connect one extension cord to another Make sure that the voltage of the power plug is the one indicated in the rating label attached on the back of the printer when you use the printer Use an extension cord that allows the current value greater than the necessary o...

Страница 24: ...e items come into contact with a high voltage area inside the printer it may result in a fire or electrical shock If these items are dropped or slipped inside the printer immediately turn OFF the power switch and disconnect the USB cable if it is connected Then unplug the power plug from the AC power outlet and contact your local authorized Canon dealer When plugging or unplugging the USB cable wh...

Страница 25: ... with water or a mild detergent diluted with water Do not use alcohol benzene paint thinner or other flammable substances If flammable substances come into contact with electrical parts inside the printer it may result in a fire or electrical shock There are some areas inside the printer which are subject to high voltages When removing jammed paper or when inspecting the inside of the printer do n...

Страница 26: ...set the toner and make it impossible to remove the toner stains When removing paper jammed inside the printer remove the jammed paper gently to prevent the toner on the paper from scattering and getting into your eyes or mouth If the toner gets into your eyes or mouth wash them immediately with cold water and immediately consult a physician When loading paper or removing jammed paper take care not...

Страница 27: ...ignite and result in burns or a fire Do not store a toner cartridge or copy paper in places exposed to open flames as this may cause the toner or paper to ignite and result in burns or a fire CAUTION Keep toner cartridges and other consumables out of the reach of small children If these items are ingested consult a physician immediately ...

Страница 28: ... chapter describes the major features and basic functions of this printer Features and Benefits 1 2 CD ROM 1 4 CD ROM Setup 1 5 Parts and Their Functions 1 7 Printer Unit 1 7 Control Panel 1 10 Optional Accessories 1 11 Paper Feeder 1 11 ...

Страница 29: ...ding the printer memory Compact Design Although LBP5300 is a color printer it is compact enough to fit on a desktop Network capable Printer LBP5300 can be used as an Ethernet network printer with the standard equipment The network board of this printer enables the operation of the printer using a built in web browser Remote UI allowing you to specify settings and manage the printer from a computer...

Страница 30: ...On demand Fixing System LBP5300 achieves low power consumption and quick startup This Canon s original technology enables instantaneous heating of the fusing heater only before printing saving warm up time So LBP5300 is always in standby status and ready to print Also thanks to its power saving design the fixing unit s power consumption is very low when idle Supporting Various Types of Media Suppo...

Страница 31: ...class driver for Windows 98 When using a USB class driver for Windows Me 2000 XP Server 2003 Vista use the one supplied with the operating system NOTE Be sure to read the README file by clicking on the installation window before installing NetSpot Device Installer Print Monitor Installer The supplied CD ROM includes NetSpot Device Installer that performs the initial settings for the network protoc...

Страница 32: ...ation etc can be performed from the CD ROM Setup Easy Installation Clicking this button allows you to install the printer driver and the instruction manuals simultaneously Custom Installation Clicking this button allows you to select whether to install the printer driver only or install the manuals only Additional Software Programs Clicking this button allows you to install NetSpot Device Installe...

Страница 33: ...tworkGuide pdf Remote UI Guide RemoteUIGuide pdf Exit Clicking this button closes the CD ROM Setup NOTE If you are using Windows Vista and the AutoPlay dialog box appears click Run AUTORUN EXE If CD ROM Setup does not appear display it using the following procedures The CD ROM drive name is indicated as D in this manual The CD ROM drive name may differ depending on the computer you are using If yo...

Страница 34: ...ots can cause the printer to overheat resulting in a fire Front View The following are the parts on the front side of the printer and their functions a a a a Ventilation Slots Ventilate air to cool the insides of the printer b b b b Auxiliary Tray Output Tray Pulled out to prevent the paper from hanging out of the output tray when outputting Legal size paper to the output tray c c c c Output Tray ...

Страница 35: ...e paper loaded in the multi purpose tray You can load paper up to under the load limit guides on this tray Rear View The following are the parts on the rear side of the printer and their functions a a a a Power Socket Connect the supplied power cord to this socket b b b b Rating Label The serial number Serial No for printer identification is indicated on this label The number is required for recei...

Страница 36: ...lowing are the parts inside the printer and their functions a a a a K Black Toner Cartridge Slot The K black toner cartridge is installed in this slot b b b b Y Yellow Toner Cartridge Slot The Y yellow toner cartridge is installed in this slot c c c c C Cyan Toner Cartridge Slot The C cyan toner cartridge is installed in this slot d d d d M Magenta Toner Cartridge Slot The M magenta toner cartridg...

Страница 37: ...e printer is busy performing some kind of processing or operation such as printing warming up calibrating or pausing a job d d d d Toner Indicator Orange On Toner cartridge replacement is required See p 6 2 Blinking Cannot print because toner cartridge replacement is required or any toner cartridge is not installed properly See p 6 2 Indicator of the color that requires toner cartridge replacement...

Страница 38: ...lling the optional paper feeder up to 3 paper sources can be used PAPER FEEDER PF 93 consists of a paper feeder and paper cassette The paper cassette can be loaded with up to approximately 500 sheets of plain paper 64 g m2 at sizes of A4 B5 A5 Legal Letter Executive 8 5 x 13 16K and paper at the following custom paper sizes Width 148 0 to 215 9 mm Length 210 0 to 355 6 mm NOTE The paper feeder is ...

Страница 39: ...1 12 Before You Start 1 Optional Accessories ...

Страница 40: ...e Package Contents 2 8 Carrying the Printer to the Installation Site and Removing the Packing Materials on the Outside of the Printer 2 9 Installing the Toner Cartridges 2 15 Loading Paper 2 25 Connecting the Power Cord 2 26 Connecting to a Computer 2 28 Using a USB Cable 2 28 Using a LAN Cable 2 30 Setting Up the Printing Environment 2 32 Turning the Printer ON OFF 2 33 Turning the Printer ON 2 3...

Страница 41: ... the optional accessories skip the procedures indicated with Optional 1 Installing the Paper Feeder See p 8 2 Optional 2 Installing the Printer Unit See p 2 9 3 Installing the Toner Cartridges See p 6 4 4 Loading Paper See p 3 17 p 3 33 5 Connecting the Power Cord See p 2 26 6 Connecting the Printer Unit and a Computer See p 2 28 7 Installing the CAPT Software See p 4 1 ...

Страница 42: ...o condensation IMPORTANT Water droplets condensation may form inside the printer under the following circumstances Leave the printer for two hours or more to adjust the surrounding temperature and humidity before using it When the room where the printer is installed is heated rapidly When the printer is moved from a cool or dry location to a hot or humid location If water droplets form inside the ...

Страница 43: ... the printer and that of machinery which consumes a large amount of electricity or generates electrical noise such as a copy machine air conditioner or shredder into the same AC power outlet Installation Requirements Install the printer in the following locations A location where sufficient space can be secured A well ventilated room A flat even surface A sturdy platform that can easily support th...

Страница 44: ...cation near products that generate magnetic waves or electromagnetic waves In rooms such as laboratories where chemical reactions occur A place where salt content corrosive gases such as ammonia or toxic gases are contained A platform that may warp from the weight of the printer and optional accessories or the printer is liable to sink such as a carpet or mat Installation Space Select an installat...

Страница 45: ... Positions Printer unit NOTE The front feet are 3 mm high and their top surface is 12 mm square The rear feet are 3 2 mm high and their top surface is 12 mm square 1312 637 100 100 150 612 100 913 Front Surface mm 33 304 6 74 4 33 304 6 74 4 102 282 9 140 1 102 282 9 140 1 Front Surface mm ...

Страница 46: ...ite PAPER FEEDER PF 93 NOTE The front feet are 3 mm high and their top surface is 12 mm square The rear feet are 3 5 mm high and their top surface is 16 mm x 17 mm rectangular 26 5 292 86 5 26 5 292 86 5 115 267 186 115 267 186 Front Surface mm ...

Страница 47: ...e Have an appropriate one available for the computer you are using or the connecting method Use a USB cable with the following symbol CD ROM LBP5300 User Software CAPT Canon Advanced Printing Technology Software USB class driver NetSpot Device Installer Canon CAPT Print Monitor User s Guide Network Guide Remote UI Guide CAPT Windows Firewall Utility Printer The paper cassette and toner cartridges ...

Страница 48: ...If you do so the paper cassette may drop resulting in personal injury IMPORTANT When installing the optional paper feeder place it on the installation site before carrying the printer unit to the site For details on installing the paper feeder see Paper Feeder on p 8 2 Secure sufficient space around the printer at the installation site so that you can install the optional accessories and connect c...

Страница 49: ...g the Printer 2 While holding the paper cassette with both hands remove it from the printer unit as shown in the figure b 2 Carry the printer unit to the installation site Carry the printer with 2 or more people by holding the center of the lift handles on the lower portion of the printer and lifting it up at the same time b ...

Страница 50: ...e taken to avoid hurting your back or other portions of your body when carrying the printer Be sure not to hold the printer by the paper cassette output area or any portions other than the lift handles If you do so you may drop the printer resulting in personal injury IMPORTANT Carry the printer with the tape that secures the rear cover etc attached 3 Put the printer down carefully at the installa...

Страница 51: ...o the Installation Site and Removing the Packing Materials on the Outside of the Printer 2 12 Installing the Printer 2 4 Remove the paper on which cautions are described 5 Remove the tape attached to the printer 11 locations ...

Страница 52: ...he Packing Materials on the Outside of the Printer 6 Install the output tray Insert the projections of the output tray in the printer a then tilt the output tray b Install the output tray until it clicks so that A on the back of it is hooked on B of the printer as shown in the figure b a B A ...

Страница 53: ...rinter 2 14 Installing the Printer 2 7 Set the paper cassette in the printer Push the paper cassette into the printer firmly until the front side of the paper cassette is flush with the front surface of the printer CAUTION When setting the paper cassette in the printer be careful not to catch your fingers ...

Страница 54: ...ands or clothing as this will dirty your hands or clothing If they become dirty wash them immediately with cold water Washing with warm water will set the toner and make it impossible to remove the toner stains IMPORTANT Dispose of the packing materials according to local regulations NOTE For details on how to handle a toner cartridge see Precautions for Handling Toner Cartridges on p 6 15 The pac...

Страница 55: ...enta from the top as shown in the figure 2 Place paper A4 size paper is recommended on the transfer belt of the ETB unit A as shown in the figure so that the paper is not shifted IMPORTANT When installing or removing the toner cartridges be sure to place paper on the transfer belt of the ETB unit to protect the belt Black Yellow Cyan Magenta A ...

Страница 56: ... the transfer belt A of the ETB unit The transfer belt of the ETB unit is supplied with a function that cleans itself therefore do not clean the belt even when the toner is on it If the ETB unit is broken or transfer belt is damaged this may result in misfeeds or deterioration in print quality A A ...

Страница 57: ...n the both sides pull it horizontally Holding the toner cartridge with your both hands firmly pull it out so that you do not touch the transfer belt of the ETB unit IMPORTANT Do not touch the high voltage contact A or the electrical contacts B shown in the figure as this may result in damage to the printer A B ...

Страница 58: ...it gently 5 or 6 times to evenly distribute the toner inside the cartridge IMPORTANT If toner is not distributed evenly this may result in deterioration in print quality Be sure to carry out this procedure properly Be sure to shake the toner cartridge gently If you do not shake the cartridge gently toner may spill out ...

Страница 59: ...ox 48 cm long gently c c c c while supporting the toner cartridge Remove the sealing tape by hooking your fingers into the tab and pulling it out straight in the direction of the arrow CAUTION If the sealing tape is pulled out forcefully or stopped at midpoint toner may spill out If the toner gets into your eyes or mouth wash them immediately with cold water and immediately consult a physician b a...

Страница 60: ...ownwards If the tape is severed it may become difficult to pull out completely Pull out the sealing tape completely from the toner cartridge If any tape remains in the toner cartridge this may result in poor print quality When pulling out the sealing tape be careful not to hold the drum protective shutter A with your hands A ...

Страница 61: ...Cartridges 2 22 Installing the Printer 2 6 Hook your finger into the tab and remove the packing materials as shown in the figure 7 Hold the toner cartridge properly with the arrowed side facing up as shown in the figure b a ...

Страница 62: ...e label of the same color is attached then insert the cartridge until it stops Align A of the toner cartridge that you want to replace with the slots B to which the label of the same color is attached then insert the cartridge until it stops IMPORTANT Be sure to install the toner cartridge by pushing it firmly If the toner cartridges are not installed firmly this may result in deterioration in pri...

Страница 63: ...nsfer belt of the ETB unit 10 Close the front cover Holding the opening of the front cover close it gently CAUTION When closing the front cover be careful not to catch your fingers IMPORTANT If you cannot close the front cover check if the toner cartridge is installed properly If you try to close the front cover forcefully this may result in damage to the printer Do not leave the front cover open ...

Страница 64: ...ng the optional paper feeder in the printer see the following directions When loading paper in the paper cassette See Loading Paper in the Paper Cassette on p 3 17 When loading paper in the multi purpose tray See Loading Paper in the Multi purpose Tray on p 3 33 When installing the optional paper feeder in the printer See Paper Feeder on p 8 2 When loading paper in the paper cassette of the paper ...

Страница 65: ...ns on p xviii IMPORTANT Do not plug the power plug into the auxiliary outlet on a computer One AC power outlet should be used exclusively for the printer Do not connect this printer to an uninterruptible power source This may cause printer malfunction or breakdown at the occurrence of a power failure 1 Make sure that the power switch of the printer is OFF The printer is OFF when of the power switc...

Страница 66: ...inter 2 Connecting the Power Cord 2 Plug the supplied power cord into the power socket 3 Plug the power plug into the AC power outlet NOTE The form of the supplied power cord may differ from the one in the above illustration ...

Страница 67: ... result in damage to the printer This printer uses bi directional communication Operation of the printer when connected via unidirectional communication equipment has not been tested and as a result Canon cannot guarantee printer operation when the printer is connected using unidirectional print servers USB hubs or switching devices NOTE The appropriate USB interface varies depending on the operat...

Страница 68: ...puter NOTE If a Wizard appears after connecting the USB cable by the Plug and Play automatic setup install the software for this printer using either one of the following procedures For more details see Installing the CAPT Software on p 4 4 Click Cancel and install the software from CD ROM Setup Installing with Plug and Play If you are not sure about the USB cable that is supported by the computer...

Страница 69: ...perating system or Network Guide Network Environment This printer supports 10BASE T 100BASE TX connections IMPORTANT This printer cannot be connected to networks other than those listed above Make sure that there is a port available on the hub to which the printer will be connected An additional hub must be installed if there is no free port NOTE When connecting to the 100BASE TX Ethernet network ...

Страница 70: ...ecting to a Computer 1 Connect the LAN cable to the LAN connector of the printer Connect a LAN cable that is compatible with the LAN connector of this printer according to the network 2 Connect the other end of the LAN cable to the hub ...

Страница 71: ...tings in the printer driver The procedure for installing the printer driver varies depending on the system environment When printing with the printer and computer connected with the USB cable See p 4 4 When printing with the printer and computer connected with the LAN cable See Network Guide Sharing the printer on a network See p 4 68 If you share this printer on a network and use it from a comput...

Страница 72: ...e power switch to turn the printer ON After running a self diagnostic test on the printer unit and optional accessories the printer will be ready to print IMPORTANT Do not turn the power ON immediately after turning it OFF If you want to turn the printer ON again after turning it OFF wait at least 10 seconds after turning the printer OFF before turning it ON again If the printer does not operate p...

Страница 73: ...ter OFF using the following procedure IMPORTANT If the printer is used on a network make sure that it is not printing data from another computer before turning the power OFF If you turn the printer OFF all print data remaining in the printer memory will be erased So wait for the necessary print data to be printed before turning the power OFF Do not turn the power OFF when the printer is in any of ...

Страница 74: ...ation or correction of a phenomenon of Out of Register Colors is not performed automatically during the sleep state you may not obtain appropriate printout results when printing immediately after the sleep state is released In this case perform calibration manually See p 6 18 or correction of the phenomenon of Out of Register Colors See p 6 23 NOTE You can select 5 10 15 30 60 90 120 150 or 180 mi...

Страница 75: ...ing the Printer Status Window see Displaying the Printer Status Window on p 5 93 2 From the Options menu in the Printer Status Window select Device Settings Sleep Settings 3 Select the Use Sleep Mode check box in the Sleep Settings dialog box to specify the time to switch to the sleep mode in Time to Enter Sleep Mode 4 Click OK ...

Страница 76: ...for Handling the Multi purpose Tray or Paper Cassette 3 14 Output Tray 3 15 Output Tray 3 15 Paper Capacity of the Output Tray 3 16 Loading Paper in the Paper Cassette 3 17 When Loading Standard Size Paper 3 19 When Loading Custom Size Paper Non Standard Size Paper or Paper at a Size of 8 5 x 13 or 16K 3 25 Loading Paper in the Multi purpose Tray 3 33 When Loading Plain Paper Heavy Paper Transpare...

Страница 77: ...er that is less than 210 0 mm wide the safety function that prevents damages caused by heat may slow the print speed down in stages The print speed may be as slow as approximately 1 6 pages min Paper Size The following shows the paper sizes that can be used with this printer The symbol indicates that the paper is available for the 1 sided printing and automatic 2 sided printing the symbol indicate...

Страница 78: ...dicates that the printing cannot be performed Custom Paper Size 1 2 2 Envelope Envelope DL 110 0 mm x 220 0 mm x x Envelope COM10 104 9 mm x 241 3 mm x x Envelope C5 162 0 mm x 229 0 mm x x Envelope Monarch 98 5 mm x 190 5 mm x x Envelope B5 176 0 mm x 250 0 mm x x Index Card 76 2 mm x 127 0 mm x x Paper Type Printer Driver Setting Paper Source Multi purpose Tray Cassette 1 Cassette 2 Optional Pla...

Страница 79: ... and Index Card Plain paper can be loaded in the paper cassettes and multi purpose tray Also paper at a size of A4 Legal Letter or 8 5 x 13 is available for automatic 2 sided printing Heavy Paper This printer can print heavy paper that is 76 2 to 215 9 mm wide 127 0 to 355 6 mm long and that weighs between 106 and 216 g m2 including the standard paper sizes A4 B5 A5 Legal Letter Executive Statemen...

Страница 80: ...at can be used with this printer are as follows IMPORTANT Do not use the following types of envelopes Using inappropriate envelopes may result in paper jams that are difficult to clear or may result in damage to the printer Envelopes with fasteners or snaps Envelopes with address windows Envelopes with adhesive on the surface Wrinkled or creased envelopes Poorly manufactured envelopes in which the...

Страница 81: ...ting envelopes of the Envelope B5 size close the flaps and load them so that the envelopes are printed from the top the edge with the flap Feeding direction Printing speed drops when printing envelops NOTE When printing envelopes they may be creased Abbreviations of Paper Sizes The following shows the abbreviations of paper sizes that are marked on the paper cassette Paper Size Paper Guides Legal ...

Страница 82: ... to be printed however the edge of paper may be missing partly during printing or may blot during color printing For more details see Online Help in the printer driver Plain Paper Heavy Paper Transparency Label Coated Paper You cannot print on any area within 5 mm of the edges of paper Envelope You cannot print on any area within 10 mm of the edges of an envelope You may have to change the printab...

Страница 83: ... paper is also unusable Paper with jagged edges Wrinkled paper Paper with the corners folded Paper that changes its quality at a high temperature Paper that contains ink that melts burns evaporates or emits harmful gases at the heating temperature approx 275 C or 527 F of the fixing unit Heat sensitive paper Treated color paper Specially coated paper coated paper for ink jet printers etc Paper wit...

Страница 84: ...ficantly in temperature or humidity keep packed paper stack in the work area for at least one day prior to printing so that it can adapt to the new environment When paper is moved to a location where the temperature or humidity differs significantly the paper may curl or become creased Storing Printouts When handling or storing printouts printed by this printer be careful of the following points I...

Страница 85: ...optional paper feeder Cassette 2 up to 3 paper sources can be used Paper Level Indicator The paper cassette has a paper level indicator A that shows the amount of paper remaining in the cassette If the cassette is full the paper level indicator is at the top Because the indicator moves down as the amount of paper drops this gives a rough estimate of the amount of paper remaining A ...

Страница 86: ...If you print from the multi purpose tray or Cassette 2 when Cassette 1 is not set this will cause paper jams Paper Capacity of Paper Source Paper Type Paper Source Multi purpose Tray Cassette 1 Cassette 2 Optional Plain paper 64 g m2 Approx 100 sheets Approx 250 sheets Approx 500 sheets Heavy paper 128 g m2 Approx 50 sheets x x Transparency Black and white printing only Approx 50 sheets x x Label ...

Страница 87: ... the paper source For details on the procedure for displaying the Paper Source sheet in the printer driver see Specifying the Printing Preferences on p 5 9 NOTE When Paper Source is set to Auto when the paper source is selected automatically you can select which paper cassette is the target for the automatic selection in Cassettes Settings in the Device Settings menu in the Printer Status Window ...

Страница 88: ...avy Paper 2 Heavy Paper 3 Transparency Label Coated Paper Rough Paper Specify the type of paper See p 3 3 Pause when Printing from the Multi purpose Tray Specify whether the printer should pause a job with a message displayed or continue the job when feeding paper from the multi purpose tray Continue Printing with the Multi purpose Tray Allows you to specify whether the printer should switch the p...

Страница 89: ...fter all the loaded paper runs out If the cassette is refilled when paper still remains in the cassette it may result in misfeeds Do not put anything other than the printing paper on the multi purpose tray Also do not press on top of or apply excessive force to the multi purposes tray This may result in damage to the multi purpose tray Do not touch the black rubber pad A in the paper cassette This...

Страница 90: ...of page When outputting Legal size paper to the output tray pull out the auxiliary tray to prevent the paper from hanging out of the output tray When you use the auxiliary tray gently pull it out until it stops CAUTION Keep your hands or clothing away from the roller in the output area Even if the printer is not printing sudden rotation of the roller may catch your hands or clothing resulting in p...

Страница 91: ...rinted on the reverse side Paper Capacity of the Output Tray Actual paper capacity varies depending on the installation environment or paper type Paper Type Output Tray Output Tray Face down Plain paper When plain paper that weighs 64 g m2 is used Approx 200 sheets Heavy paper When heavy paper that weighs 128 g m2 is used Approx 40 sheets Transparency Black and white printing only Approx 50 sheets...

Страница 92: ...w and the Load Paper indicator orange comes on or blinks In this case load paper and specify the settings for the paper Be sure to load paper in portrait orientation when loading it in the paper cassette The paper loading methods are different between standard size paper and custom size paper Therefore load paper properly using the following procedures When Loading Standard Size Paper See p 3 19 W...

Страница 93: ...ted load the appropriate paper in the paper cassette again and then specify the appropriate paper size in the Register Paper Size in Cassettes dialog box When printing the currently loaded paper click the Resolve Error button If Paper Source is set to Auto the printer checks the paper size regardless of the setting for Detect Paper Size Size of the Paper Loaded in the Paper Cassette Output Size 1 ...

Страница 94: ...er If paper is loaded while the paper cassette is partially pulled out the paper cassette may drop or the printer may become damaged resulting in personal injury Cassette 1 Pull out the paper cassette gently a Cassette 2 Pull out the paper cassette gently a While holding the paper cassette with both hands remove it from the printer unit as shown in the figure b While holding the paper cassette wit...

Страница 95: ...he side paper guides slide the guides to the mark for the size of the paper to be loaded The side paper guides move together Align the position of A with the mark for the size of the paper to be loaded While holding the lock release lever of the rear paper guide slide the guide to the size mark for the paper to be loaded Align the position of A with the mark for the size of the paper to be loaded ...

Страница 96: ...s with the edges of the paper IMPORTANT Be sure to check if the paper guide is at the position of the size of the loaded paper If the paper guide is set at a wrong position this may result in misfeeds If you use paper that has been poorly cut multiple sheets of paper may be fed at once In this case fan the paper thoroughly and then align the edges of the stack on a hard flat surface Cassette 1 Cas...

Страница 97: ...gure Feeding direction 4 Hold down the paper as shown in the figure make sure that the paper stack does not exceed the load limit marks A and then set it under the hooks B on the paper guides Make sure that there is sufficient space between the hooks of the paper guides and the paper stack If there is no sufficient space slightly reduce the amount of paper Cassette 1 Cassette 2 Cassette 1 Cassette...

Страница 98: ...nter Push the paper cassette into the printer firmly until the front side of the paper cassette is flush with the front surface of the printer CAUTION When setting the paper cassette in the printer be careful not to catch your fingers 6 Register the size of the loaded paper using the following procedure This printer s paper cassette cannot automatically detect the paper size Therefore you need to ...

Страница 99: ...ssette Loading and Outputting Paper 3 8 From the Options menu select Device Settings Register Paper Size in Cassettes 9 Select the size of the paper loaded in the paper cassette then click OK Next configure the printer driver See p 3 52 ...

Страница 100: ...m 1 Pull out the paper cassette CAUTION Be sure to take the paper cassette out of the printer before loading paper If paper is loaded while the paper cassette is partially pulled out the paper cassette may drop or the printer may become damaged resulting in personal injury Cassette 1 Pull out the paper cassette gently a Cassette 2 Pull out the paper cassette gently a While holding the paper casset...

Страница 101: ... with the edges of the paper IMPORTANT If you use paper that has been poorly cut multiple sheets of paper may be fed at once In this case fan the paper thoroughly and then align the edges of the stack on a hard flat surface NOTE To print letterhead paper or paper printed with a logo load the paper so that the printing side is facing up as shown in the following figure Feeding direction Cassette 1 ...

Страница 102: ... of the loaded paper The side paper guides move together IMPORTANT Be sure to align the paper guides with the width of the paper If the paper guides are too loose or too tight this may result in misfeeds or paper jams 4 While holding the lock release lever of the rear paper guide slide the guide to the size mark for the loaded paper Cassette 1 Cassette 2 Cassette 1 Cassette 2 ...

Страница 103: ...een the hooks of the paper guides and the paper stack If there is no sufficient space slightly reduce the amount of paper IMPORTANT The paper capacity of Cassette 1 is approximately 250 sheets of plain paper 64 g m2 and that of Cassette 2 is approximately 500 sheets of plain paper 64 g m2 Be sure that the paper stack does not exceed the load limit marks on the paper guides If the paper stack excee...

Страница 104: ...he paper cassette in the printer be careful not to catch your fingers 7 Register the size of the loaded paper using the following procedure This printer s paper cassette cannot automatically detect the paper size Therefore you need to register the size of the loaded paper in the Printer Status Window 8 Display the Printer Status Window For details on methods for displaying the Printer Status Windo...

Страница 105: ...3 11 When loading custom size paper register the size of the loaded custom size paper using the following procedure When printing custom size paper you need to register the custom paper size in the printer driver previously NOTE To specify a custom paper size display the following dialog box For Windows 2000 XP Server 2003 Vista Display the Document Properties dialog box from the Printers and Faxe...

Страница 106: ... paper sizes and added custom paper sizes Name of Custom Paper Size You can enter the name of the custom paper size to be added Up to 31 characters can be entered Unit Specify the unit Millimeter or Inch to be used when setting the custom paper size Paper Size Specify the height and width of the custom paper size Height Width Specify the custom paper size in portrait orientation Height Width withi...

Страница 107: ...tting Paper 3 14 Click Register NOTE On Windows 98 Me up to 30 custom paper sizes can be added On Windows 2000 XP Server 2003 Vista the number depends on the system environment 15 Confirm the settings then click OK Next configure the printer driver See p 3 52 ...

Страница 108: ...ain Paper Heavy Paper Transparency Label Coated Paper See When Loading Plain Paper Heavy Paper Transparencies Labels or Coated Paper on p 3 35 Envelope See When Loading Envelopes on p 3 40 Custom Size Paper See When Loading Custom Size Paper Non Standard Size Paper on p 3 45 IMPORTANT For more details on the usable paper see Usable Paper on p 3 2 For details on handling the multi purpose tray see ...

Страница 109: ...wer ON OFF A job that takes place immediately after resuming from sleep mode A job that takes place immediately after reloading paper If Paper Source is set to Auto the printer checks the paper size regardless of the setting for Detect Paper Size Size of the Paper Loaded in the Multi purpose Tray Output Size Setting for Output Size for the Previous Job Printer Operation A4 A4 A5 When the setting f...

Страница 110: ...se tray Be sure to load paper in portrait orientation when loading it in the multi purpose tray IMPORTANT Transparencies can only be printed in black and white It is not recommended to print on heavy paper that weighs between 177 and 220 g m2 However set Paper Type in the Paper Source sheet in the printer driver to Heavy Paper 3 if you have to perform the printing 1 Open the multi purpose tray Hol...

Страница 111: ...rpose Tray Loading and Outputting Paper 3 2 Pull out the auxiliary tray IMPORTANT Be sure to pull out the auxiliary tray when loading paper in the multi purpose tray 3 When loading long size paper such as A4 etc open the tray extension ...

Страница 112: ...TANT Be sure to fan the transparencies labels or coated paper thoroughly before loading them If they are not fanned enough multiple sheets of paper may be fed at once causing paper jams When fanning or aligning the transparencies or coated paper try to hold the edges to avoid touching the printing surface Take care not to mark or stain the printing surface of the transparencies or coated paper wit...

Страница 113: ...ceed the load limit guides Plain paper Approx 100 sheets When plain paper that weighs 64 g m2 is used Heavy paper Approx 50 sheets When heavy paper that weighs 128 g m2 is used Transparency Approx 50 sheets Label Approx 40 sheets Coated paper Approx 50 sheets Load the paper so that it is straight If the rear edge of the paper stack is not properly aligned this may result in misfeeds or paper jams ...

Страница 114: ...ading and Outputting Paper 3 NOTE To print letterhead paper or paper printed with a logo load the paper so that the printing side is facing down as shown in the following figure Feeding direction 7 Align the paper guides with both sides of the stack ...

Страница 115: ... too tight this may result in misfeeds or paper jams Next configure the printer driver See p 3 52 When Loading Envelopes You can load envelopes at sizes of DL COM10 C5 Monarch and B5 in the multi purpose tray Load envelopes in the multi purpose tray using the following procedure 1 Open the multi purpose tray Holding the opening at the center of the printer open the multi purpose tray ...

Страница 116: ...e Tray Loading and Outputting Paper 3 2 Pull out the auxiliary tray IMPORTANT Be sure to pull out the auxiliary tray when loading paper in the multi purpose tray 3 When loading long size paper such as Envelope B5 etc open the tray extension ...

Страница 117: ...ttle wider than the actual paper width 5 When loading envelopes align them as follows Place the stack of envelopes on a flat surface flatten them to release any remaining air and be sure that the edges are pressed tightly CAUTION When loading paper take care not to cut your hands with the edges of the paper ...

Страница 118: ...opes and flatten curls as shown in the figure Align the edges of the envelopes on a flat surface 6 Gently load the stack of envelopes with the printing side facing down until it touches the back of the multi purpose tray as shown in the figure Be sure that the paper stack is loaded under the load limit guides A A ...

Страница 119: ...elopes can be loaded in the multi purpose tray Make sure that the paper stack does not exceed the load limit guides You cannot print on the reverse side glued side of envelopes 7 Align the paper guides with both sides of the stack Envelope DL COM10 C5 Monarch Load the envelopes so that the flap is toward the left of the printer when viewed from the front Envelope B5 Close the flaps and load the en...

Страница 120: ...n misfeeds or paper jams Next configure the printer driver See p 3 52 When Loading Custom Size Paper Non Standard Size Paper Load custom size paper in the multi purpose tray using the following procedure You can load paper of the following custom paper sizes Width 76 2 to 215 9 mm Length 127 0 to 355 6 mm 1 Open the multi purpose tray Holding the opening at the center of the printer open the multi...

Страница 121: ...Multi purpose Tray Loading and Outputting Paper 3 2 Pull out the auxiliary tray IMPORTANT Be sure to pull out the auxiliary tray when loading paper in the multi purpose tray 3 When loading long size paper open the tray extension ...

Страница 122: ...k is loaded under the load limit guides A CAUTION When loading paper take care not to cut your hands with the edges of the paper IMPORTANT The multi purpose tray can be loaded with up to the number of sheets listed below Make sure that the paper stack does not exceed the load limit guides Plain paper Approx 100 sheets When plain paper that weighs 64 g m2 is used Heavy paper Approx 50 sheets When h...

Страница 123: ...ed at corners flatten it before loading it in the printer If you use paper that has been poorly cut multiple sheets of paper may be fed at once In this case fan the paper thoroughly and then align the edges of the stack on a hard flat surface NOTE To print letterhead paper or paper printed with a logo load the paper so that the printing side is facing down as shown in the following figure Feeding ...

Страница 124: ...ister the size of the loaded custom size paper using the following procedure When printing custom size paper you need to register the custom paper size in the printer driver previously NOTE To specify a custom paper size display the following dialog box For Windows 2000 XP Server 2003 Vista Display the Document Properties dialog box from the Printers and Faxes folder the Printers folder for Window...

Страница 125: ...d paper sizes and added custom paper sizes Name of Custom Paper Size You can enter the name of the custom paper size to be added Up to 31 characters can be entered Unit Specify the unit Millimeter or Inch to be used when setting the custom paper size Paper Size Specify the height and width of the custom paper size Height Width Specify the custom paper size in portrait orientation Height Width with...

Страница 126: ...putting Paper 3 10 Click Register NOTE On Windows 98 Me up to 30 custom paper sizes can be added On Windows 2000 XP Server 2003 Vista the number depends on the system environment 11 Confirm the settings then click OK Next configure the printer driver See p 3 52 ...

Страница 127: ...or details on the procedure for installing the printer driver see Installing the CAPT Software on p 4 4 For more details on the settings for the printer driver see Various Pages in the Printer Driver p 5 26 or Online Help For details on methods for displaying Online Help see How to Use Online Help on p 5 80 1 Select Print from the File menu in the application Select the name of this printer for Na...

Страница 128: ...ay the Page Setup sheet then from Page Size select the size of a document that you have created with the application NOTE If you set Page Size to Envelope DL Envelope COM10 Envelope C5 Envelope Monarch or Envelope B5 the following message appears and Paper Type is automatically specified ...

Страница 129: ...e since there is no need to change the setting IMPORTANT The print will be automatically reduced or enlarged to fit on the page when the settings for Page Size and Output Size are different 4 Make sure that the setting in the Register Paper Size in Cassettes dialog box in the Printer Status Window and the paper size in Output Size match when printing from the paper cassette For displaying the Regi...

Страница 130: ...aper Source Specify the same setting as the one for Paper Source although the setting for Paper Source changes to ones such as First Page or Other Pages when Paper Selection is set to other than Same Paper for All Pages 6 Select the paper type specified in Paper Type NOTE Load paper based on the following Paper Type criteria ...

Страница 131: ...een 121 and 160 g m2 set Paper Type to Coated Paper click Finishing Details in the Finishing sheet click Advanced Settings in the Finishing Details dialog box and then set Fixing Mode in the Advanced Settings dialog box to Mode 1 5 When printing envelopes the printer automatically applies the appropriate print mode to the envelope type by specifying Output Size in the Page Setup sheet 7 Click OK t...

Страница 132: ...3 57 Setting Up the Printer Driver and Printing Loading and Outputting Paper 3 8 Click OK to start printing ...

Страница 133: ...rse side NOTE When the last page for the 2 sided printing is 1 sided printing the printer prints faster than normal 2 sided printing by clicking Finishing Details in the Finishing sheet and Advanced Settings in the Finishing Details dialog box and then selecting the Print Last Page in 1 sided Mode when 2 sided Printing is Set check box in the Advanced Settings dialog box However when printing punc...

Страница 134: ...ting Loading and Outputting Paper 3 When paper is fed from the paper cassette Load the paper so that the printing side front side is facing down as shown in the following figures Feeding direction Cassette 1 Cassette 2 ...

Страница 135: ...d from the multi purpose tray Load the paper so that the printing side front side is facing up as shown in the following figures Feeding direction Load paper in Cassette 2 Only when the optional paper feeder is installed in the same manner as you load paper in Cassette 1 ...

Страница 136: ...Select Print from the File menu in the application Select the name of this printer for Name or Printer Name and then click Properties 3 Display the Page Setup sheet then from Page Size select the size of a document that you have created with the application ...

Страница 137: ...Size when the page size and the size of the paper loaded in the paper source are the same since there is no need to change the setting IMPORTANT The print will be automatically reduced or enlarged to fit on the page when the settings for Page Size and Output Size are different 5 Display the Finishing sheet and select 2 sided Printing for Print Style ...

Страница 138: ...pecify the same setting as the one for Paper Source although the setting for Paper Source changes to ones such as First Page or Other Pages when Paper Selection is set to other than Same Paper for All Pages 7 Select the paper type specified in Paper Type NOTE Load paper based on the following Paper Type criteria ...

Страница 139: ... option when a paper jam occurs or when you want to improve the fixation on printing coarse paper 75 105 g m2 with Plain Paper selected 8 Click OK to close the Properties dialog box Paper Type Printer Driver Setting Plain paper 60 105 g m2 Plain Paper Plain Paper H 1 Rough Paper 2 Heavy paper 106 120 g m2 Heavy Paper 1 Coated paper 105 120 g m2 Coated Paper ...

Страница 140: ...3 65 2 sided Printing Loading and Outputting Paper 3 9 Click OK to start printing ...

Страница 141: ...3 66 2 sided Printing Loading and Outputting Paper 3 ...

Страница 142: ...em Requirements 4 2 Installing the CAPT Software 4 4 Installing from CD ROM Setup 4 5 Installing with Plug and Play 4 13 Installing from the Printers and Faxes Folder or the Printers Folder 4 38 After Completing Installation 4 62 For Windows Vista 4 62 For Windows XP Server 2003 4 63 For Windows 98 Me 2000 4 64 Checking the Operations by Configuration Page Print 4 65 Printing from a Network Comput...

Страница 143: ...on a network and use it from a computer on the network you must specify the settings for the computer and install the printer driver on the client computers Tasks to Perform Each Time You Print The following shows the tasks that should be performed each time you print Specifying printing preferences Specify the paper size document size and print copies in the printer driver If you do not specify t...

Страница 144: ...lent When connecting to a network Connector 10BASE T or 100BASE TX Protocol TCP IP NOTE When using Sound a PC synthesizer and the driver for PCM synthesizer must be installed in your computer Do not use a PC Speaker driver speaker drv etc This printer uses bi directional communication Operation of the printer when connected via unidirectional communication equipment has not been tested and as a re...

Страница 145: ...space and then install the CAPT software again Installation method Contents Reference page Easy Installation Installs the manuals when installing the printer driver from the CD ROM supplied with the printer CD ROM Setup p 4 5 Custom Installation You can choose to install only the printer driver or only the manuals from the CD ROM supplied with the printer CD ROM Setup 1 p 4 5 Installing with Plug ...

Страница 146: ...river uninstall the printer driver used in the print server install the new printer driver and then see Print Server Settings p 4 69 and install the additional driver again This printer does not come with a USB cable Have an appropriate one available for the computer you are using Use a USB cable with the following symbol Installing from CD ROM Setup The screen shots used in this section are from ...

Страница 147: ...into the drive IMPORTANT If you are using Windows Vista and the AutoPlay dialog box appears click Run AUTORUN EXE If CD ROM Setup does not appear display it using the following procedures The CD ROM drive name is indicated as D in this manual The CD ROM drive name may differ depending on the computer you are using If you are using an operating system other than Windows Vista select Run from the St...

Страница 148: ...ling the CAPT Software 6 Click Easy Installation or Custom Installation Easy Installation allows you to install the printer driver and the instruction manuals simultaneously If you do not install the manuals select Custom Installation 7 Click Install ...

Страница 149: ...Up the Printing Environment Installing the CAPT Software 4 If you selected Custom Installation in Step 6 clear the Online Manuals check box and then click Install 8 Confirm the contents then click Yes 9 Click Next ...

Страница 150: ...n is displayed Specify whether to configure Windows Firewall to unblock communication with the client computers when sharing the printer on a network Click Yes when you share the printer on a network After completing the installation see Printing from a Network Computer by Sharing the Printer on a Network p 4 68 and specify the settings for sharing the printer on the network Click No when you do n...

Страница 151: ...e message Installation cannot be stopped once it starts Do you want to continue appears Click Yes NOTE If you are using Windows 2000 and the Digital Signature Not Found dialog box appears click Yes If you are using Windows XP Server 2003 and the Hardware Installation dialog box appears click Continue Anyway If you are using Windows Vista and the Windows Security dialog box appears click Install th...

Страница 152: ... printer is not recognized automatically even after the USB cable is connected see Installation Problems on p 7 50 If you are using Windows XP Server 2003 and the Hardware Installation dialog box appears click Continue Anyway If you are using Windows Vista and the Windows Security dialog box appears click Install this driver software anyway 14 If Easy Installation is selected in Step 6 the manuals...

Страница 153: ...tallation results then click Next NOTE If the printer driver is not installed properly see Installation Problems on p 7 50 16 Select the Restart Computer Now Recommended check box then click Restart Windows restarts The installation of the USB class driver and the printer driver is completed ...

Страница 154: ...tem other than Windows Vista see the following For Windows XP Server 2003 See p 4 19 For Windows 2000 See p 4 24 For Windows 98 Me See p 4 29 1 Make sure that the printer and computer are OFF 2 Connect the B type square end of the USB cable to the USB connector on the printer 3 Connect the A type flat end of the USB cable to the USB port on the computer ...

Страница 155: ... the computer on and start up Windows Vista 6 Log on as a member of Administrators The Found New Hardware dialog box appears NOTE Full Control Permission is required for the installation of the printer driver 7 Click Locate and install driver software recommended NOTE If the User Account Control dialog box appears click Continue ...

Страница 156: ...4 15 Setting Up the Printing Environment 4 Installing the CAPT Software 8 If the following screen appears click Don t search online 9 Click I don t have the disc Show me other options ...

Страница 157: ...Environment Installing the CAPT Software 4 10 Click Browse my computer for driver software advanced 11 Insert the supplied LBP5300 User Software CD ROM into the CD ROM drive and then click Browse If CD ROM Setup appears click Exit ...

Страница 158: ...s indicated as D in this manual The CD ROM drive name may differ depending on the computer you are using 13 Make sure that the folder to be browsed is displayed in Search for driver software in this location and then click Next Copying files is started NOTE If the Windows Security dialog box appears click Install this driver software anyway ...

Страница 159: ...NT If you want to use the computer in which the printer driver was installed as the print server configure Windows Firewall to unblock communication with the client computers See p 9 15 The installation of the USB class driver supplied with an operating system and the printer driver is completed ...

Страница 160: ...e the following For Windows Vista See p 4 13 For Windows 2000 See p 4 24 For Windows 98 Me See p 4 29 The screen shots used in this section are from Windows XP 1 Make sure that the printer and computer are OFF 2 Connect the B type square end of the USB cable to the USB connector on the printer 3 Connect the A type flat end of the USB cable to the USB port on the computer ...

Страница 161: ...indows XP Server 2003 6 Log on as a member of Administrators NOTE Full Control Permission is required for the installation of the printer driver 7 Insert the supplied LBP5300 User Software CD ROM into the CD ROM drive If CD ROM Setup appears click Exit If the following screen is displayed Select Install from a list or specific location Advanced then click Next ...

Страница 162: ...ng Up the Printing Environment 4 Installing the CAPT Software If the following screen is displayed Select No not this time then click Next Select Install from a list or specific location Advanced then click Next ...

Страница 163: ...lear the Search removable media floppy CD ROM check box and then select the Include this location in the search check box 9 Click Browse then select the folder Select D English Win2K_Vista then click OK The CD ROM drive name is indicated as D in this manual The CD ROM drive name may differ depending on the computer you are using ...

Страница 164: ... Hardware Installation dialog box appears click Continue Anyway 11 Click Finish IMPORTANT If you are using a computer with Windows XP Service Pack 2 or another operating system equipped with Windows Firewall as the print server you need to configure Windows Firewall to unblock communication with the client computers See p 9 15 The installation of the USB class driver supplied with an operating sys...

Страница 165: ...indows 2000 see the following For Windows Vista See p 4 13 For Windows XP Server 2003 See p 4 19 For Windows 98 Me See p 4 29 1 Make sure that the printer and computer are OFF 2 Connect the B type square end of the USB cable to the USB connector on the printer 3 Connect the A type flat end of the USB cable to the USB port on the computer ...

Страница 166: ...ss of the power switch to turn the printer ON 5 Turn the computer on and start up Windows 2000 6 Log on as a member of Administrators The Found New Hardware Wizard dialog box appears NOTE Full Control Permission is required for the installation of the printer driver 7 Click Next ...

Страница 167: ... 4 8 Select Search for a suitable driver for my device recommended then click Next NOTE Unknown may be displayed as the name of the device 9 Clear the Floppy disk drives check box and the CD ROM drives check box select the Specify a location check box and then click Next ...

Страница 168: ...n click Browse If CD ROM Setup appears click Exit 11 Select D English Win2K_Vista Select CNAC5STK INF then click Open The CD ROM drive name is indicated as D in this manual The CD ROM drive name may differ depending on the computer you are using 12 Make sure that the folder to be browsed is displayed for Copy manufacturer s files from and then click OK ...

Страница 169: ...the CAPT Software 4 13 Click Next Copying files is started NOTE If the Digital Signature Not Found dialog box appears click Yes 14 Click Finish The installation of the USB class driver supplied with an operating system and the printer driver is completed ...

Страница 170: ...ng For Windows Vista See p 4 13 For Windows XP Server 2003 See p 4 19 For Windows 2000 See p 4 24 The screen shots used in this section are from Windows Me 1 Make sure that the printer and computer are OFF 2 Connect the B type square end of the USB cable to the USB connector on the printer 3 Connect the A type flat end of the USB cable to the USB port on the computer ...

Страница 171: ... 4 Press of the power switch to turn the printer ON 5 Turn the computer on and start up Windows 98 Me The Add New Hardware Wizard dialog box appears For Windows Me If the following dialog box appears proceed to Step 6 If the following dialog box appears proceed to Step 13 ...

Страница 172: ...following dialog box appears click Next then proceed to Step 6 If the following dialog box appears click Next then proceed to Step 13 6 Select Specify the location of the driver Advanced then click Next For Windows 98 Select Search for the best driver for your device Recommended then click Next ...

Страница 173: ...heck box and then select the Specify a location check box For Windows 98 Clear the Floppy disk drives check box and the CD ROM drives check box and then select the Specify a location check box 9 Click Browse then select the folder For Windows Me Select D English USBPORT WinMe and then click OK For Windows 98 Select D English USBPORT Win98 and then click OK The CD ROM drive name is indicated as D i...

Страница 174: ...ng the CAPT Software 10 Make sure that the folder to be browsed is displayed for Specify a location and then click Next 11 Click Next Installation of the USB class driver starts 12 Click Finish The printer is detected automatically Please wait a moment ...

Страница 175: ... Next 13 Select Specify the location of the driver Advanced then click Next For Windows 98 Select Search for the best driver for your device Recommended then click Next 14 If the supplied LBP5300 User Software CD ROM is not in the CD ROM drive insert the LBP5300 User Software CD ROM into the CD ROM drive If CD ROM Setup appears click Exit ...

Страница 176: ...nd then select the Specify a location check box For Windows 98 Clear the Floppy disk drives check box and the CD ROM drives check box and then select the Specify a location check box 16 Click Browse then select the folder Select D English Win98_Me then click OK The CD ROM drive name is indicated as D in this manual The CD ROM drive name may differ depending on the computer you are using ...

Страница 177: ...Specify a location and then click Next 18 Click Next 19 Enter a new name in Printer name if you want to change the printer name NOTE If another printer driver has already been installed in the computer the message Do you want your Windows based programs to use this printer as the default printer appears In this case select Yes or No ...

Страница 178: ...nt 4 Installing the CAPT Software 20 Click Finish Copying files is started 21 When the dialog box for completing the installation appears click OK 22 Click Finish The installation of the USB class driver and the printer driver is completed ...

Страница 179: ...03 See p 4 44 For Windows 2000 See p 4 51 For Windows 98 Me See p 4 57 IMPORTANT When printing a test page make sure that the printer is properly connected to the computer and the printer is ON before installing the CAPT software 1 Turn the computer on and start up Windows Vista 2 Log on as a member of Administrators IMPORTANT If a dialog box appears by the Plug and Play automatic setup click Canc...

Страница 180: ...inting Environment 4 Installing the CAPT Software 4 Click Add a printer 5 Click Add a local printer 6 Make sure that Use an existing port is selected select the USB port to which this printer is connected and then click Next ...

Страница 181: ...ing Up the Printing Environment Installing the CAPT Software 4 7 Click Have Disk 8 Insert the supplied LBP5300 User Software CD ROM into the CD ROM drive and then click Browse If CD ROM Setup appears click Exit ...

Страница 182: ...AC5STK INF then click Open The CD ROM drive name is indicated as D in this manual The CD ROM drive name may differ depending on the computer you are using 10 Confirm the contents of Copy manufacturer s files from then click OK For example when your CD ROM drive is drive D it is displayed as D English Win2K_Vista ...

Страница 183: ...Copying files is started NOTE If another printer driver has already been installed in the computer Set as the default printer appears When specifying the printer as the default printer select the Set as the default printer check box If the User Account Control dialog box appears click Continue If the Windows Security dialog box appears click Install this driver software anyway ...

Страница 184: ... box 14 Click Finish 15 If the printer and computer are not connected turn the computer off connect the computer and printer with a USB cable and then turn them ON IMPORTANT If you want to use the computer in which the printer driver was installed as the print server configure Windows Firewall to unblock communication with the client computers See p 9 15 The installation of the printer driver is c...

Страница 185: ... and the printer is ON before installing the CAPT software 1 Turn the computer on and start up Windows XP Server 2003 2 Log on as a member of Administrators IMPORTANT If a Wizard appears by the Plug and Play automatic setup click Cancel and then install the CAPT software using this procedure NOTE Full Control Permission is required for the installation of the printer driver 3 Display the Printers ...

Страница 186: ... Printing Environment 4 Installing the CAPT Software 4 Click Add a printer For Windows Server 2003 Double click Add Printer 5 Click Next 6 Make sure that Local printer attached to this computer is selected then click Next ...

Страница 187: ...he CAPT Software 4 NOTE Do not select the Automatically detect and install my Plug and Play printer check box 7 Make sure that Use the following port is selected select the USB port to which this printer is connected and then click Next 8 Click Have Disk ...

Страница 188: ...Setup appears click Exit 10 Select D English Win2K_Vista Select CNAC5STK INF then click Open The CD ROM drive name is indicated as D in this manual The CD ROM drive name may differ depending on the computer you are using 11 Confirm the contents of Copy manufacturer s files from then click OK For example when your CD ROM drive is drive D it is displayed as D English Win2K_Vista ...

Страница 189: ...ick Next 13 Enter a new name in Printer name if you want to change the printer name then click Next NOTE If another printer driver has already been installed in the computer the message Do you want to use this printer as the default printer appears In this case select Yes or No ...

Страница 190: ...CAPT Software 14 Click Next NOTE When sharing this printer on a network select Share name and then click Next The window for entering Location and Comment is displayed Enter them as needed then click Next 15 When printing a test page click Yes then click Next ...

Страница 191: ... click Continue Anyway 17 If the printer and computer are not connected turn the computer off connect the computer and printer with a USB cable and then turn them ON IMPORTANT If you are using a computer with Windows XP Service Pack 2 or another operating system equipped with Windows Firewall as the print server you need to configure Windows Firewall to unblock communication with the client comput...

Страница 192: ...ter is properly connected to the computer and the printer is ON before installing the CAPT software 1 Turn the computer on and start up Windows 2000 2 Log on as a member of Administrators IMPORTANT If a Wizard appears by the Plug and Play automatic setup click Cancel and then install the CAPT software using this procedure NOTE Full Control Permission is required for the installation of the printer...

Страница 193: ...alling the CAPT Software 4 5 Make sure that Local printer is selected then click Next NOTE Do not select the Automatically detect and install my Plug and Play printer check box 6 Select the USB port for connecting this printer and then click Next ...

Страница 194: ...plied LBP5300 User Software CD ROM into the CD ROM drive and then click Browse If CD ROM Setup appears click Exit 9 Select D English Win2K_Vista Select CNAC5STK INF then click Open The CD ROM drive name is indicated as D in this manual The CD ROM drive name may differ depending on the computer you are using ...

Страница 195: ...re 4 10 Confirm the contents of Copy manufacturer s files from then click OK For example when your CD ROM drive is drive D it is displayed as D English Win2K_Vista 11 Click Next 12 Enter a new name in Printer name if you want to change the printer name then click Next ...

Страница 196: ... you want your Windows based programs to use this printer as the default printer appears In this case select Yes or No 13 Click Next NOTE When sharing this printer on a network select Share as and then click Next The window for entering Location and Comment is displayed Enter them as needed then click Next 14 When printing a test page click Yes then click Next ...

Страница 197: ...e a dialog box will appear after printing Click OK to close the dialog box NOTE If the Digital Signature Not Found dialog box appears click Yes 16 If the printer and computer are not connected turn the computer off connect the computer and printer with a USB cable and then turn them ON The installation of the printer driver is completed ...

Страница 198: ...e p 4 51 The screen shots used in this section are from Windows Me 1 From the Start menu select Settings Printers to open the Printers folder Then double click Add Printer The Add Printer Wizard dialog box is displayed NOTE The Add Printer Wizard dialog box can also be displayed using the following procedure Double click My Computer Control Panel Printers Add Printer For Windows Me Double click My...

Страница 199: ...4 3 Select Local printer then click Next NOTE This screen does not appear when the network settings have not been configured 4 Click Have Disk 5 Insert the supplied LBP5300 User Software CD ROM into the CD ROM drive and then click Browse If CD ROM Setup appears click Exit ...

Страница 200: ...e name is indicated as D in this manual The CD ROM drive name may differ depending on the computer you are using 7 Confirm the contents of Copy manufacturer s files from then click OK For example when your CD ROM drive is drive D it is displayed as D English Win98_Me 8 Select the name of this printer for Printers then click Next ...

Страница 201: ...click Next 10 Enter a new name in Printer name if you want to change the printer name NOTE If another printer driver has already been installed in the computer the message Do you want your Windows based programs to use this printer as the default printer appears In this case select Yes or No 11 Click Finish Copying files is started ...

Страница 202: ...are 12 When the dialog box for completing the installation appears click OK 13 If the printer and computer are not connected turn the computer off connect the computer and printer with a USB cable and then turn them ON The installation of the printer driver is completed ...

Страница 203: ... and folder for this printer will be created For Windows Vista The icon for this printer is displayed in the Printers folder Canon Printer Uninstaller is added to All Programs under the Start menu If the manuals are installed LBP5300 Online Manuals is created on the desktop and LBP5300 Online Manuals under Canon LBP5300 is added to All Programs under the Start menu ...

Страница 204: ...on for this printer is displayed in the Printers and Faxes folder Canon Printer Uninstaller is added to All Programs under the Start menu If the manuals are installed LBP5300 Online Manuals is created on the desktop and LBP5300 Online Manuals under Canon LBP5300 is added to All Programs under the Start menu ...

Страница 205: ... The icon for the printer is displayed in the Printers folder Canon Printer Uninstaller is added to Programs under the Start menu If the manuals are installed LBP5300 Online Manuals is created on the desktop and LBP5300 Online Manuals under Canon LBP5300 is added to Programs under the Start menu ...

Страница 206: ...d to be printed on A4 size paper Load A4 size paper The screen shots used in this section are from Windows XP Professional 1 Display the Printers and Faxes folder or the Printers folder For Windows 98 Me 2000 From the Start menu select Settings Printers For Windows XP Professional Server 2003 From the Start menu select Printers and Faxes For Windows XP Home Edition From the Start menu select Contr...

Страница 207: ...iguration Page Print 4 3 Display the Page Setup sheet then click Display Printer Status Window to run the Printer Status Window NOTE For details on the Printer Status Window see Printer Status Window on p 5 90 4 From the Options menu select Utility Configuration Page Print ...

Страница 208: ...n Page Print 5 Click OK Configuration Page Print is printed IMPORTANT This is a sample of Configuration Page Print The contents may differ from the Configuration Page Print printed by your printer NOTE If Configuration Page Print is not printed properly see Chapter 7 Troubleshooting ...

Страница 209: ...the network are called clients 1 Download installation is to download the printer driver from the print server to client computers and install it without using the supplied CD ROM when an additional driver alternate driver is installed on the print server 2 If the print server is running Windows Vista you cannot download and install the driver on Windows 98 Me Network Environment Print Server Wind...

Страница 210: ...t File and printer sharing for Microsoft Networks then click OK 5 Click File and Print Sharing make sure that I want to be able to allow others to print to my printer s is selected then click OK 6 Display the Access Control sheet select Share level access control or User level access control and then click OK to restart Windows 7 After Windows restarts from the Start menu select Settings Printers ...

Страница 211: ...the Start menu select Control Panel Network Connections Local Area Connection click Properties and then proceed to Step 3 For Windows Vista From the Start menu select Control Panel and then click View network status and tasks Manage network connections For Windows 2000 The Network and Dial up Connections folder is displayed For Windows XP Vista The Network Connections folder is displayed 2 Right c...

Страница 212: ...ion Printer sharing settings require running Network Setup Wizard to enable the sharing settings For more details see Windows online Help 1 Display the Printers and Faxes folder or the Printers folder For Windows 2000 From the Start menu select Settings Printers For Windows XP Professional Server 2003 From the Start menu select Printers and Faxes For Windows XP Home Edition From the Start menu sel...

Страница 213: ... Sharing the Printer on a Network 4 2 Right click the icon for this printer then select Sharing from the pop up menu NOTE If you are using Windows Vista and Change sharing options appears click Change sharing options If the User Account Control dialog box appears click Continue ...

Страница 214: ...on a Network 3 Select Share this printer Change the share name as needed For Windows 2000 Select Share as For Windows Vista Select the Share this printer check box NOTE You can also specify the sharing settings during the local installation Do not enter blank or special characters for the share name ...

Страница 215: ...nter icon changes to the shared printer icon and the printer sharing settings are completed NOTE To update the additional driver alternate driver uninstall the printer driver used in the print server install the new printer driver and then see Print Server Settings p 4 69 and install the additional driver again 5 Select the Windows 95 98 and Me check box then click OK For Windows 2000 Select the W...

Страница 216: ...box appears click OK 7 Click Browse When your CD ROM drive is drive D select D English Win98_Me and then click OK Copying files is started 8 Click Close The printer icon changes to the shared printer icon IMPORTANT To clear the printer sharing settings use the following procedures For an operating system other than Windows Vista Select Do not share this printer Not shared for Windows 2000 in the S...

Страница 217: ...communication with the client computers Use the following procedure to ensure that Windows Firewall does not block this communication If you installed the CAPT software from CD ROM Setup a Warning dialog box was displayed If you clicked Yes Windows Firewall was configured to allow communication with the client computers If you clicked No however Windows Firewall was configured to block communicati...

Страница 218: ...escribes the procedure for installing the printer driver on a client computer There are two ways to install the printer driver local installation and download installation Local Installation See p 4 79 Installing the printer driver using the supplied CD ROM Download Installation Installing the printer driver without using the supplied CD ROM but by downloading the printer driver from the print ser...

Страница 219: ...nd Internet Connections Windows Firewall For Windows Server 2003 From the Start menu select Control Panel Windows Firewall For Windows Vista From the Start menu select Control Panel and then click Allow a program through Windows Firewall If the User Account Control dialog box appears click Continue 2 In the Exceptions sheet in the Windows Firewall Windows Firewall Settings for Windows Vista dialog...

Страница 220: ...me is indicated as D in this manual The CD ROM drive name may differ depending on the computer you are using If you are using an operating system other than Windows Vista select Run from the Start menu enter D English MInst exe and then click OK If you are using Windows Vista enter D English MInst exe in Start Search under the Start menu and then press the ENTER key on your keyboard NOTE If you ar...

Страница 221: ...onment Printing from a Network Computer by Sharing the Printer on a Network 4 3 Click Install If you selected Custom Installation in Step 2 clear the Online Manuals check box and then click Install 4 Confirm the contents then click Yes ...

Страница 222: ...4 81 Setting Up the Printing Environment 4 Printing from a Network Computer by Sharing the Printer on a Network 5 Click Next 6 Select Manually Set Port to Install then click Next 7 Click Add Port ...

Страница 223: ...from a Network Computer by Sharing the Printer on a Network 4 8 Select Network then click OK 9 Select the icon for the shared printer in the print server then click OK 10 Select whether or not to use this printer as the default printer then click Next ...

Страница 224: ... displayed Click No Select Yes only when the computer on which you are currently installing the printer driver is to be used as a print server 12 If you are using Windows Vista the following screen is displayed Click Yes Select No only when you do not use a LAN cable to connect the printer to a computer on which the CAPT software is being installed 13 The message Installation cannot be stopped onc...

Страница 225: ...lation of the printer driver starts For Windows Vista The Printers dialog box appears Click Install driver 14 If Easy Installation is selected in Step 2 the manuals are installed 15 Confirm the installation results then click Next NOTE If the printer driver is not installed properly see Installation Problems on p 7 50 ...

Страница 226: ...e p 9 15 Installing from the Printers and Faxes Folder or the Printers Folder 1 Display the Printers and Faxes folder or the Printers folder For Windows 98 Me 2000 From the Start menu select Settings Printers For Windows XP Professional Server 2003 From the Start menu select Printers and Faxes For Windows XP Home Edition From the Start menu select Control Panel and then click Printers and Other Ha...

Страница 227: ...A network printer or a printer attached to another computer then click Next For Windows 98 Me 2000 Select Network printer then click Next For Windows Vista Click Add a network wireless or Bluetooth printer If you are using Windows Vista searching the printer on a network starts automatically Click The printer that I want isn t listed ...

Страница 228: ... the print server then click Next For Windows Vista select the printer on the print server and then click Select For Windows 98 Me Proceed to Step 8 For Windows Vista The Printers dialog box appears Click Install driver If the User Account Control dialog box appears click Continue NOTE If you are using Windows XP Server 2003 and the Connect to Printer dialog box appears follow the directions in th...

Страница 229: ...r check box and then click Next For Windows Vista click Print a test page when printing a test page A dialog box appears after printing Click Close to close the dialog box 8 Click Finish IMPORTANT If you are using Windows XP Service Pack 2 or another operating system equipped with Windows Firewall on the client computers configure Windows Firewall to unblock communication with the print server If ...

Страница 230: ...orhood for Windows 98 from Network for Windows Vista then double click the icon for this printer Alternatively you can drag and drop the icon for the printer into the Printers and Faxes folder or Printers folder 3 Follow the instructions on the screen IMPORTANT If you are using Windows XP Service Pack 2 or another operating system equipped with Windows Firewall on the client computers configure Wi...

Страница 231: ...installed manuals also can be uninstalled by uninstalling the CAPT software using the Uninstaller If you are using a computer with Windows XP Service Pack 2 or another operating system equipped with Windows Firewall the printer is registered in the Exceptions sheet in the Windows Firewall Windows Firewall Settings for Windows Vista dialog box When you uninstall the CAPT software using the uninstal...

Страница 232: ... not on the list in the Delete Printer dialog box you can delete the file and information related to this printer by clicking Delete 4 Click Yes When the printer is used as a shared printer the following screen appears Confirm the contents of the message then click Yes when you are uninstalling the CAPT software Uninstallation starts Please wait a moment ...

Страница 233: ...4 92 Setting Up the Printing Environment Uninstalling the CAPT Software 4 5 Click Exit NOTE If the CAPT software cannot be uninstalled see When Uninstallation Fails on p 7 55 ...

Страница 234: ... 5 49 Scaling Print Output 5 51 Poster Printing 5 53 Watermark Printing 5 54 Printing Borders and Printing Date 5 56 Selecting a Print Style 5 58 Printing with a Gutter 5 60 Specifying the Paper Output Method 5 61 Printing with Upper Left of Sheet as Starting Point 5 62 Printing with the Data 180 Degrees Rotated 5 64 Smoothing Out Rough Textured Images 5 65 Printing with Toner Density Adjusted 5 6...

Страница 235: ...nuals 5 89 Printer Status Window 5 90 Functions on the Printer Status Window 5 90 Displaying the Printer Status Window 5 93 Preferences Menu 5 95 Consumables Counters Menu 5 96 Utility Menu 5 97 Device Settings Menu 5 97 Refresh 5 99 Resolve Error 5 99 Displaying Printer Status When Using a Print Server 5 100 ...

Страница 236: ...dows 98 Me 2000 From the Start menu select Settings Printers For Windows XP Professional Server 2003 From the Start menu select Printers and Faxes For Windows XP Home Edition From the Start menu select Control Panel and then click Printers and Other Hardware Printers and Faxes For Windows Vista From the Start menu select Control Panel and then click Printer 2 Right click the icon for this printer ...

Страница 237: ...lay the Device Settings for Windows 2000 XP Server 2003 Vista or Configuration for Windows 98 Me sheet then specify the settings for Paper Source Options NOTE You can also obtain the printer status such as the paper feeder automatically by clicking Get Device Status 4 Click OK ...

Страница 238: ...urpose tray NOTE When loading paper in the paper cassette see Loading Paper in the Paper Cassette p 3 17 when loading paper in the multi purpose tray see Loading Paper in the Multi purpose Tray p 3 33 and when performing 2 sided printing see 2 sided Printing p 3 58 2 Open the PDF file to print with Adobe Reader and then select Print Setup from the File menu 3 Specify the paper size of the document...

Страница 239: ...for Name or Printer Name and then specify the printing preferences NOTE The printer name displayed in this dialog box can be changed in the Printers and Faxes folder the Printers folder for Windows 98 Me 2000 Vista 6 If you want to specify more detailed printing preferences click Properties ...

Страница 240: ... currently opened file Check the contents of the Document Properties dialog box each time you print In particular it is recommended that you confirm the contents of the Page Setup sheet and the Paper Source sheet The default settings for all files can be configured using the following dialog box For Windows 98 Me Open the Printer Properties dialog box from the Printers folder See Displaying the Pr...

Страница 241: ...an when General is selected 9 Click OK The Print dialog box reappears 10 Click OK The printer starts printing NOTE If you have any problems with printing see Chapter 7 Troubleshooting Using the Various Printing Functions See p 5 19 describes how to use the various functions of the printer and printer driver By specifying the settings for the printer and printer driver for each job you can make the...

Страница 242: ...r or the Printers folder you can specify various settings for the printer and add the frequently used options as Profiles NOTE Full Control Permission is required to specify the settings for the Printers and Faxes folder or the Printers folder If you cannot display the Document Properties dialog box from the Printers and Faxes folder or the Printers folder display the dialog box from the applicati...

Страница 243: ...5 10 Printing a Document 5 Specifying the Printing Preferences 2 Confirm the printer name then click Properties The Document Properties dialog box is displayed ...

Страница 244: ...u select Settings Printers For Windows XP Professional Server 2003 From the Start menu select Printers and Faxes For Windows XP Home Edition From the Start menu select Control Panel and then click Printers and Other Hardware Printers and Faxes For Windows Vista From the Start menu select Control Panel and then click Printer 2 Right click the icon for this printer then select Printing Preferences f...

Страница 245: ... or the Printers Folder 1 Display the Printers and Faxes folder or the Printers folder For Windows 2000 From the Start menu select Settings Printers For Windows XP Professional Server 2003 From the Start menu select Printers and Faxes For Windows XP Home Edition From the Start menu select Control Panel and then click Printers and Other Hardware Printers and Faxes For Windows Vista From the Start m...

Страница 246: ...ters folder you can specify various settings for the printer and default values for all jobs NOTE The Configuration sheet that allows you to specify various settings for the printer can be displayed only by using the procedure described in Displaying the Printer Properties Dialog Box from the Printers Folder See p 5 15 Displaying the Document Properties Dialog Box from an Application This section ...

Страница 247: ...5 14 Printing a Document 5 Specifying the Printing Preferences 2 Select the name of this printer for Name or Printer Name and then click Properties The Document Properties dialog box is displayed ...

Страница 248: ...Folder 1 From the Start menu select Settings Printers 2 Right click the icon for this printer then select Properties from the pop up menu The Printer Properties dialog box is displayed NOTE The Printer Properties dialog box can also be displayed by selecting the icon for this printer and selecting Properties from the File menu ...

Страница 249: ... process Deleting Pausing Resuming a Print Job Using the Printer Status Window 1 Display the Printer Status Window For details on methods for displaying the Printer Status Window see Displaying the Printer Status Window on p 5 93 2 When deleting or pausing the job click the Pause Job button in the Current Print Job tab or My Job Operation tab The following message is displayed and the My Job Opera...

Страница 250: ...for the desired operation from among the Job Operation buttons Deleting a Job Click Delete Job Pausing a Job Click Pause Job Resuming the Job Click Resume Job NOTE You cannot control another user s job For more details see Displaying Printer Status When Using a Print Server on p 5 100 ...

Страница 251: ... of paper cannot be canceled If the job when the key is pressed and the job when the key is released are different the both jobs cannot be canceled Depending on the settings for Enable to Cancel Error Jobs or Enable to Cancel Any Processing Print Job in the Settings of the Cancel Job Key dialog box in the Printer Status Window you may not be able to cancel the job For details on the Settings of th...

Страница 252: ...variety of ways by using the printer driver as follows Printing Multiple Pages on One Sheet See p 5 49 Multiple pages can be printed on one sheet of paper Scaling Print Output See p 5 51 Specify this option when A4 size data is reduced in size and printed on B5 size paper or B5 size data is enlarged and printed on A4 size paper You can specify an arbitrary scaling ...

Страница 253: ... it out on multiple sheets of paper You can join these printouts together to make one large poster Watermark Printing See p 5 54 You can superimpose watermarks such as COPY DRAFT etc over the documents created by an application Printing Borders and Printing Date See p 5 56 You can print with borders printing date and or page numbers etc ...

Страница 254: ...d ready to be bound into a booklet Therefore 4 pages in total are printed on a single sheet of paper For example when making a booklet of 12 pages 3 sheets are used in total since 2 pages are printed on each side of paper To make a booklet you only have to fold the printouts into two and bind them The booklet printing function arranges the page order so that the pages are aligned properly when the...

Страница 255: ...job are collated For example if you are printing three copies of a 3 page document printouts of a complete job are collated arranged in this page order 1 2 3 1 2 3 1 2 3 Print with Upper Left of Sheet as Starting Point See p 5 62 Since printing is usually performed with the upper left 5 mm 10 mm for envelopes margin within the printable area of a sheet as the starting point a certain portion lower...

Страница 256: ... useful for printing envelopes and Index Card that can be fed only in specific orientations Smoothing Out Rough Textured Images See p 5 65 Specify this option when printing by smoothing out this kind of low resolution image data Printing with Toner Density Adjusted See p 5 67 You can print with the toner density of each color black yellow magenta and cyan adjusted C M Y K C M Y K ...

Страница 257: ...ious Printing Functions Color Settings See p 5 68 You can perform color printing with the colors originally specified Specifying the Brightness and Contrast See p 5 70 You can perform color printing with the brightness and contrast specified ...

Страница 258: ...only See p 5 72 You can print an adjusted color sample after specifying the settings in the Color Adjustment sheet Editing Jobs with PageComposer See p 5 77 You can combine two jobs into one and change the job settings for the combined job You can edit a job in another application You can also preview the job JobA JobB Job ...

Страница 259: ... Windows 2000 XP Server 2003 Vista Document Properties Dialog Box Page Setup Sheet Finishing Sheet Paper Source Sheet Quality Sheet Printer Properties Dialog Box General Sheet Sharing Sheet Ports Sheet Advanced Sheet Color Management Sheet Security Sheet Device Settings Sheet Profile Sheet NOTE The General Sharing Ports Advanced Color Management Security sheets in the Printer Properties dialog box...

Страница 260: ...roperties dialog box are displayed by Windows For details on these sheets see Windows Help Page Setup Sheet The Page Setup sheet allows you to specify the following printing preferences Setting Button Contents Page Size You can select the paper size of the document created by an application Output Size You can specify the actual paper size to be printed Copies You can specify the number of copies ...

Страница 261: ... a single page image and print it out on multiple sheets of paper You can join these printouts together to make one large poster Page Order You can specify the page order layout for printing when Page Layout is set to N Pages per Sheet N 2 4 6 8 9 16 Manual Scaling See p 5 52 Selecting this check box allows you to enter the value for scaling the printed document manually Watermark See p 5 54 You c...

Страница 262: ... standard paper sizes and Custom Name Fixed These standard paper sizes and Custom Name Fixed cannot be deleted Name of Custom Paper Size You can enter the name of the custom paper size to be added Unit Specify the unit Millimeter or Inch to be used when setting the custom paper size Paper Size Specify the height and width of the custom paper size Height Width Specify the custom paper size in portr...

Страница 263: ...d by default These provided watermarks cannot be deleted Add Allows you to add and specify a new watermark in the Edit Watermark dialog box Up to 50 watermarks can be added Delete Deletes the watermark selected in Watermark List However you cannot delete the default watermarks Name You can enter the name for the added watermark to be displayed in Watermark in the Page Setup sheet Text Enter the ch...

Страница 264: ...in the Page Options dialog box This dialog box allows you to specify the font for printing date and page number Setting Button Contents Edging You can select the type of edging to print as a border When a border is applied the original print data will be reduced slightly in size to make room for the border Print Date You can print the date Print User Name You can print a user name that is register...

Страница 265: ...to select the print style 1 sided Printing 2 sided Printing or Booklet Printing Booklet Displays a dialog box for Booklet Printing Print in Different Orientations When there are data of different orientations in a job select the Print in Different Orientations check box and specify the settings for Paper Alignment or Gutter Click Details to specify the settings Details Displays a dialog box for de...

Страница 266: ...e p 5 61 Specify the paper output method Finishing Details Displays the Finishing Details dialog box for specifying the finishing details and print mode appropriate to the paper Setting Button Contents Booklet Printing Method Specify the unit for Booklet Printing printing all pages at once or by dividing into several portions Specify Booklet Gutter Select this check box when specifying the gutter ...

Страница 267: ... dialog box allows you to specify the width of the gutter and image processing method Setting Button Contents Paper Alignment You can select the pattern of Paper Alignment when printing in different orientations Gutter When a value is specified a margin of white space is created on one side of the printed paper This margin is called Gutter The gutter is useful when binding pages Valid values for G...

Страница 268: ...tion of the page image is adjusted to make room for the gutter At this point you can select whether to reduce the size of the image to fit the remaining space Setting Button Contents Paper Size Override Specify this option when Letter size pages are printed on A4 size paper or A4 size pages are printed on Letter size paper Print with Upper Left of Sheet as Starting Point See p 5 62 1 Since printin...

Страница 269: ...us Window 2 When paper is printed from the multi purpose tray and the setting for Output Size in the Page Setup sheet is different from that for the previous job When printing on paper of the size specified in Output Size for 1 load the appropriate paper in the paper cassette again and then set the setting for the Register Paper Size in Cassettes dialog box to the appropriate paper size for 2 load...

Страница 270: ...when printing coated paper 121 160 g m2 Special Print Mode Print quality may deteriorate depending on the type of paper being used or the operating environment of the printer Special Print Mode provides a number of settings for solving problems related to printing quality EMF Spooling Windows 2000 XP Server 2003 only Specify whether the print data is spooled in EMF meta file format Print Last Page...

Страница 271: ...ptional paper feeder The following types of paper can be loaded in the optional paper feeder Plain paper 60 105 g m2 Paper Type You can specify the type of paper See p 3 3 Pause when Printing from the Multi purpose Tray Specify whether the printer should pause a job with a message displayed or continue the job when feeding paper from the multi purpose tray Continue Printing with the Multi purpose ...

Страница 272: ... Mode Specifies whether to perform color printing or black and white printing Manual Color Settings See p 5 68 Select this check box when customizing colors To specify the colors in detail click Color Settings to display the Color Settings dialog box Color Settings See p 5 68 After selecting the Manual Color Settings check box click this button to customize colors Print Color Sample Windows 2000 X...

Страница 273: ...data in monochrome halftones Enable Image Correction See p 5 65 When image data such as photographic images are enlarged in size in an application and printed the printed images can look rough or jagged Specify this option when printing by smoothing out this kind of low resolution image data Toner Density See p 5 67 Adjusts the toner density for the print data Toner Save The toner save mode is use...

Страница 274: ...en printing using the toner save mode Color Settings Dialog Box The following dialog box is displayed by clicking Color Settings This dialog box has the Color Adjustment sheet and the Matching sheet Prioritize Printing of Colored Lines and Text Select the check box for this option when color lines or text appear patchy or broken You should be able to print thin lines finely Setting Button Contents...

Страница 275: ...plays a sample of the original image before adjustment Adjustment Grid See p 5 68 Adjust the colors by moving the Preview Image at the center of Adjustment Grid from side to side or up and down Adjusted Position Adjusted Position shows the X horizontal and Y vertical position of Preview Image after adjustment Brightness See p 5 70 You can adjust the brightness for the print data Contrast See p 5 7...

Страница 276: ...method for color correction Application Color Matching Priority Windows 2000 XP Server 2003 Vista only If the check box for this option is cleared you can print with the color matching process specified in the printer driver prioritized If you want to print with the color matching in the application prioritized select the check box for this option Matching Method You can specify which element is t...

Страница 277: ...t yet been scanned diagrams charts or graphics created on the monitor or when you want to change the brightness of colors Use CanoFine Windows 2000 XP Server 2003 Vista only Select this option when using CanoFine CanoFine is the function that is used to print bitmap data finely correcting it automatically The images shot by a digital camera are printed finely by using this option Single page Batch...

Страница 278: ... whether the jobs are processed in the computer When Spooling at Host is not performed in the computer some options become disabled You can select either Auto or Disabled When Auto is selected the spooling status is automatically determined by the printer settings Show Icon in the Taskbar When this check box is selected an icon for displaying the Printer Status Window appears in the taskbar on the...

Страница 279: ... the selected Profile from Profile List However you cannot delete the default Profiles Import Imports a Profile saved as a file and adds it to Profile List Export Exports the selected Profile in Profile List as a file However you cannot export a default Profile Define Document Property By using the two check boxes specify the operations of Profiles that will be permitted in the Document Properties...

Страница 280: ... by clicking Add or Edit This dialog box allows you to enter Name Icon Comment and the printing preferences for the newly added Profile or the one that you want to edit Setting Button Contents Name You can enter the name for the Profile Icon You can select the icon for the Profile Comment You can enter the comment for the Profile ...

Страница 281: ...Printing only and Color Mode Left clicking the edge of the document image allows you to specify Binding Location The setting for Page Layout changes successively among 1 Page per Sheet 2 Pages per Sheet and 4 Pages per Sheet by repeatedly left clicking within the document image Right clicking on Preview selects 1 Page per Sheet 1 sided 2 Pages per Sheet 1 sided 4 Pages per Sheet 1 sided 1 Page per...

Страница 282: ...ies Finishing If Paper Selection is set to Different for First Others and Last Different for First Second Others and Last or Different for Cover and Others you can specify the paper source for each page Printing Multiple Pages on One Sheet Multiple pages can be printed on one sheet of paper 1 If you are using Windows 2000 XP Server 2003 Vista display the Device Settings sheet and then make sure th...

Страница 283: ...or 16 Pages per Sheet Page Order appears Specify how the pages are aligned NOTE The options under the Page Order pull down menu differ depending on the paper orientation or the number of pages to be printed on one sheet 4 Confirm the settings then click OK 5 Click OK or Print The printer starts printing ...

Страница 284: ...rom each other the scale factor is adjusted automatically The scale factor can also be specified manually You can specify from 25 to 200 Scaling a Document Automatically 1 Display the Page Setup sheet then specify the page size in Page Size 2 Specify the paper size in Output Size 3 Confirm the settings then click OK The scaling will be set automatically according to the sizes specified in Page Siz...

Страница 285: ...ctions Scaling a Document Manually 1 Display the Page Setup sheet then specify the page size in Page Size 2 Specify the paper size in Output Size 3 Select the Manual Scaling check box then specify the value in the spin box 4 Confirm the settings then click OK ...

Страница 286: ...ether to make one large poster 1 If you are using Windows 2000 XP Server 2003 Vista display the Device Settings sheet and then make sure that Spooling at Host is set to Auto 2 Display the Page Setup sheet then select Poster N x N N 2 3 4 from Page Layout A layout image of the printed paper appears on Preview 3 Confirm the settings then click OK 4 Click OK or Print The printer starts printing ...

Страница 287: ...rks or edit the already registered watermarks by clicking Edit Watermark in the Page Setup sheet Watermark Printing 1 If you are using Windows 2000 XP Server 2003 Vista display the Device Settings sheet and then make sure that Spooling at Host is set to Auto 2 Display the Page Setup sheet select the Watermark check box and then select the watermark to print with the document from the drop down lis...

Страница 288: ...termarks 1 If you are using Windows 2000 XP Server 2003 Vista display the Device Settings sheet and then make sure that Spooling at Host is set to Auto 2 Display the Page Setup sheet select the Watermark check box and then click Edit Watermark 3 Specify the options as needed ...

Страница 289: ...en adding a new watermark click Add You cannot change the settings for the default watermarks 4 Confirm the settings then click OK The Page Setup sheet reappears Printing Borders and Printing Date You can print with borders printing date and or page numbers 1 If you are using Windows 2000 XP Server 2003 Vista display the Device Settings sheet and then make sure that Spooling at Host is set to Auto...

Страница 290: ... more details on the settings see Various Pages in the Printer Driver p 5 26 or Online Help For details on methods for displaying Online Help see How to Use Online Help on p 5 80 4 Confirm the settings then click OK The Page Setup sheet reappears 5 Click OK 6 Click OK or Print The printer starts printing ...

Страница 291: ...n the Device Settings sheet 1 Display the Finishing sheet and select any one of 1 sided Printing 2 sided Printing or Booklet Printing for Print Style 1 sided Printing Prints on one side of paper 2 sided Printing Prints on both sides of paper Booklet Printing Prints booklets Booklet printing involves printing 2 pages on both sides of a sheet of paper in the appropriate order so that the printouts b...

Страница 292: ... as needed NOTE For more details on the settings see Various Pages in the Printer Driver p 5 26 or Online Help For details on methods for displaying Online Help see How to Use Online Help on p 5 80 3 Confirm the settings then click OK The Finishing sheet reappears 4 Confirm the settings then click OK 5 Click OK or Print The printer starts printing ...

Страница 293: ...for the gutter At this point you can select whether to reduce the size of the image to fit the remaining space 1 Display the Finishing sheet specify the edge on which the gutter is to be located in Binding Location and then click Gutter 2 Specify the options as needed NOTE For more details on the settings see Various Pages in the Printer Driver p 5 26 or Online Help For details on methods for disp...

Страница 294: ... in Finishing in the Finishing sheet Off Printouts of a complete job are grouped For example if you are printing three copies of a 3 page document printouts of a complete job are grouped arranged in this page order 1 1 1 2 2 2 3 3 3 Collate Printouts of a complete job are collated For example if you are printing three copies of a 3 page document printouts of a complete job are collated arranged in...

Страница 295: ...t a certain portion lower right may be missing when printing data with no margin In this case you can print with the upper left 0 mm margin as the starting point and as a result all sides of the sheet will be printed evenly IMPORTANT Depending on the print data to be printed the edge of paper may be missing partly during printing or may blot during color printing The function of Print with Upper L...

Страница 296: ...ng the Various Printing Functions 2 Select the Print with Upper Left of Sheet as Starting Point check box 3 Confirm the settings then click OK The Finishing sheet reappears 4 Click OK 5 Click OK or Print The printer starts printing ...

Страница 297: ...th the image 180 degrees rotated This option is useful for printing envelopes and Index Card that can be fed only in specific orientations 1 Display the Finishing sheet then click Finishing Details 2 Select the Rotate Print Data 180 Degrees check box 3 Confirm the settings then click OK The Finishing sheet reappears ...

Страница 298: ...arts printing Smoothing Out Rough Textured Images When image data such as photographic images are enlarged in size in an application and printed the printed images can look rough or jagged You can print this kind of low resolution image data with smoothing it out 1 Display the Quality sheet then click Settings ...

Страница 299: ...Document 5 Using the Various Printing Functions 2 Select the Enable Image Correction check box 3 Confirm the settings then click OK The Quality sheet reappears 4 Click OK 5 Click OK or Print The printer starts printing ...

Страница 300: ...n print with the toner density of each color black yellow magenta and cyan adjusted 1 Display the Quality sheet then click Settings 2 Adjust the toner density by dragging the Toner Density slider of each color from side to side Move the slider to the right to make it darker and to the left to make it lighter ...

Страница 301: ...cified 1 Display the Quality sheet select the Manual Color Settings check box and then click Color Settings 2 Display the Color Adjustment sheet then adjust the colors by moving the Preview Image at the center of Adjustment Grid from side to side or up and down When Preview Image is in the center the image has not been adjusted There are three methods to adjust it as follows Clicking the buttons o...

Страница 302: ...Adjustment Grid Dragging Preview Image in the center onto the desired color 3 Confirm the settings then click OK The Quality sheet reappears If you are using Windows 2000 XP Server 2003 Vista you can print an adjusted color sample For more details see Printing a Color Sample Windows 2000 XP Server 2003 Vista only on p 5 72 ...

Страница 303: ...arious Printing Functions Specifying the Brightness and Contrast You can perform color printing with the brightness and contrast specified 1 Display the Quality sheet select the Manual Color Settings check box and then click Color Settings ...

Страница 304: ...it lighter and to the left to make it darker Move the Contrast slider to the right to make it higher and to the left to make it lower 3 Confirm the settings then click OK The Quality sheet reappears If you are using Windows 2000 XP Server 2003 Vista you can print a sample after adjusting the brightness and contrast For more details see Printing a Color Sample Windows 2000 XP Server 2003 Vista only...

Страница 305: ...directions This is useful to adjust the colors on the printed paper 1 If you are using Windows 2000 XP Server 2003 Vista display the Device Settings sheet and then make sure that Spooling at Host is set to Auto 2 Display the Quality sheet select the Manual Color Settings check box and then select the Print Color Sample check box When printing a sample after adjusting the brightness or contrast set...

Страница 306: ...s using the following options in the Quality sheet Custom Settings dialog box cannot be added as a Profile Color Halftones B W Halftones Use Pure Black Prioritize Printing of Colored Lines and Text NOTE For Windows 98 Me up to 50 Profiles can be added To make it possible to add up to 50 Profiles for each user account double click My Computer Control Panel Passwords to display the User Profiles she...

Страница 307: ...per Source and Quality sheets specify the printer settings that you want to add 2 Click Add Profile 3 Enter the name of the Profile in Name Icon allows you to select the icon for the Profile Enter any comments in Comment as needed NOTE You can enter up to 31 characters for Name and up to 255 characters for Comment ...

Страница 308: ...ious Printing Functions Confirming the Printer Settings Click View Settings When OK is clicked the Add Profile dialog box reappears 4 Click OK The Properties dialog box reappears Make sure that the name of the added Profile is in Profile List ...

Страница 309: ... the Profiles Editing a Profile You can change the settings for Name Icon and Comment By clicking or you can change the order of the selected Profile When Import is clicked information about the Profiles is imported from the previously saved file When Export is clicked information about the selected Profile is saved into the file The Profile saved in the file can be used again even if it is delete...

Страница 310: ...e is deleted from the list IMPORTANT You can delete only custom Profiles You cannot delete the default Profiles Also you cannot delete the Profile currently selected in each sheet Editing Jobs with PageComposer You can combine two jobs into one and change the job settings for the combined job You can edit a job in another application You can also preview the job Make sure that any one of the Page ...

Страница 311: ...u that the output method is going to be switched to the Edit and Preview mode is displayed Click OK 3 Specify the printing preferences in each sheet then click OK The Print dialog box reappears 4 Click OK or Print The Canon PageComposer dialog box is displayed and the job is displayed on a list ...

Страница 312: ...e jobs on the list in the Canon PageComposer dialog box NOTE For more details on the setting procedures for the Canon PageComposer dialog box see Help for Canon PageComposer When the Edit and Preview mode is selected in the Printer Properties dialog box and Lock is set the Canon PageComposer dialog box appears each time you print ...

Страница 313: ...ows help application WinHlp32 exe is not installed on your system download it from the Microsoft Corporation website For details on the download methods click Help in the printer driver or Printer Status Window and then see the Windows Help and Support dialog box Displaying Online Help on the Options Displayed on the Screen There are three methods to display Online Help on the windows of the print...

Страница 314: ...n click it This method cannot display Help on Windows Vista Press the TAB key on your keyboard to select the item of which you want to display Help then press the F1 key Displaying Online Help on the Operation Procedures Display the procedures for operating the printer driver or the Printer Status Window using the following procedure 1 Click Help ...

Страница 315: ...5 82 Printing a Document 5 How to Use Online Help 2 Click Contents 3 Double click the title of which you want to know the operation procedure ...

Страница 316: ...nline Help Retrieving the Option about Which You Want to Know with Keywords and Displaying its Online Help Retrieve the option about which you want to know with keywords and display its Online Help using the following procedure 1 Click Help ...

Страница 317: ...5 84 Printing a Document 5 How to Use Online Help 2 Click Index 3 Enter the keyword to display the option about which you want to know ...

Страница 318: ...e option about which you want to know NOTE Depending on your operating system a list of words created automatically may be displayed on Find You can also display Online Help by selecting a word that is related to the option about which you want to know from the displayed word list ...

Страница 319: ...he drive IMPORTANT If you are using Windows Vista and the AutoPlay dialog box appears click Run AUTORUN EXE If CD ROM Setup does not appear display it using the following procedures The CD ROM drive name is indicated as D in this manual The CD ROM drive name may differ depending on the computer you are using If you are using an operating system other than Windows Vista select Run from the Start me...

Страница 320: ... 87 Printing a Document 5 Manuals 2 Click Custom Installation 3 Clear the Printer Driver check box then click Install 4 Confirm the contents then click Yes Installation of the instruction manuals starts ...

Страница 321: ...k Next 6 Click Exit The installation of the manuals is completed To see the manuals double click LBP5300 Online Manuals created on the desktop to display respective manuals or select Canon LBP5300 LBP5300 Online Manuals added to All Programs Programs for Windows 98 Me 2000 under the Start menu ...

Страница 322: ...ograms for Windows 98 Me 2000 under the Start menu then select Delete from the pop up menu Desktop LBP5300 Online Manuals Shortcut for Index pdf IMPORTANT If the manuals are installed on Windows 2000 XP Server 2003 Vista logged on by a user who is a member of Administrators they cannot be uninstalled from the computer logged on by anyone other than users who are members of Administrators Be sure t...

Страница 323: ...oblem when an error has occurred in the printer or printing is not performed See p 7 32 You can delete or pause a job See p 5 16 You can check the amount of toner remaining See p 5 96 You can register the size of paper to be loaded in the paper cassette See p 3 17 You can check information the user name document name etc about the current print job NOTE To activate a sound your computer must have ...

Страница 324: ...s permission is grayed out Options Menu Allows you to change the preferences for the Printer Status Window and perform calibration of the printer Help Menu Allows you to search for the desired items using keywords and displays About the version information of the Printer Status Window Refresh Button Message Area Auxiliary Resolve Error Button Menu Bar Icon Message Area Consumables Counters Button ...

Страница 325: ...s Refresh Button Obtains the printer status and refreshes the Printer Status Window display Resolve Error Button Allows you to resume a job when the job is paused for some reason Current Print Job Tab Progress Bar Indicates the progress of the current job by showing the number of printed pages or changing the background color Pause Job Button Pauses the job temporarily Job Information Area Display...

Страница 326: ...Printer Status Window in locations such as in the Page Setup sheet in the Document Properties dialog box Display the Printer Properties dialog box and display the Configuration Device Settings sheet and then select the Show Icon in the Taskbar check box The icon for the Printer Status Window is displayed in the Windows taskbar Click the icon then click the printer name to run it ...

Страница 327: ... window minimized 1 Does not change Does not change When a print job finishes Exits automatically 2 Does not change Does not change During idling When an error occurs Does not change Blinks with the window minimized 1 Does not change When an error is solved Does not change Stops blinking with the window minimized 1 Does not change During printing When an error occurs Displayed on the screen 3 Disp...

Страница 328: ...s set to When Starting Printing or Only when Errors Occur See Preferences Menu on p 5 95 Preferences Menu The Preferences menu allows you to select a method for displaying the Printer Status Window automatically specify the sound settings and make the Printer Status Window monitor the printer status For more details on each setting see Online Help For details on methods for displaying Online Help ...

Страница 329: ...essages other than error messages such as the messages indicating that the printer s consumables need to be replaced Consumables Counters Menu Select Consumables Counters from the Options menu to display the Consumables Counters dialog box In the Consumables Counters dialog box icons and meanings that indicate life of toner cartridges of each color and the number of total printed pages are display...

Страница 330: ... Print Prints the optional settings of the printer the settings for Device Settings in the Options menu and the current printer status such as the total number of printed pages For more details see Confirming the Printer Features on p 7 67 Network Status Print Prints the version of the printer s network board or the TCP IP settings For more details see Chapter 4 Troubleshooting in Network Guide Pr...

Страница 331: ...more details see Power Saving Sleep Mode on p 2 35 Calibration Settings You can set the printer to perform calibration automatically at the designated time everyday You can also specify whether the printer should perform calibration immediately after the printer is turned ON For more details see Calibrating the Printer on p 6 18 Cassettes Settings Allows you to specify which paper cassette is to b...

Страница 332: ... black and white page between color pages faster than Mode 2 Refresh Selecting Refresh from the Options menu obtains the latest printer status and refreshes the Printer Status Window display You can obtain the same result by clicking Refresh in the Printer Status Window Resolve Error When a job is paused for some reason you can resume the job by selecting Resolve Error from the Job menu Resuming a...

Страница 333: ...inting is possible Printer Status at the Clients Displaying the Printer Status Window and Job Operation The My Job Operation tab is displayed by clicking the Pause Job button Current Print Job Tab My Job Operation Tab Job Operation Job Information Area Pause Job Button Job Information Area Job Operation Buttons Displays the first job Enabled 1 Displays the first job 2 Enabled Pause Job Pauses all ...

Страница 334: ...While another user s job is being printed Progress Bar is displayed in gray Sounds are played only from the clients whose user name is verified by the print server NOTE To display the printer status when printing a job over the network a network environment that uses one of the following protocols is required TCP IP NetBEUI ...

Страница 335: ...5 102 Printing a Document 5 Printer Status Window ...

Страница 336: ...idges 6 17 Calibrating the Printer 6 18 Performing Calibration Manually 6 18 Performing Calibration Automatically at the Designated Time 6 19 Performing Calibration Immediately after the Printer is Turned ON 6 21 To Correct a Phenomenon of Out of Register Colors of the Printer 6 23 Cleaning the Fixing Roller 6 25 Adjusting the Printing Position 6 27 Checking the Printing Position 6 27 Adjusting th...

Страница 337: ...oon You can continue to print Have ready a new toner cartridge of the indicated color It is recommended that you replace the toner cartridge before printing a large amount of data Check the Toner Cartridges Toner Color Toner cartridges with print quality that cannot be guaranteed or used toner cartridges that have reached their lifetime may be inserted Continuing to use these cartridges may cause ...

Страница 338: ...nt such as the intermittency of printing paper types and paper sizes the number of pages you can print may be half this number When the toner consumption is low due to low printing ratio printing of the expected number of print pages may not be able to be achieved Also if you print in color more than one cartridges may reach the end of their life at the same time Even if you print in black and whi...

Страница 339: ... as this may cause the toner remaining inside the cartridge to ignite resulting in burns or a fire CAUTION Take care not to allow the toner to come into contact with your hands or clothing as this will dirty your hands or clothing If they become dirty wash them immediately with cold water Washing with warm water will set the toner and make it impossible to remove the toner stains IMPORTANT Dispose...

Страница 340: ...6 5 Routine Maintenance 6 Replacing Toner Cartridges 1 If you are using the multi purpose tray close it 2 Open the front cover Holding the opening of the front cover open it gently ...

Страница 341: ... from the top as shown in the figure 3 Place paper A4 size paper is recommended on the transfer belt of the ETB unit A as shown in the figure so that the paper is not shifted IMPORTANT When installing or removing the toner cartridges be sure to place paper on the transfer belt of the ETB unit to protect the belt Black Yellow Cyan Magenta A ...

Страница 342: ... transfer belt A of the ETB unit The transfer belt of the ETB unit is supplied with a function that cleans itself therefore do not clean the belt even when the toner is on it If the ETB unit is broken or transfer belt is damaged this may result in misfeeds or deterioration in print quality A A ...

Страница 343: ...s on the both sides pull it horizontally Holding the toner cartridge with your both hands firmly pull it out so that you do not touch the transfer belt of the ETB unit IMPORTANT Do not touch the high voltage contact A or the electrical contacts B shown in the figure as this may result in damage to the printer A B ...

Страница 344: ...oner cartridge IMPORTANT Keep the protective bag for the toner cartridge It may be required after taking out the toner cartridge for printer maintenance 6 Hold the toner cartridge as shown in the figure shake it gently 5 or 6 times to evenly distribute the toner inside the cartridge IMPORTANT If toner is not distributed evenly this may result in deterioration in print quality Be sure to carry out ...

Страница 345: ...8 cm long gently c c c c while supporting the toner cartridge Remove the sealing tape by hooking your fingers into the tab and pulling it out straight in the direction of the arrow CAUTION If the sealing tape is pulled out forcefully or stopped at midpoint toner may spill out If the toner gets into your eyes or mouth wash them immediately with cold water and immediately consult a physician b a c ...

Страница 346: ...ards If the tape is severed it may become difficult to pull out completely Pull out the sealing tape completely from the toner cartridge If any tape remains in the toner cartridge this may result in poor print quality When pulling out the sealing tape be careful not to hold the drum protective shutter A with your hands A ...

Страница 347: ...tenance 6 Replacing Toner Cartridges 8 Hook your finger into the tab and remove the packing materials as shown in the figure 9 Hold the toner cartridge properly with the arrowed side facing up as shown in the figure b a ...

Страница 348: ...both hands and install it into the printer Align A of the toner cartridge that you want to replace with the slots B to which the label of the same color is attached then insert the cartridge until it stops IMPORTANT Be sure to install the toner cartridge by pushing it firmly If the toner cartridges are not installed firmly this may result in deterioration in print quality A B A B ...

Страница 349: ... Holding the opening of the front cover close it gently CAUTION When closing the front cover be careful not to catch your fingers IMPORTANT If you cannot close the front cover check if the toner cartridge is installed properly If you try to close the front cover forcefully this may result in damage to the printer Do not leave the front cover open for a long time after installing the toner cartridg...

Страница 350: ...If they become dirty wash them immediately with cold water Washing with warm water will set the toner and make it impossible to remove the toner stains IMPORTANT When you take the toner cartridge out of the printer for servicing the printer place the toner cartridge into the original protective bag or wrap it with a thick cloth immediately When replacing a toner cartridge be sure to replace the to...

Страница 351: ...in this procedure such as the electrical contacts D This may result in damage to the cartridge When handling a toner cartridge hold it properly as shown in the figure and handle it with the arrowed side facing up Do not place it vertically or upside down Do not attempt to disassemble or modify the toner cartridge D ...

Страница 352: ...e toner cartridge out of the printer for servicing the printer or other purposes place the toner cartridge into the original protective bag or wrap it with a thick cloth immediately Do not place it vertically or upside down Store the toner cartridge in the same orientation as when installed in the printer Do not store the toner cartridge in a place exposed to direct sunlight Do not store cartridge...

Страница 353: ... immediately after the printer is turned ON NOTE Calibration takes approximately 60 seconds Performing Calibration Manually Perform calibration manually using the following procedure IMPORTANT If you perform calibration frequently this may affect the life of the toner cartridges 1 Display the Printer Status Window For details on methods for displaying the Printer Status Window see Displaying the P...

Страница 354: ... following status calibration is not performed even if the specified time has come When the printer is printing or an error has occurred Calibration is performed after the job is completed or the error is resolved When the time specified in the Calibration Settings dialog box has come within 30 minutes after performing calibration last time 1 Display the Printer Status Window For details on method...

Страница 355: ... From the Options menu in the Printer Status Window select Device Settings Calibration Settings 3 Select the Use Periodical Calibration Timer check box in the Calibration Settings dialog box then specify the time to perform calibration in Time 4 Click OK ...

Страница 356: ...inter is turned ON however calibration is not performed even after the completion of the first printing Even if Calibration Priority is selected calibration may not be performed immediately after the printer is turned ON depending on the inside state of the printer NOTE When calibration is performed immediately after the printer is turned ON excessive time is required until the printer is ready to...

Страница 357: ...e Maintenance 6 Calibrating the Printer 3 If you want the printer to perform calibration immediately after the printer is turned ON select Calibration Priority from Operation Immediately after Power On 4 Click OK ...

Страница 358: ...ORTANT If the phenomenon of Out of Register Colors is corrected frequently this may affect the life of the toner cartridges NOTE It takes approximately 100 seconds to correct the phenomenon of Out of Register Colors 1 Display the Printer Status Window For details on methods for displaying the Printer Status Window see Displaying the Printer Status Window on p 5 93 2 From the Options menu in the Pr...

Страница 359: ...6 24 Routine Maintenance 6 To Correct a Phenomenon of Out of Register Colors of the Printer 3 Click OK ...

Страница 360: ...MPORTANT The cleaning page cannot be output on any paper other than A4 Be sure to use A4 size paper NOTE When the printer is used as a shared printer you cannot perform cleaning from a client computer Cleaning takes approximately 40 seconds 1 Load A4 size blank paper plain paper in the multi purpose tray or paper cassette 2 Display the Printer Status Window For details on methods for displaying th...

Страница 361: ...atus Window then the cleaning starts When the cleaning page is output and the message is cleared the cleaning is completed IMPORTANT Do not touch the cleaning page until it is output to the output tray completely The cleaning page is first output partially after the front side is printed and then it is fed again to be printed on the reverse side NOTE The cleaning process cannot be canceled Please ...

Страница 362: ...the part will be missing in the print result NOTE Be aware that when adjusting the printing position for 2 sided printing the orientation of the images on the reverse pages varies depending on the printing orientation or setting for Binding Location in the Finishing sheet Checking the Printing Position Perform the Printing Position Adjustment Print and check the position to be adjusted 1 Display t...

Страница 363: ...ion Adjustment Print The Printing Position Adjustment Print dialog box is displayed 3 Select the paper source of which you want to check the printing position in the Printing Position Adjustment Print dialog box Select the Check Duplex Unit Also check box when adjusting the printing position for 2 sided printing ...

Страница 364: ...int NOTE When you print the Printing Position Adjustment Print with the Check Duplex Unit Also check box selected in Step 3 the side on which a solid black arrow is printed is to be the printout result of the front side and the side on which an outlined arrow is printed is to be that of the back side Next check the printout results and specify the position to be adjusted in Adjusting the Printing ...

Страница 365: ...g This section describes the setting procedure for the following Printing Position Adjustment Print printed with Paper Source in the Printing Position Adjustment Print dialog box set to Cassette 1 as an example In this case adjust the printing position by 2 22 mm to the left 1 Display the Printer Status Window For details on methods for displaying the Printer Status Window see Displaying the Print...

Страница 366: ...stment dialog box is displayed 3 Select the printing position from the list in the Printing Position Adjustment dialog box Next check the printout results of the Printing Position Adjustment Print and select the numerical value to adjust the position Negative values move the position to the left and positive values to the right by the selected value 4 Click OK ...

Страница 367: ... 5 From the Options menu select Utility Printing Position Adjustment Print The Printing Position Adjustment Print dialog box is displayed 6 Select the paper source of which you changed the printing position in the Printing Position Adjustment Print dialog box ...

Страница 368: ...djusting the Printing Position 7 Click OK The Printing Position Adjustment Print in which the setting is changed is printed Check the printout results to confirm the printing position To make further adjustment repeat Step 1 to 7 ...

Страница 369: ... unplug the power plug Failure to observe these steps may result in a fire or electrical shock Do not use alcohol benzene paint thinner or other flammable substances If flammable substances come into contact with electrical parts inside the printer it may result in a fire or electrical shock IMPORTANT Be careful not to use a cleaning agent other than water or a mild detergent diluted with water as...

Страница 370: ...ed turn the computer off b and then disconnect the USB cable c Disconnect the power plug from the AC power outlet d 2 Firmly wring a soft cloth dampened with water or a mild detergent diluted with water and wipe off the dirt If you use a mild detergent for cleaning be sure to wipe away the detergent with a soft cloth dampened with water b a c d ...

Страница 371: ...enance 6 Cleaning the Outside of the Printer 3 After wiping off the dirt wipe the printer with a dry cloth 4 When the printer is completely dry plug the power plug into the AC power outlet and then connect the USB cable ...

Страница 372: ...d If you do so the paper cassette may drop resulting in personal injury IMPORTANT Make sure that the front cover and multi purpose tray are closed before carrying the printer NOTE For details on the installation site see Installation Site on p 2 3 1 Perform the following procedure Turn the printer OFF a If a USB cable is connected turn the computer off b and then disconnect the USB cable c Disconn...

Страница 373: ...inter before moving the printer Otherwise the power cord or interface cables may be damaged resulting in a fire or electrical shock 2 Remove all the interface cables and the power cord from the printer 3 Pull out the paper cassette Pull out the paper cassette gently a While holding the paper cassette with both hands remove it from the printer unit as shown in the figure b a b ...

Страница 374: ...ng the center of the lift handles on the lower portion of the printer and lifting it up at the same time CAUTION This printer weighs approximately 25 8 kg without the paper cassette installed The printer must be carried by 2 or more people and care must be taken to avoid hurting your back or other portions of your body when carrying the printer ...

Страница 375: ...ine Maintenance 6 Moving the Printer Be sure not to hold the printer by the front panel output area or any portions other than the lift handles If you do so you may drop the printer resulting in personal injury ...

Страница 376: ...tallation site before carrying the printer to the site For details on the procedure for installing the paper feeder see Removing the Packing Materials and Installing the Paper Feeder on p 8 7 5 Put the printer down carefully at the new installation site CAUTION Put the printer down slowly and carefully Be careful not to hurt your hands IMPORTANT Secure sufficient space around the printer at the in...

Страница 377: ...aper cassette in the printer Push the paper cassette into the printer firmly until the front side of the paper cassette is flush with the front surface of the printer CAUTION When setting the paper cassette in the printer be careful not to catch your fingers ...

Страница 378: ...er When transporting the printer for reasons such as relocating remove the toner cartridges and store the printer and the parts in the package that they came in with the packing materials attached in order to prevent them from being damaged while being transported If the original package and packing materials are not available find an appropriate box and packing materials and pack the printer and ...

Страница 379: ... that the multi purpose tray is closed before opening the front cover If you open the front cover with the multi purpose tray opened this may result in damage to the printer Do not place any heavy objects on the printer trays or covers This may result in damage to the printer Do not leave each cover open longer than required Exposing the printer to direct sunlight or strong light may result in det...

Страница 380: ...re to do so may result in damage to the printer If you want to spread a blanket on the printer to prevent dust from entering the printer turn the power OFF and allow the printer to cool down sufficiently before covering the printer If you do not plan to use the printer for a long period of time unplug the power plug from the AC power outlet Do not use or store the printer in a room where chemicals...

Страница 381: ...6 46 Routine Maintenance 6 Handling the Printer ...

Страница 382: ...he Alarm Indicator is On a Service Error Appears 7 33 The Alarm Indicator is Blinking 7 36 Print Quality Problems 7 37 Paper Problems 7 48 Installation Problems 7 50 Problems on Local Installation 7 51 Installation Problems When the Printer is Shared on a Network 7 52 Printing a Test Page 7 54 When Uninstallation Fails 7 55 Uninstalling the USB Class Driver 7 57 When Data is Not Sent to the Printe...

Страница 383: ... the messages displayed on the Printer Status Window to remedy an error See Printer Status Window on p 5 90 The power cord is not connected The power switch is turned OFF See Turning the Printer ON OFF on p 2 33 No The Load Paper indicator is on or blinking See Loading Paper in the Paper Cassette on p 3 17 Loading Paper in the Multi purpose Tray on p 3 33 The Alarm indicator is on or blinking See ...

Страница 384: ...g messages appear in the Printer Status Window WARNING There are some areas inside the printer which are subject to high voltages When removing jammed paper or when inspecting the inside of the printer do not allow necklaces bracelets or other metal objects to touch the inside of the printer as this may result in burns or electrical shock ...

Страница 385: ...h warm water will set the toner and make it impossible to remove the toner stains When removing paper jammed inside the printer remove the jammed paper gently to prevent the toner on the paper from scattering and getting into your eyes or mouth If the toner gets into your eyes or mouth wash them immediately with cold water and immediately consult a physician When removing jammed paper take care no...

Страница 386: ...r damaging the parts in the printer When removing jammed paper pull out the paper in the most appropriate direction judging from the position of the paper If paper is torn be sure to find and remove any remaining pieces of paper Do not place any object on or touch the transfer belt A of the ETB unit The transfer belt of the ETB unit is supplied with a function that cleans itself therefore do not c...

Страница 387: ...the top cover Output tray Top Cover b Inside the front cover Duplex print transport area Front Cover c Multi purpose tray Multi purpose Tray d Cassette 1 Cassette 1 e Cassette 2 only when the paper feeder is installed Cassette 2 a b c d e Paper flow for 1 sided printing Paper flow for 2 sided printing Output Tray Cassette 1 Cassette 2 Optional Paper Feeder Unit Optional Multi purpose Tray Duplex U...

Страница 388: ...is removed without opening the front cover or top cover In this case open and close the front cover or top cover once 1 Check the output tray and remove any jammed paper IMPORTANT If the jammed paper cannot be removed easily do not try to remove it forcefully but proceed to the next step NOTE If unfixed toner is on the removed paper it may adhere to the paper to be printed next ...

Страница 389: ... Paper Jams 2 If you are using the multi purpose tray remove any paper jammed in the multi purpose tray IMPORTANT If the jammed paper cannot be removed easily do not try to remove it forcefully but proceed to the next step ...

Страница 390: ...7 9 Troubleshooting 7 Paper Jams 3 If you are using the multi purpose tray close it 4 Open the front cover Holding the opening of the front cover open it gently ...

Страница 391: ...mmed paper by pulling it in the direction of the arrow Remove the jammed paper in the direction of the arrow gently to prevent unfixed toner from spilling Remove the paper being careful not to touch the transfer belt of the ETB unit or toner cartridge ...

Страница 392: ...curs when performing 2 sided printing perform the following procedure If you are not performing 2 sided printing proceed to the next step Press the lock release buttons on the duplex print transport guide a raise it b and remove the jammed paper c IMPORTANT If the jammed paper cannot be removed easily do not try to remove it forcefully but proceed to the next step b a a c ...

Страница 393: ...nsport guide Close both sides of the duplex print transport guide securely IMPORTANT Be sure to check if the duplex print transport guide is closed completely If the duplex print transport guide is not closed completely this may result in misfeeds or paper jams ...

Страница 394: ...t with your right hand a pull out the jammed paper in the direction of the arrow to remove the paper b as shown in the figure NOTE If the duplex unit comes off see When the Duplex Unit is Not Installed Properly on p 7 26 Move the duplex unit back to its original position a A b ...

Страница 395: ...7 Paper Jams 7 Open the top cover 8 Remove any jammed paper by pulling it in the direction of the arrow IMPORTANT If the jammed paper cannot be removed easily do not try to remove it forcefully but proceed to the next step ...

Страница 396: ... CAUTION When closing the front cover be careful not to catch your fingers 10 Perform the following procedure with the top cover open Be careful so that the top cover does not close 11 If the optional paper feeder is installed pull out the paper cassette of the paper feeder Pull out the paper cassette gently a a ...

Страница 397: ... with both hands remove it from the paper feeder as shown in the figure b 12 Pull out the paper cassette of the printer Pull out the paper cassette gently a While holding the paper cassette with both hands remove it from the printer unit as shown in the figure b b a b ...

Страница 398: ...7 17 Troubleshooting 7 Paper Jams 13 Remove any jammed paper while pushing it downward to some extent In case of the printer unit In case of the paper feeder ...

Страница 399: ...o remove it forcefully but open the front cover and then see Step 5 and remove the jammed paper If you try to remove the jammed paper forcefully the feed roller may come off Do not touch the feed rollers A in the printer unit and paper feeder This may result in damage to the printer or printer error A ...

Страница 400: ...Troubleshooting 7 Paper Jams 14 Set the paper cassette in the printer Push the paper cassette into the printer firmly until the front side of the paper cassette is flush with the front surface of the printer ...

Страница 401: ...ooting 7 Paper Jams If the paper feeder is installed set the paper cassette of the paper feeder also CAUTION When setting the paper cassette in the printer be careful not to catch your fingers 15 Close the top cover ...

Страница 402: ...e top cover is displayed even after the jammed paper is removed and the display of the Printer Status Window is refreshed this indicates that the jammed paper still remains in the fixing unit Remove the fixing unit using the following procedure to remove the jammed paper CAUTION The fixing unit and its surroundings inside the printer are hot during use Make sure the fixing unit is completely cool ...

Страница 403: ...7 22 Troubleshooting 7 Paper Jams 1 Turn the power of the printer OFF 2 Open the top cover ...

Страница 404: ...7 23 Troubleshooting 7 Paper Jams 3 While holding the fixing unit by the arrowed portions a remove it gently as shown in the figure b b a a ...

Страница 405: ...e cover of the fixing unit a a a a pull out the jammed paper in the direction of the arrow to remove the paper b b b b as shown in the figure Remove the jammed paper in the direction of the arrow gently to prevent unfixed toner from spilling a b ...

Страница 406: ...7 25 Troubleshooting 7 Paper Jams 5 Install the fixing unit 6 Close the top cover 7 Turn the printer ON ...

Страница 407: ...roperly the following message is displayed in the Printer Status Window Install the duplex unit properly using the following procedure IMPORTANT To install the duplex unit properly remove it once When you remove the duplex unit the data being printed will be deleted because you have to turn the power of the printer OFF Print the data again after installing the duplex unit properly ...

Страница 408: ...7 27 Troubleshooting 7 When the Duplex Unit is Not Installed Properly 1 Turn the power of the printer OFF 2 If you are using the multi purpose tray close it ...

Страница 409: ...operly 3 Open the front cover Holding the opening of the front cover open it gently 4 Remove the duplex unit gently While pressing the levers on both sides of the duplex unit a and holding the tabs A remove the duplex unit gently b as shown in the figure b a A A a ...

Страница 410: ... or touch the transfer belt A of the ETB unit The transfer belt of the ETB unit is supplied with a function that cleans itself therefore do not clean the belt even when the toner is on it If the ETB unit is broken or transfer belt is damaged this may result in misfeeds or deterioration in print quality A A ...

Страница 411: ... 5 Install the duplex unit Insert the projections of the duplex unit in the printer then install the duplex unit firmly until it clicks as shown in the figure Make sure that the triangular mark on the printer is aligned with that on the duplex unit as shown in the figure ...

Страница 412: ...leshooting 7 When the Duplex Unit is Not Installed Properly 6 Close the front cover Holding the opening of the front cover close it gently CAUTION When closing the front cover be careful not to catch your fingers ...

Страница 413: ...r is On Blinking When a problem has occurred in the printer the Alarm indicator orange comes on or blinks If the Alarm indicator is on see The Alarm Indicator is On a Service Error Appears p 7 33 and if the Alarm indicator is blinking see The Alarm Indicator is Blinking p 7 36 ...

Страница 414: ...following service error appears in the Printer Status Window When the error code E012 0000 appears see When the Duplex Unit is Not Installed Properly p 7 26 and install the duplex unit If the service error appears cycle the power of the printer using the following procedure This may clear the message NOTE For details on methods for displaying the Printer Status Window see Displaying the Printer St...

Страница 415: ... again If the message does not reappear the printer can be used as normal If the error message still appears proceed to the next step 2 Note down the error code displayed in the Printer Status Window When the error code E012 0000 appears see When the Duplex Unit is Not Installed Properly p 7 26 and install the duplex unit ON OFF ...

Страница 416: ...inter OFF a If a USB cable is connected turn the computer off b and then disconnect the USB cable c Disconnect the power plug from the AC power outlet d 4 Contact your local authorized Canon dealer When contacting your Canon dealer please report the problems and the error code that you have noted b a c d ...

Страница 417: ... printer needs some measures the Alarm indicator orange blinks and the following error message appears in the Printer Status Window If an error message appears follow the directions displayed in the Printer Status Window NOTE For details on methods for displaying the Printer Status Window see Displaying the Printer Status Window on p 5 93 ...

Страница 418: ...rtridges has deteriorated Remedy Replace the toner cartridge with a new one See Replacing Toner Cartridges on p 6 2 Cause 2 A problem has occurred inside the printer Remedy 1 If Service Error is displayed in the Printer Status Window turn the power OFF wait for 10 seconds or longer and then turn the power ON again This may clear the message Remedy 2 If the message does not disappear even after app...

Страница 419: ...g Details dialog box Cause 3 Residual images appear depending on the printer status Remedy Set Special Print Mode to Special Settings 8 in the printer driver If this solves the problem set Special Print Mode to Off In order to specify the setting for Special Print Mode display the Advanced Settings dialog box by clicking Finishing Details in the Finishing sheet and then clicking Advanced Settings ...

Страница 420: ...d Remedy Set Special Print Mode to Special Settings 10 in the printer driver If this solves the problem set Special Print Mode to Off In order to specify the setting for Special Print Mode display the Advanced Settings dialog box by clicking Finishing Details in the Finishing sheet and then clicking Advanced Settings in the Finishing Details dialog box Cause 3 The toner cartridge has run out of to...

Страница 421: ...e streaks appear Cause 1 Paper is inappropriate Remedy Replace the paper with one that can be used with this printer See Paper Requirements on p 3 2 Cause 2 Continuous printing was performed Remedy Set Special Print Mode to Special Settings 5 in the printer driver If this solves the problem set Special Print Mode to Off In order to specify the setting for Special Print Mode display the Advanced Se...

Страница 422: ...inishing Details dialog box Text or patterns printed on the front page blot on 2 sided printing Cause Paper is inappropriate Remedy 1 Replace the paper with one that can be used with this printer See Paper Requirements on p 3 2 Remedy 2 Set Special Print Mode to Special Settings 12 in the printer driver If this solves the problem set Special Print Mode to Off In order to specify the setting for Sp...

Страница 423: ...d Cause 1 Gutter is specified Remedy Specify Gutter in the printer driver to 0 In order to specify the setting for Gutter display the Gutter Settings dialog box by clicking Gutter in the Finishing sheet Cause 2 Top Margin and Paper Position in the application are not specified properly Remedy Specify the settings for Top Margin and Paper Position in the application properly See the instruction man...

Страница 424: ...r Type in the printer driver to the appropriate value In order to specify the setting for Paper Type display the Paper Source sheet Cause 3 A problem has occurred inside the printer Remedy 1 If Service Error is displayed in the Printer Status Window turn the power OFF wait for 10 seconds or longer and then turn the power ON again This may clear the message Remedy 2 If the message does not disappea...

Страница 425: ... printer driver is set to Never poor print quality a phenomenon of Out of Register Colors may be alleviated In order to specify the setting for Use Pure Black display the Custom Settings dialog box by clicking Settings in the Quality sheet Data is not printed in the correct color specified color or colored text appears blurred due to a phenomenon of Out of Register Colors Cause 1 Any of the toner ...

Страница 426: ...ecified colors or do not appear at all Cause 1 Some colors cannot be reproduced due to the combination of colors or patterns Remedy 1 Adjust the colors in the application and print again Remedy 2 Change the patterns in the application and print again Cause 2 The color may appear different depending on the fill pattern Remedy 1 Readjust to a darker color and print again Remedy 2 Reload paper to cha...

Страница 427: ... gradated portions when printing diagrams with gradations Cause Use Pure Black is applied to the gray color portions of the streaks in the diagrams Remedy Set Use Pure Black to Never in the printer driver In order to specify the setting for Use Pure Black display the Custom Settings dialog box by clicking Settings in the Quality sheet Data is not printed in the correct color specified color even a...

Страница 428: ...lay appear around lines or text and are printed in a different color from the other areas Cause A process that is different from the specified halftone process or color process may be applied depending on the operating system or application Remedy 1 Set Use Pure Black to Always or Never in the printer driver In order to specify the setting for Use Pure Black display the Custom Settings dialog box ...

Страница 429: ...n See Paper Requirements on p 3 2 Remedy 2 Set Special Print Mode to Special Settings 1 in the printer driver If this solves the problem set Special Print Mode to Off In order to specify the setting for Special Print Mode display the Advanced Settings dialog box by clicking Finishing Details in the Finishing sheet and then clicking Advanced Settings in the Finishing Details dialog box Cause 2 Pape...

Страница 430: ... Off In order to specify the setting for Special Print Mode display the Advanced Settings dialog box by clicking Finishing Details in the Finishing sheet and then clicking Advanced Settings in the Finishing Details dialog box IMPORTANT When printing with Special Settings 9 specified this affects the life of the color toner cartridges even on black and white printing ...

Страница 431: ...nstallation Fails on p 7 55 Install the CAPT software again See Installing the CAPT Software on p 4 4 Install the CAPT software again See Installing the CAPT Software on p 4 4 Uninstall the USB class driver See Uninstalling the USB Class Driver on p 7 57 Print a test page See Printing a Test Page on p 7 54 Check the power supply cables etc See Problems on Local Installation on p 7 51 Installation ...

Страница 432: ... Use a USB cable appropriate for the USB interface of this printer The USB interface of this printer is USB 2 0 Hi Speed Windows 2000 XP Server 2003 Vista only and USB Full Speed USB1 1 equivalent Use a USB cable with the following symbol Cause 5 The printer driver cannot be installed from CD ROM Setup Remedy Install the printer driver with plug and play See Installing with Plug and Play on p 4 13...

Страница 433: ...ter Remedy Specify the printer as a shared printer in the Printer Properties dialog box Cause 3 The user does not have permission to access the print server or printer Remedy Ask your network administrator to change the user permissions Cause 4 If you are using Windows Vista Network discovery is not set to On Remedy Set Network discovery to On To specify the setting for Network discovery select Co...

Страница 434: ...indows Vista then confirm the icon for this printer If you cannot find the icon for this printer ask your network administrator To install the printer driver double click the icon for this printer or drag and drop it into the Printers and Faxes folder or Printers folder and follow the instructions on the screen Remedy 2 When installing the CAPT software from the Printers and Faxes folder or the Pr...

Страница 435: ...the icon for this printer in the Printers folder then select Properties from the pop up menu Click Print Test Page in the General sheet in the Printer Properties dialog box For Windows 2000 XP Server 2003 Vista Right click the icon for this printer in the Printers and Faxes or the Printers folder then select Properties from the pop up menu Click Print Test Page in the General sheet in the Printer ...

Страница 436: ...Add Remove Programs For Windows Server 2003 From the Start menu select Control Panel Add or Remove Programs For Windows Vista From the Start menu select Control Panel and then click Uninstall a program 2 Select Canon LBP5300 in the Add or Remove Programs dialog box then click Change Remove For Windows 98 Me Select Canon LBP5300 in the Add Remove Programs Properties dialog box then click Add Remove...

Страница 437: ...oftware again If you are using Windows Vista and the User Account Control dialog box appears click Continue 3 Select the name of this printer then click Delete 4 Click Yes When the printer is used as a shared printer the following screen appears Confirm the contents of the message then click Yes when you are uninstalling the CAPT software Uninstallation starts Please wait a moment ...

Страница 438: ... the CAPT software 1 Make sure that the computer is connected to the printer with the USB cable and that the printer is ON 2 From the Start menu select Control Panel and then click Add or Remove Programs For Windows 98 Me 2000 From the Start menu select Settings Control Panel and then double click Add Remove Programs For Windows Server 2003 From the Start menu select Control Panel Add or Remove Pr...

Страница 439: ...rams and Features dialog box and then click NOTE If Canon LBP5300 is displayed in the dialog box see When Uninstallation Fails p 7 55 and delete Canon LBP5300 in the dialog box 4 From the Start menu select Control Panel and then click Performance and Maintenance System For Windows 98 Me 2000 From the Start menu select Settings Control Panel and then double click the System icon For Windows Server ...

Страница 440: ...the System Properties dialog box click the Device Manager tab and then double click Universal Serial Bus controllers For Windows Vista Double click Universal Serial Bus controllers 6 Right click USB Printing Support then select Uninstall from the pop up menu For Windows 98 select Canon LBP5300 for Windows Me select Canon CAPT USB Device and then click Remove ...

Страница 441: ...stake Windows may not operate properly If the USB class driver is not installed properly USB Printing Support for Windows 2000 XP Server 2003 Vista Canon CAPT USB Device for Windows Me or Canon LBP5300 for Windows 98 is not displayed 7 When the Confirm Device Removal Confirm Device Uninstall for Windows Vista dialog box appears click OK 8 Click Device Manager closes 9 Disconnect the USB cable from...

Страница 442: ...t Remedy Plug the power plug into the AC power outlet Cause 2 The printer is plugged to an extension cord or multiple power strip Remedy Plug the power plug of the printer directly into an AC power outlet on the wall Cause 3 The breakers have tripped Remedy Reset the breakers on the switch board Cause 4 There is a break in the power cord Remedy If the printer is turned ON after replacing the power...

Страница 443: ... the following procedure 1 Display the Printers and Faxes folder or the Printers folder For Windows 98 Me 2000 From the Start menu select Settings Printers For Windows XP Professional Server 2003 From the Start menu select Printers and Faxes For Windows XP Home Edition From the Start menu select Control Panel and then click Printers and Other Hardware Printers and Faxes For Windows Vista From the ...

Страница 444: ...rectly into an AC power outlet on the wall Cause 3 The breakers have tripped Remedy Reset the breakers on the switch board Cause 4 There is a break in the power cord Remedy If the printer is turned ON after replacing the power cord with the one that is of the same type and is used for other device there is a break in the power cord In this case purchase a new power cord and replace it with the bro...

Страница 445: ...dy Start up the print server then configure Windows Firewall to unblock communication with the client computers See Configuring Windows Firewall to Unblock Communication with the Client Computers on p 9 16 A problem has occurred in a client computer Cause You are using a computer with Windows XP Service Pack 2 or another operating system equipped with Windows Firewall as a client computer and Wind...

Страница 446: ... the paper is changed from narrower one to wider one the printer cools down the fixing unit so that the print quality is maintained Remedy Please wait a moment The printer cools down the fixing unit automatically When the printer finished cooling down the fixing unit it stops operation and becomes ready to print If the printer was in the middle of printing it resumes the job after finishing the co...

Страница 447: ...Remedy Start up the print server then configure Windows Firewall to unblock communication with the client computers See Windows Firewall on p 9 15 The printer status is not displayed properly in the Printer Status Window when the printer is shared over a network Cause You are using a computer with Windows XP Service Pack 2 or another operating system equipped with Windows Firewall as a client comp...

Страница 448: ...rsion of the printer s network board equipped with the printer or confirm the TCP IP settings Use these functions when required after installing and connecting the printer for example when you want to check the operation NOTE Configuration Page Print is designed to be printed on A4 size paper Load A4 size paper For details on Network Status Print see Chapter 4 Troubleshooting in Network Guide 1 Di...

Страница 449: ...ints information as shown in the following figure You can confirm the optional settings of the printer settings for Device Settings in the Options menu in the Printer Status Window and the current printer status such as Number of Total Printed Pages IMPORTANT This is a sample of Configuration Page Print The contents may differ from the Configuration Page Print printed by your printer ...

Страница 450: ...ccessories This chapter describes the procedures for installing the optional accessories on the printer Paper Feeder 8 2 Moving the Printer 8 3 Removing the Packing Materials and Installing the Paper Feeder 8 7 Removing the Paper Feeder 8 13 ...

Страница 451: ...the printer before installing the paper feeder Otherwise the power cord or interface cables may be damaged resulting in a fire or electrical shock IMPORTANT Do not touch the connector A or feed roller B in the paper feeder This may result in damage to the printer or misfeeds If you are printing from Cassette 2 make sure that Cassette 1 is set before printing If you print from Cassette 2 when Casse...

Страница 452: ...e sure to turn the printer and computer OFF unplug the power plug and then disconnect all the interface cables from the printer before moving the printer Otherwise the power cord or interface cables may be damaged resulting in a fire or electrical shock CAUTION Do not carry the printer with the paper cassette attached If you do so the paper cassette may drop resulting in personal injury 1 Perform ...

Страница 453: ...eder 2 Remove all the interface cables and the power cord from the printer 3 Pull out the paper cassette Pull out the paper cassette gently a While holding the paper cassette with both hands remove it from the printer unit as shown in the figure b a b ...

Страница 454: ...holding the center of the lift handles on the lower portion of the printer and lifting it up at the same time CAUTION This printer weighs approximately 25 8 kg without the paper cassette installed The printer must be carried by 2 or more people and care must be taken to avoid hurting your back or other portions of your body when carrying the printer ...

Страница 455: ...t to hold the printer by the front panel output area or any portions other than the lift handles If you do so you may drop the printer resulting in personal injury IMPORTANT Make sure that the front cover and multi purpose tray are closed before carrying the printer ...

Страница 456: ...you do so the paper cassette may drop resulting in personal injury IMPORTANT If there is any packing material remaining inside the paper feeder this may result in misfeeds or damage to the printer when operating the printer Be sure to remove all the packing materials following the procedure The removed packing materials are required when transporting the printer for relocation or maintenance Keep ...

Страница 457: ... 8 Installing the Optional Accessories 8 Paper Feeder 1 Remove the tape attached to the paper feeder 3 locations 2 Pull out the paper cassette from the paper feeder Pull out the paper cassette gently a a ...

Страница 458: ...eeder While holding the paper cassette with both hands remove it from the paper feeder as shown in the figure b 3 Remove the packing material with tape inside the paper feeder Remove the tape a then remove it together with the packing material b b b a ...

Страница 459: ...alling the Optional Accessories 8 Paper Feeder 4 Remove the packing material with tape and a sheet of blank paper from the paper cassette Remove the tape a then remove it together with the packing material b b a ...

Страница 460: ... the connector A or feed roller B in the paper feeder This may result in damage to the printer or misfeeds Do not install the paper feeder on a platform that may warp from the weight of the printer and optional accessories or where the printer is liable to sink such as a carpet or mat Secure sufficient space around the paper feeder so that you can install the printer and connect cords such as the ...

Страница 461: ... again If you try to set the printer unit forcefully without lifting it the connector and positioning pins may be broken 7 Set the paper cassette in the printer unit and paper feeder 8 Connect the interface cables except for the USB cable and connect the power cord 9 Plug the power plug into the AC power outlet 10 Connect the USB cable NOTE After installing the paper feeder you have to specify the...

Страница 462: ...er before removing the paper feeder Otherwise the power cord or interface cables may be damaged resulting in a fire or electrical shock CAUTION Do not carry the printer with the paper cassette attached If you do so the paper cassette may drop resulting in personal injury Do not carry the printer with the paper feeder installed If you do so the paper feeder may drop resulting in personal injury IMP...

Страница 463: ...es and the power cord from the printer 5 Pull out the paper cassette from the printer unit and all the paper feeder 6 Lift the printer unit and remove it from the paper feeder 7 Move the paper feeder 8 Move back the printer unit to the installation site 9 Set the paper cassette in the printer 10 Connect the interface cables except for the USB cable and connect the power cord 11 Plug the power plug...

Страница 464: ...r Expressing Color 9 9 About Color Printing 9 10 Achieving More Beautiful Color Printing 9 11 NetSpot Device Installer 9 13 Print Monitor Installer 9 14 Windows Firewall 9 15 Configuring Windows Firewall to Unblock Communication with the Client Computers 9 16 Configuring Windows Firewall to Block Communication with the Client Computers 9 18 Configuring Windows Firewall to Unblock Communication wit...

Страница 465: ...ype print copies and the settings of the fixing mode This is because the safety function that prevents damage caused by heat becomes active Warm up time 20 C 68 F 0 second from standby mode 45 seconds or less from power ON 1 2 Approximately 20 seconds from the sleep mode 1 3 1 May vary depending on the use conditions such as the availability of the optional accessories and installation environment...

Страница 466: ...elope COM10 Envelope C5 Envelope Monarch Envelope B5 Index Card Custom paper sizes Width 76 2 to 215 9 mm Length 127 0 to 355 6 mm Paper capacity approx 100 sheets 64 g m2 Automatic 2 sided printing A4 Legal Letter 8 5 x 13 Paper output Face down Output capacity Output tray approx 200 sheets 64 g m2 Noise Declared noise emission in accordance with ISO 9296 Lwad declared A weighted sound power leve...

Страница 467: ...by approx 40 W 1 Average during the sleep mode approx 13 W 1 Maximum 1287 W 2 or less 220 240 V Average during operation approx 415 W 1 Average during standby approx 45 W 1 Average during the sleep mode approx 13 W 1 Maximum 1213 W 2 or less 1 When the printer is with standard equipment 2 The instantaneous peak on startup when all the optional accessories are installed in the printer shall not be ...

Страница 468: ...an Printing software CAPT Canon Advanced Printing Technology Printable area Data cannot be printed within a 5 0 mm margin on all sides of the paper 10 mm for envelopes The data may be printed with the edges missing when a document with no margins is printed even if the Print with Upper Left of Sheet as Starting Point check box in the Finishing Details dialog box in the Finishing sheet is selected ...

Страница 469: ... the paper feeder installed 412 176 157 79 453 Tray extension Auxiliary tray Multi purpose tray 209 437 7 470 7 111 5 72 Output tray Auxiliary tray Front Surface mm 176 157 79 412 111 5 72 453 Tray extension 349 9 578 6 611 6 mm Auxiliary tray Multi purpose tray Auxiliary tray Output tray Front Surface ...

Страница 470: ...9 7 Appendix 9 Dimensions of Each Part PAPER FEEDER PF 93 405 568 165 4 mm Front Surface ...

Страница 471: ...sic colors red green and blue The 3 primary colors of light which are red green and blue can be combined to give white additive color mixing A color printer however does not use the 3 primary colors of light but uses the same 3 primary colors as used in paintings to reproduce colors If the 3 primary colors of paint C cyan M magenta and Y yellow are mixed together the resulting color is black subtr...

Страница 472: ... for Expressing Color Creating colors for painting involves mixing the colors on a palette to get a match In a computer display and printer it is not possible to mix colors to match in the same way as paints so colors are reproduced by groups of colored dots On the computer display various colors are reproduced by the intensity of three red green and blue dots Complementary Colors C C M Y M Y Gree...

Страница 473: ... This means that higher resolution color prints are possible the smaller these dots are About Color Printing A color printer expresses the shape and color of images in groups of minute C Cyan M Magenta Y Yellow and K Black dots Therefore image data input to the printer is divided into cyan magenta yellow and black The data is reproduced separately by each toner cartridge and the toner is transferr...

Страница 474: ...making minor adjustments and taking a little bit of care we can make sure we get 100 out of the printer Adjusting the color on the display Colors that you can see on the computer display are not limited to true colors If we perform a color print based on the colors we can see on the computer display with the aim of matching those colors the printed colors will be a little different Use the color s...

Страница 475: ...time and the data size will also grow Conversely if the data resolution is too low you cannot achieve sufficient image quality Check the dimensions and resolution of print data using an image processing application and set the resolution to 300 dpi or 200 dpi Using the toner save mode for confirming the text and layout When checking the contents or layout of a document print in the toner save mode...

Страница 476: ...tSpot Device Installer is software that allows you to easily initialize the settings of printers connected to the network For more details on NetSpot Device Installer see Network Guide NOTE When the printer driver is installed from CD ROM Setup the initial settings for the network are performed automatically Use NetSpot Device Installer as needed when you want to reset the IP address manually with...

Страница 477: ...APT For details on Canon CAPT Port see Network Guide NOTE When the printer driver is installed from CD ROM Setup the following port is created automatically depending on the operating system of the computer on which the printer driver is installed Windows 2000 XP Server 2003 Vista Standard TCP IP Port Windows 98 Me Canon CAPT Port Use Print Monitor Installer as needed such as when you want to crea...

Страница 478: ...y CAPT Windows Firewall Utility to your hard disk to run it copy all of the files CNAC5FW EXE CAPTRGFW DLL CNAC5FW INI from the WF_UTIL folder on the supplied LBP5300 User Software CD ROM to your hard disk Setting See Print server When installing CAPT Software from CD ROM Setup The Warning dialog box appears during the installation Click Yes to configure Windows Firewall to unblock communication w...

Страница 479: ...D ROM icon and then select Open from the pop up menu 3 Double click English WF_UTIL CNAC5FW EXE CAPT Windows Firewall Utility runs IMPORTANT You can also run CAPT Windows Firewall Utility using the following procedures The CD ROM drive name is indicated as D in this manual The CD ROM drive name may differ depending on the computer you are using For an operating system other than Windows Vista Sele...

Страница 480: ...l Panel and then click Network and Internet Connections Windows Firewall For Windows Server 2003 From the Start menu select Control Panel Windows Firewall For Windows Vista From the Start menu select Control Panel and then click Allow a program through Windows Firewall If the User Account Control dialog box appears click Continue 2 Make sure that the Canon LBP5300 RPC Server Process check box is s...

Страница 481: ...D ROM icon and then select Open from the pop up menu 3 Double click English WF_UTIL CNAC5FW EXE CAPT Windows Firewall Utility runs IMPORTANT You can also run CAPT Windows Firewall Utility using the following procedures The CD ROM drive name is indicated as D in this manual The CD ROM drive name may differ depending on the computer you are using For an operating system other than Windows Vista Sele...

Страница 482: ...he printer status may not be displayed properly in the Printer Status Window and some of the printer functions may not operate properly 1 Display the Windows Firewall Windows Firewall Settings for Windows Vista dialog box For Windows XP From the Start menu select Control Panel and then click Network and Internet Connections Windows Firewall For Windows Server 2003 From the Start menu select Contro...

Страница 483: ...he Exceptions sheet in the Windows Firewall Windows Firewall Settings for Windows Vista dialog box select the File and Printer Sharing check box and then click OK Windows Firewall is configured to unblock communication with the print server ...

Страница 484: ...ive Cover 1 8 CD ROM 1 4 Cleaning Fixing Roller 6 25 Outside of the Printer 6 34 Client 4 68 4 77 Coated Paper 3 5 Color Adjustment Sheet 5 42 Color Mode 5 39 Color Settings 5 41 Configuration Device Settings Sheet 5 44 Continue Printing with the Multi purpose Tray 5 38 Contrast 5 70 Control Panel 1 7 Copies 5 27 Correction of a Phenomenon of Out of Register Colors 6 23 Custom Installation 4 4 Cus...

Страница 485: ...allation Requirements 2 4 Installation Site 2 3 Installation Space 2 5 K K Black Toner Cartridge Slot 1 9 L Label 3 5 LAN Cable 2 30 Connector 1 8 Laser Beam xxii Lift Handles 1 8 LNK Indicator Green 1 9 Load Paper Indicator 1 10 Loading Paper Custom Paper Size 3 45 Envelope 3 40 Heavy Paper 3 17 3 35 Labels 3 35 Multi purpose Tray 3 33 Paper Cassette 3 17 Plain Paper 3 17 3 35 Transparencies 3 35...

Страница 486: ... Type List 3 3 Parts and Their Functions 1 7 Pause when Printing from the Multi purpose Tray 5 38 Peripheral Space Required 2 5 Plain Paper 3 4 Plug and Play Windows 2000 4 24 Windows 98 Me 4 29 Windows Vista 4 13 Windows XP Server 2003 4 19 Poster Printing 5 53 Power Socket 1 8 Power Supply Turning the Printer OFF 2 34 Turning the Printer ON 2 33 Power Supply Requirements 2 4 Power Switch 1 7 Pre...

Страница 487: ...t 5 46 Import 5 46 Name 5 46 Profile List 5 45 Specifying Profiles 5 73 Profile Sheet 5 45 Q Quality Sheet 5 39 R Rating Label 1 8 Ready Indicator 1 10 S Scaling 5 51 Self diagnostic Test 2 33 Serial Number 9 26 Service Error Display 7 32 Settings 5 39 5 40 Shared Printer 4 68 Show Icon in the Taskbar 5 45 Sleep Mode 2 35 Specifications 9 2 Hardware 9 2 Software 9 5 Spooling at Host 5 45 System Re...

Страница 488: ...9 25 Index 9 Appendix V Ventilation Slots 1 7 1 8 View Settings 5 46 W Watermark 5 28 5 54 Windows Firewall 9 15 Y Y Yellow Toner Cartridge Slot 1 9 ...

Страница 489: ...aintenance service The serial number for this printer is indicated at the location shown in the following figure IMPORTANT The label on which the serial number is indicated is required for service or maintenance Be sure not to remove them Inside of the Printer Outside View of the Packaging Box Serial Number Serial Number ...

Страница 490: ...ie 92414 Courbevoie Cedex France CANON U K LTD Woodhatch Reigate Surrey RH2 8BF United Kingdom CANON DEUTSCHLAND GmbH Europark Fichtenhain A10 47807 Krefeld Germany CANON ITALIA S p A Via Milano 8 20097 San Donato Milanese MI Italy CANON LATIN AMERICA INC 703 Waterford Way Suite 400 Miami Florida 33126 U S A CANON AUSTRALIA PTY LTD 1 Thomas Holt Drive North Ryde Sydney N S W 2113 Australia CANON C...

Отзывы: