


4-89
Setting Up the Pr
inting En
vironment
4
Printing from a Network Computer by Sharing the Printer on a Network
Installing from [Windows Explorer]
1
From the [Start] menu, select [All Programs]
➞
[Accessories]
➞
[Windows Explorer].
For Windows Me/2000: From the [Start] menu, select [Programs]
➞
[Accessories]
➞
[Windows Explorer].
For Windows 98: From the [Start] menu, select [Programs]
➞
[Windows
Explorer].
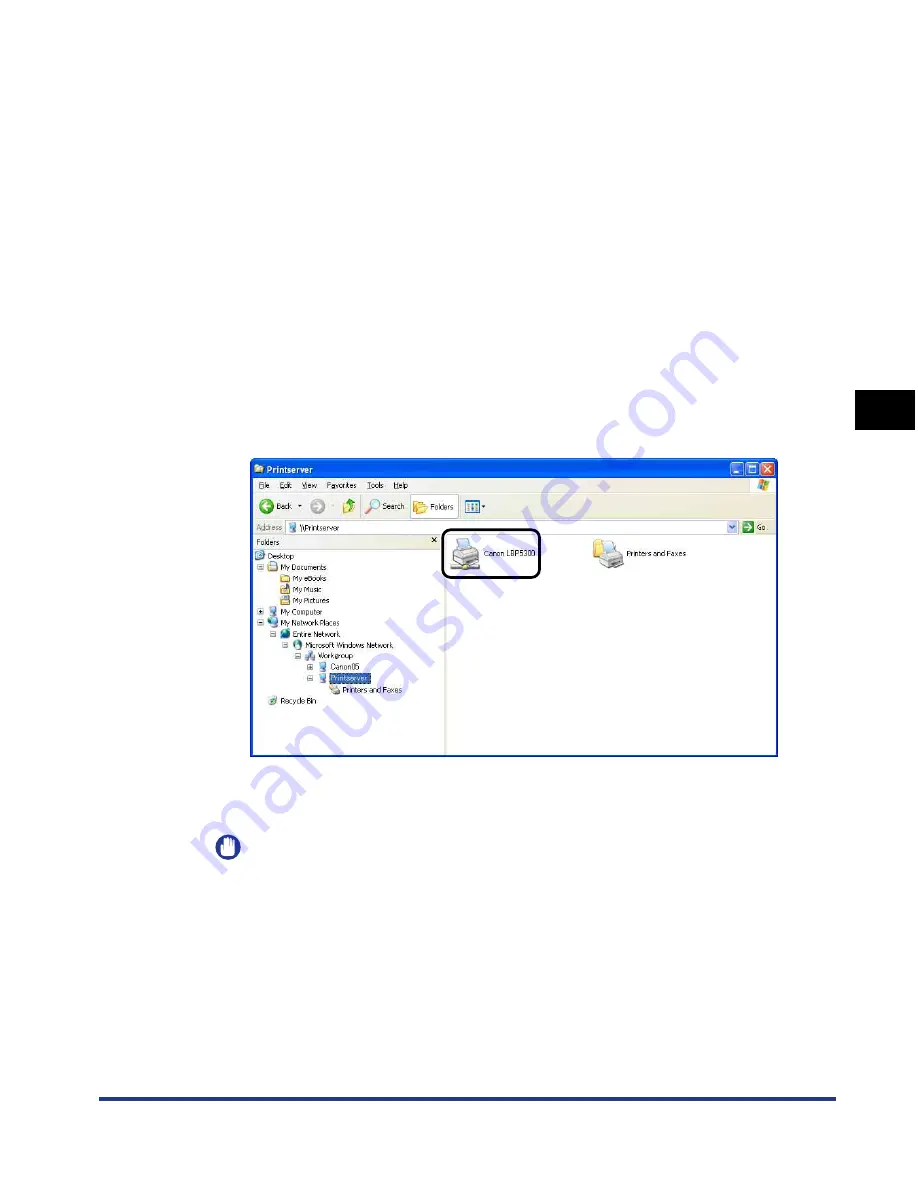
2
Select the print server from [My Network Places] (from
[Network Neighborhood] for Windows 98; from [Network] for
Windows Vista), then double-click the icon for this printer.
Alternatively, you can drag and drop the icon for the printer into the [Printers and
Faxes] folder or [Printers] folder.
3
Follow the instructions on the screen.
IMPORTANT
If you are using Windows XP Service Pack 2 or another operating system equipped
with Windows Firewall on the client computers, configure Windows Firewall to
unblock communication with the print server. If you do not clear the block, the
printer status may not be displayed properly in the Printer Status Window, and
some of the printer functions may not operate properly. (See p. 9-15)
Содержание i-SENSYS LBP5300 Series
Страница 2: ...LBP5300 Laser Printer User s Guide ...
Страница 39: ...1 12 Before You Start 1 Optional Accessories ...
Страница 132: ...3 57 Setting Up the Printer Driver and Printing Loading and Outputting Paper 3 8 Click OK to start printing ...
Страница 140: ...3 65 2 sided Printing Loading and Outputting Paper 3 9 Click OK to start printing ...
Страница 141: ...3 66 2 sided Printing Loading and Outputting Paper 3 ...
Страница 335: ...5 102 Printing a Document 5 Printer Status Window ...
Страница 359: ...6 24 Routine Maintenance 6 To Correct a Phenomenon of Out of Register Colors of the Printer 3 Click OK ...
Страница 381: ...6 46 Routine Maintenance 6 Handling the Printer ...
Страница 403: ...7 22 Troubleshooting 7 Paper Jams 1 Turn the power of the printer OFF 2 Open the top cover ...
Страница 406: ...7 25 Troubleshooting 7 Paper Jams 5 Install the fixing unit 6 Close the top cover 7 Turn the printer ON ...
Страница 470: ...9 7 Appendix 9 Dimensions of Each Part PAPER FEEDER PF 93 405 568 165 4 mm Front Surface ...


