


4-71
Setting Up the Pr
inting En
vironment
4
Printing from a Network Computer by Sharing the Printer on a Network
3
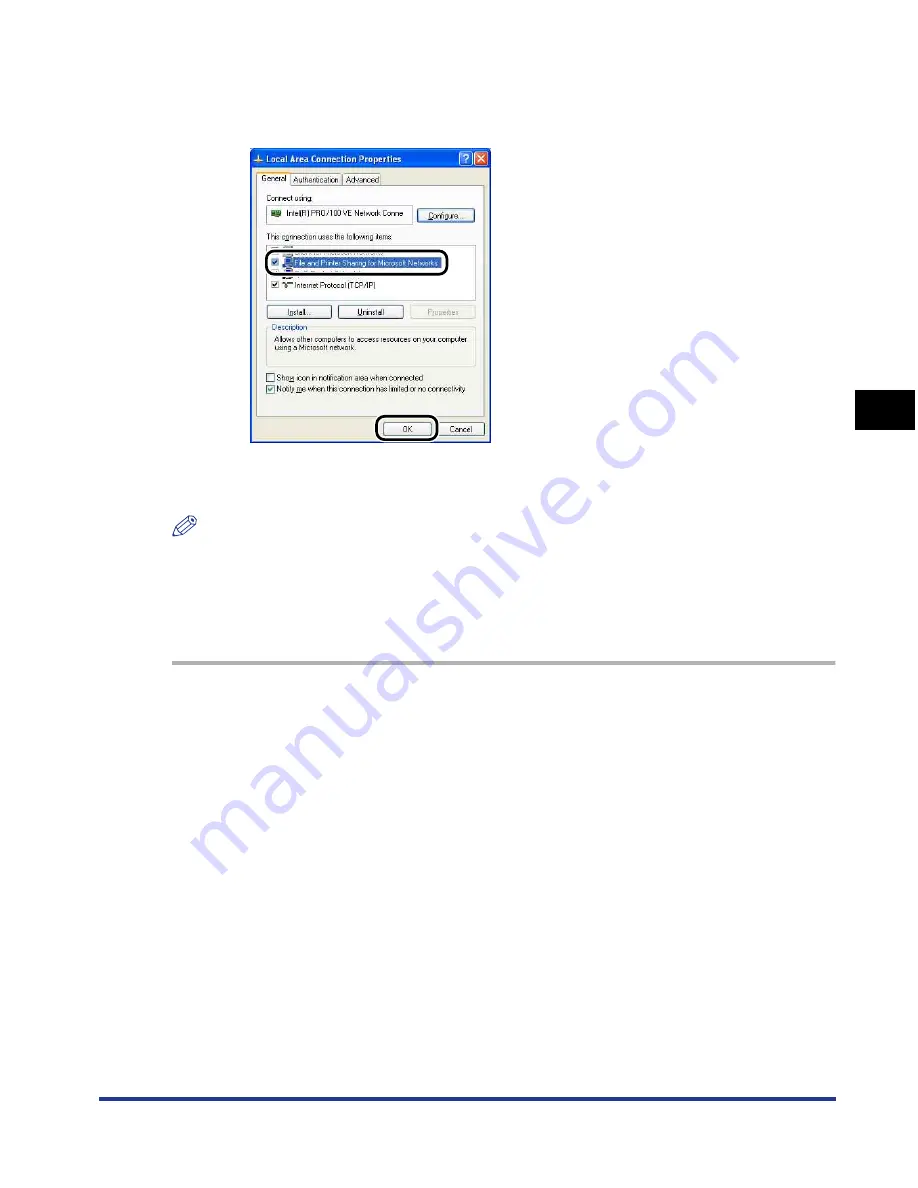
Make sure that [File and Printers Sharing for Microsoft
Networks] is selected, then click [OK].
■
Printer Sharing Settings
NOTE
For Windows XP, the printer cannot be shared on a network at the default settings (the
settings immediately after the installation).
Printer sharing settings require running [Network Setup Wizard] to enable the sharing
settings.
For more details, see Windows online Help.
1
Display the [Printers and Faxes] folder or the [Printers] folder.
For Windows 2000: From the [Start] menu, select [Settings]
➞
[Printers].
For Windows XP Professional/Server 2003: From the [Start] menu, select [Printers
and Faxes].
For Windows XP Home Edition: From the [Start] menu, select [Control Panel], and
then click [Printers and Other Hardware]
➞
[Printers and Faxes].
For Windows Vista: From the [Start] menu, select [Control Panel], and then click
[Printer].
Содержание i-SENSYS LBP5300 Series
Страница 2: ...LBP5300 Laser Printer User s Guide ...
Страница 39: ...1 12 Before You Start 1 Optional Accessories ...
Страница 132: ...3 57 Setting Up the Printer Driver and Printing Loading and Outputting Paper 3 8 Click OK to start printing ...
Страница 140: ...3 65 2 sided Printing Loading and Outputting Paper 3 9 Click OK to start printing ...
Страница 141: ...3 66 2 sided Printing Loading and Outputting Paper 3 ...
Страница 335: ...5 102 Printing a Document 5 Printer Status Window ...
Страница 359: ...6 24 Routine Maintenance 6 To Correct a Phenomenon of Out of Register Colors of the Printer 3 Click OK ...
Страница 381: ...6 46 Routine Maintenance 6 Handling the Printer ...
Страница 403: ...7 22 Troubleshooting 7 Paper Jams 1 Turn the power of the printer OFF 2 Open the top cover ...
Страница 406: ...7 25 Troubleshooting 7 Paper Jams 5 Install the fixing unit 6 Close the top cover 7 Turn the printer ON ...
Страница 470: ...9 7 Appendix 9 Dimensions of Each Part PAPER FEEDER PF 93 405 568 165 4 mm Front Surface ...


