


xiii
EMC Directive (220 - 240 V model)
"This equipment has been tested in a typical system to comply with the technical
requirements of EMC Directive."
•
Use of shielded cable is necessary to comply with the technical requirements of
EMC Directive.
The product is in conformity with the EMC directive at nominal mains input 230 V,
50 Hz although the rated input of the product is 220 - 240 V, 50/60 Hz.
C-tick marking
on the rating label means that we declare the product is in
conformity with the relevant requirements at nominal mains input 230 V, 50 Hz
although the rated input of the product is 220 - 240 V, 50/60 Hz.
Laser Safety
This product complies with 21 CFR Chapter 1 Subchapter J as a Class I laser
product under the U.S. Department of Health and Human Services (DHHS)
Radiation Performance Standard according to the Radiation Control for Health and
Safety Act of 1968. Also, this product is certified as a Class 1 laser product under
IEC60825-1:1993 and EN60825-1:1994. This means that the product does not
produce hazardous laser radiation.
Since radiation emitted inside the product is completely confined within protective
housings and external covers, the laser beam cannot escape from the machine
during any phase of user operation. Do not remove protective housings or external
covers, except as directed by the equipment's manuals.
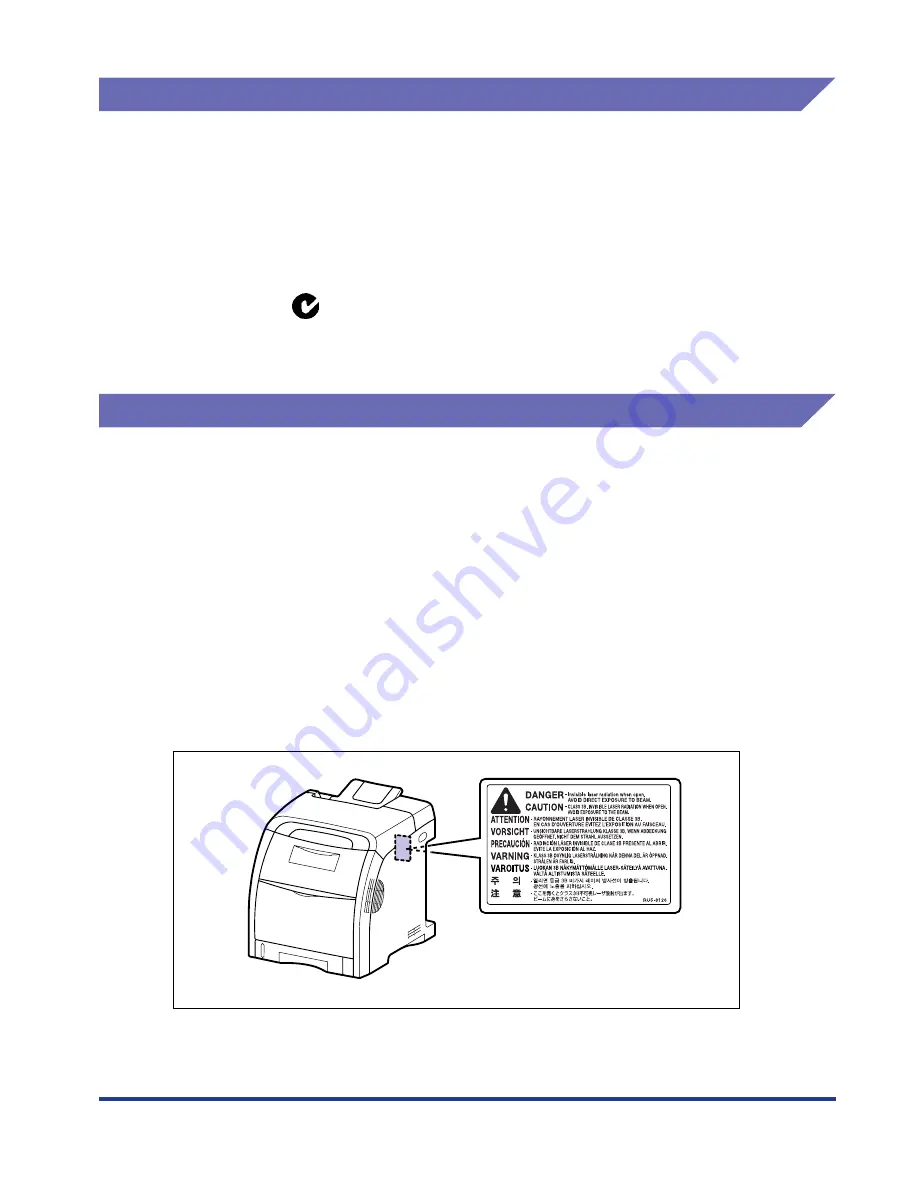
The label shown below is attached to the laser scanner unit inside the machine.
Содержание i-SENSYS LBP5300 Series
Страница 2: ...LBP5300 Laser Printer User s Guide ...
Страница 39: ...1 12 Before You Start 1 Optional Accessories ...
Страница 132: ...3 57 Setting Up the Printer Driver and Printing Loading and Outputting Paper 3 8 Click OK to start printing ...
Страница 140: ...3 65 2 sided Printing Loading and Outputting Paper 3 9 Click OK to start printing ...
Страница 141: ...3 66 2 sided Printing Loading and Outputting Paper 3 ...
Страница 335: ...5 102 Printing a Document 5 Printer Status Window ...
Страница 359: ...6 24 Routine Maintenance 6 To Correct a Phenomenon of Out of Register Colors of the Printer 3 Click OK ...
Страница 381: ...6 46 Routine Maintenance 6 Handling the Printer ...
Страница 403: ...7 22 Troubleshooting 7 Paper Jams 1 Turn the power of the printer OFF 2 Open the top cover ...
Страница 406: ...7 25 Troubleshooting 7 Paper Jams 5 Install the fixing unit 6 Close the top cover 7 Turn the printer ON ...
Страница 470: ...9 7 Appendix 9 Dimensions of Each Part PAPER FEEDER PF 93 405 568 165 4 mm Front Surface ...


