


5-94
Pr
inting a Document
5
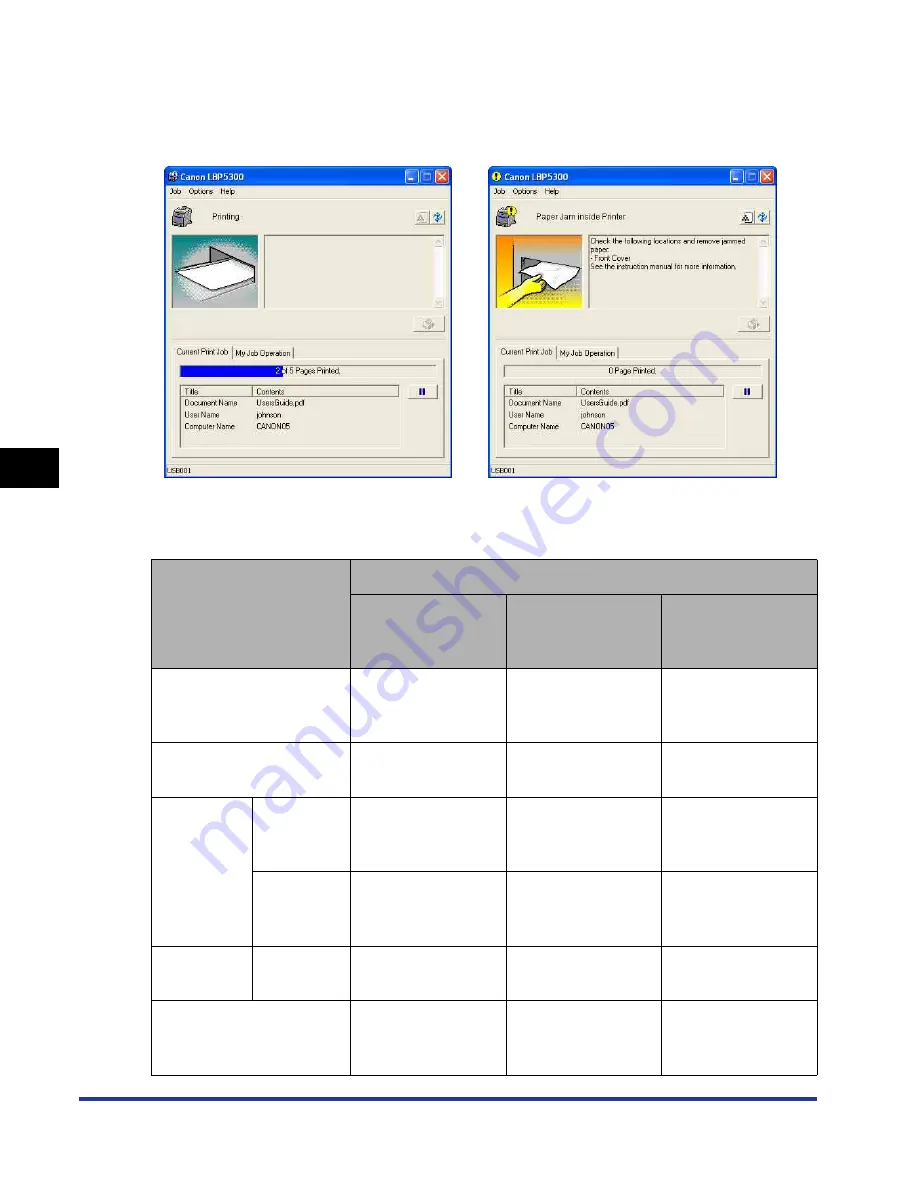
Printer Status Window
The Printer Status Window appears as follows during printing or when an error
occurs.
The status of the Printer Status Window varies depending on the printer operation
as follows.
Operation
Status of the Printer Status Window
Not running
Displayed with the
window
minimized*
1
Displayed on the
screen
When a print job starts
Runs*
2
with the
window
minimized*
1
Does not change
Does not change
When a print job finishes
Exits
automatically*
2
Does not change
Does not change
During
idling
When an
error occurs
Does not change
Blinks with the
window
minimized*
1
Does not change
When an
error is
solved
Does not change
Stops blinking with
the window
minimized*
1
Does not change
During
printing
When an
error occurs
Displayed on the
screen*
3
Displayed on the
screen
Does not change
When a toner cartridge
needs to be replaced
soon
Does not change
Blinks with the
window
minimized*
1
Does not change
•
During printing
•
When an error occurs
Содержание i-SENSYS LBP5300 Series
Страница 2: ...LBP5300 Laser Printer User s Guide ...
Страница 39: ...1 12 Before You Start 1 Optional Accessories ...
Страница 132: ...3 57 Setting Up the Printer Driver and Printing Loading and Outputting Paper 3 8 Click OK to start printing ...
Страница 140: ...3 65 2 sided Printing Loading and Outputting Paper 3 9 Click OK to start printing ...
Страница 141: ...3 66 2 sided Printing Loading and Outputting Paper 3 ...
Страница 335: ...5 102 Printing a Document 5 Printer Status Window ...
Страница 359: ...6 24 Routine Maintenance 6 To Correct a Phenomenon of Out of Register Colors of the Printer 3 Click OK ...
Страница 381: ...6 46 Routine Maintenance 6 Handling the Printer ...
Страница 403: ...7 22 Troubleshooting 7 Paper Jams 1 Turn the power of the printer OFF 2 Open the top cover ...
Страница 406: ...7 25 Troubleshooting 7 Paper Jams 5 Install the fixing unit 6 Close the top cover 7 Turn the printer ON ...
Страница 470: ...9 7 Appendix 9 Dimensions of Each Part PAPER FEEDER PF 93 405 568 165 4 mm Front Surface ...


