


5-29
Pr
inting a Document
5
Using the Various Printing Functions
■
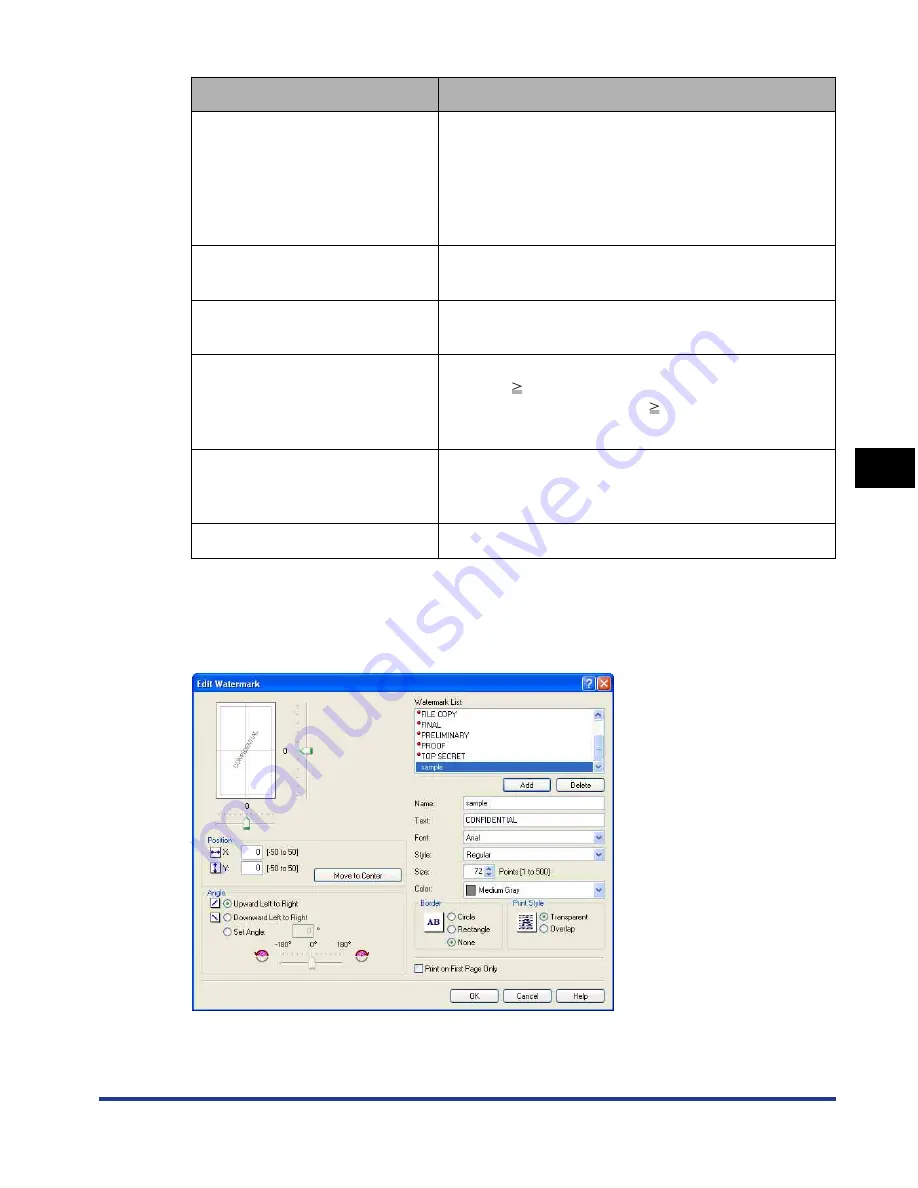
[Edit Watermark] Dialog Box (See p. 5-55)
The following dialog box is displayed by clicking [Edit Watermark].
This dialog box allows you to add new watermarks and edit the added watermarks.
Setting/Button
Contents
[Paper List]
Displays [Name] and [Size] of standard paper sizes
and added custom paper sizes. The paper sizes with
a small red mark placed at the left side of the name
are standard paper sizes and [Custom [Name Fixed]].
These standard paper sizes and [Custom [Name
Fixed]] cannot be deleted.
[Name of Custom Paper Size]
You can enter the name of the custom paper size to
be added.
[Unit]
Specify the unit ([Millimeter] or [Inch]) to be used
when setting the custom paper size.
[Paper Size]
Specify the height and width of the custom paper size
([Height]
[Width]). Specify the custom paper size in
portrait orientation ([Height]
[Width]) within
user-definable sizes.
[Delete]
Deletes the custom paper size selected in [Paper
List]. However, you cannot delete the default standard
paper sizes and [Custom [Name Fixed]].
[Register]
Registers custom paper sizes.
Содержание i-SENSYS LBP5300 Series
Страница 2: ...LBP5300 Laser Printer User s Guide ...
Страница 39: ...1 12 Before You Start 1 Optional Accessories ...
Страница 132: ...3 57 Setting Up the Printer Driver and Printing Loading and Outputting Paper 3 8 Click OK to start printing ...
Страница 140: ...3 65 2 sided Printing Loading and Outputting Paper 3 9 Click OK to start printing ...
Страница 141: ...3 66 2 sided Printing Loading and Outputting Paper 3 ...
Страница 335: ...5 102 Printing a Document 5 Printer Status Window ...
Страница 359: ...6 24 Routine Maintenance 6 To Correct a Phenomenon of Out of Register Colors of the Printer 3 Click OK ...
Страница 381: ...6 46 Routine Maintenance 6 Handling the Printer ...
Страница 403: ...7 22 Troubleshooting 7 Paper Jams 1 Turn the power of the printer OFF 2 Open the top cover ...
Страница 406: ...7 25 Troubleshooting 7 Paper Jams 5 Install the fixing unit 6 Close the top cover 7 Turn the printer ON ...
Страница 470: ...9 7 Appendix 9 Dimensions of Each Part PAPER FEEDER PF 93 405 568 165 4 mm Front Surface ...


