Printing banners or at other non-standard sizes
Printing Vertical or Horizontal Banners (Large-Format
Printing; Mac OS X)
This topic describes how to print a banner about ve times as long as the roll width based on the following example.
•
Document: An original designed for a horizontal banner
•
Page size: Non-standard (100 × 500 mm [3.4 × 19.7 in])
•
Paper: Roll
•
Paper type: Plain Paper
•
Roll paper width: 16 inches (406.4 mm)
Follow the steps below to print a banner in either horizontal or vertical format.
1.
In the application, create an original in the format of a horizontal or vertical banner.
2.
Register a “Custom Page Size.”
Banners tend to be in non-standard sizes, so register a “Custom Page Size” in
Page Setup
. In this
example, 100 × 500 mm (3.4 × 19.7 in) is registered.
3.
Print the banner, using the settings that correspond to banners.
Note
•
The following procedures are based on Mac OS X 10.4. The method of setting up non-standard paper
sizes varies depending on the version of Mac OS X.
Register a “Custom Page Size”
This example describes how to register and print using a page size that is horizontally elongated and suitable
for banners in either horizontal or vertical format.
1.
Create the document in the application.
2.
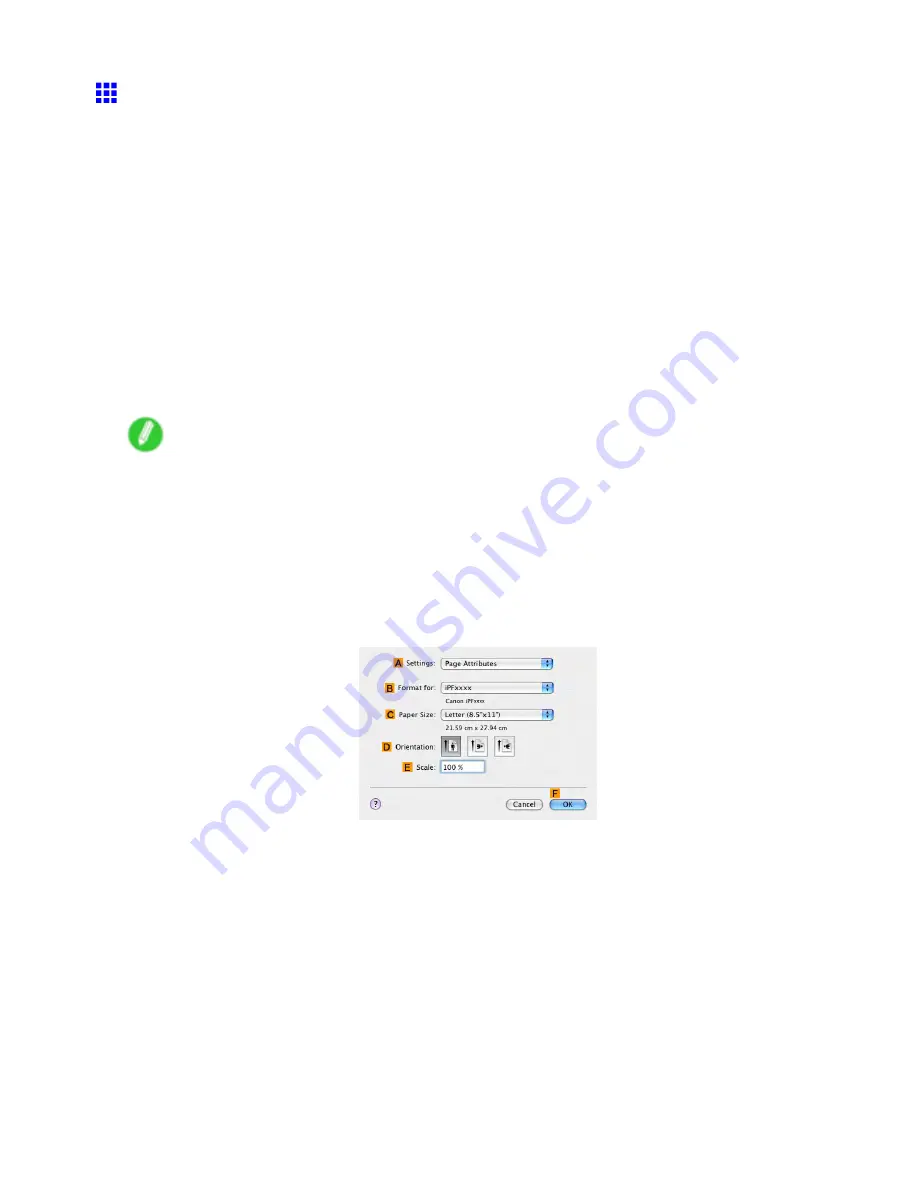
Choose
Page Setup
in the application menu to display the
Page Attribute
dialog box.
3.
Select the printer in the
B
Format for
list.
4.
Click
Manage Custom Sizes
in the
C
Paper Size
list to display the
Custom Page Sizes
dialog box.
5.
Double-click
Untitled
in the list at left, and then enter a name for the page size you want
to register. Here, enter “100*500.”
If the
Untitled
size is not visible in the list at left, click
+
below the list.
6.
Under
Page Size
, enter “10” in
Width
and “50” in
Height
. Here, measurements are entered
in centimeters.
408 Enhanced Printing Options
Содержание 2162B002
Страница 1: ...User Manual ENG Large Format Printer ...
Страница 2: ......
Страница 105: ...Hard Disk Note Enter a password if one has been set 2 Select the print job in the list and click Move Printer parts 91 ...
Страница 124: ...Hard Disk 2 Select the saved job in the list and click Delete For details refer to the RemoteUI help 110 Printer parts ...
Страница 240: ...Output Stacker 3 Push in the left and right Basket Arms toward the back all the way until they stop 226 Handling Paper ...
Страница 727: ...Cleaning the Printer 4 Plug the power cord into the outlet Maintenance 713 ...
Страница 807: ... CANON INC 2007 ...


