Printing enlargements or reductions
Printing Enlargements of Scanned Originals from a Color
imageRUNNER (Windows)
Scanned originals from a Color imageRUNNER can be enlarged and printed automatically.
Originals you create by scanning with a Color imageRUNNER are transferred to a "hot folder" and printed
automatically after enlargement according to printing conditions you specify for that folder.
This processing sequence is called the Color imageRUNNER Enlargement Copy function.
To use Color imageRUNNER Enlargement Copy, rst complete these settings in the following order.
1.
Register a hot folder on your computer
Register a hot folder on your computer for storing scanned originals from the Color imageRUNNER
and complete the settings for enlargement copy.
2.
Complete the scanning settings on the Color imageRUNNER.
Congure the Color imageRUNNER to send scanned originals to the hot folder.
After these settings are complete, you can print enlarged copies of scanned originals from the Color
imageRUNNER.
Registering a hot folder on your computer
Folders used for
Color imageRUNNER Enlargement Copy
(iR enlargement copy) are called hot folders.
Register a hot folder on your computer for storing scanned originals from the Color imageRUNNER. You can
specify printing conditions (such as the image quality and paper size), based on which originals transferred to
the hot folder will be printed. Follow these steps to register and modify hot folders.
1.
Display the printer driver dialog box. (→P.204)
2.
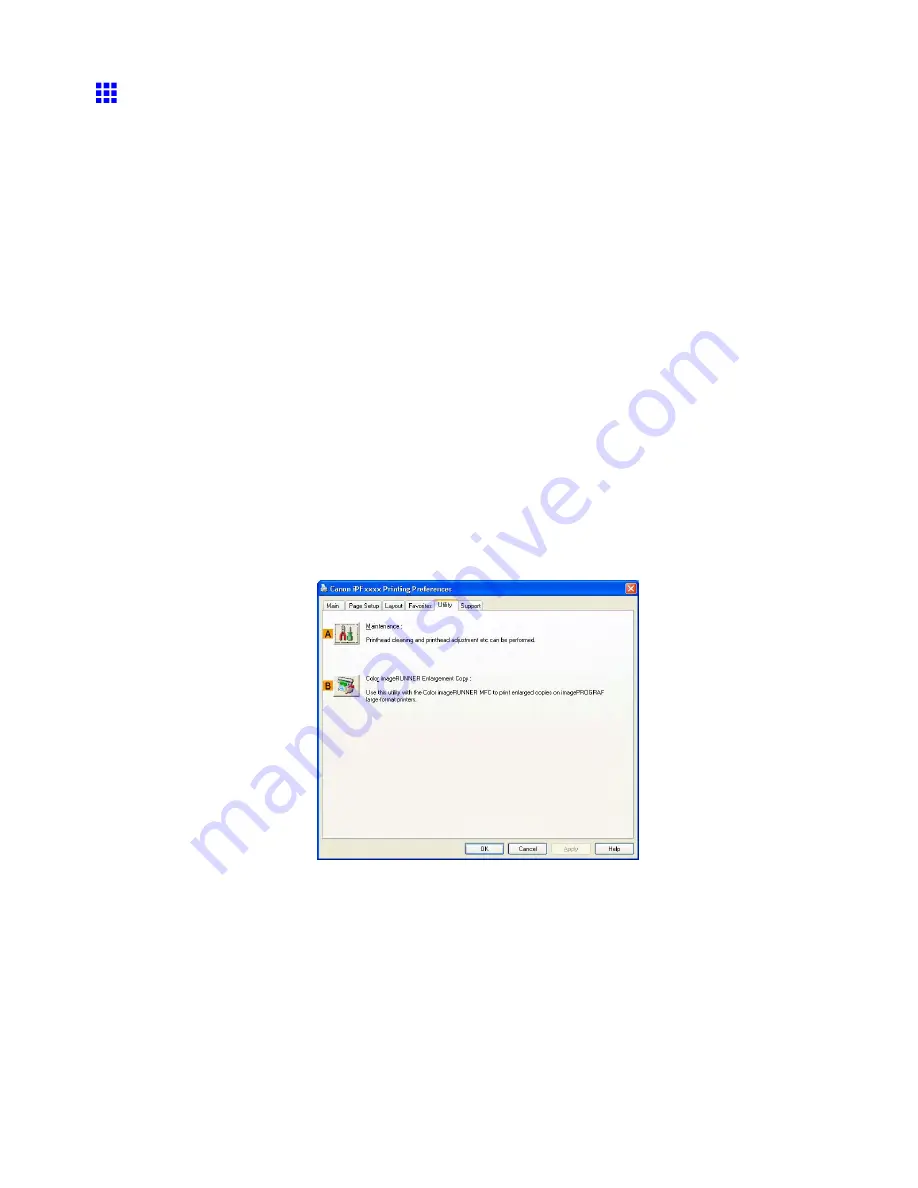
Click the
Utility
tab to display the
Utility
sheet.
3.
Click
B
Color imageRUNNER Enlargement Copy
to start the Color imageRUNNER
Enlargement Copy utility.
4.
Use the Color imageRUNNER Enlargement Copy utility to register or modify hot folders.
For instructions on registering and modifying hot folders, refer to the help le for the Color
imageRUNNER Enlargement Copy utility.
Enhanced Printing Options 317
Содержание 2162B002
Страница 1: ...User Manual ENG Large Format Printer ...
Страница 2: ......
Страница 105: ...Hard Disk Note Enter a password if one has been set 2 Select the print job in the list and click Move Printer parts 91 ...
Страница 124: ...Hard Disk 2 Select the saved job in the list and click Delete For details refer to the RemoteUI help 110 Printer parts ...
Страница 240: ...Output Stacker 3 Push in the left and right Basket Arms toward the back all the way until they stop 226 Handling Paper ...
Страница 727: ...Cleaning the Printer 4 Plug the power cord into the outlet Maintenance 713 ...
Страница 807: ... CANON INC 2007 ...


