4-34
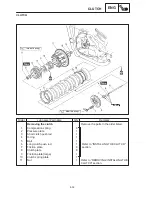
CLUTCH
ENG
3
2
1
NOTE:
NOTE:
NOTE:
EB405100
REMOVING THE CLUTCH
1. Straighten the lock washer tab.
2. Loosen:
clutch boss nut
1
While holding the clutch boss
2
with the uni-
versal clutch holder
3
, loosen the clutch
boss nut.
Universal clutch holder
3
90890-04086
3. Remove:
spacer
1
bearing
2
Insert two M6-mm bolts
3
into the spacer
and then remove the spacer by pulling on the
bolts.
EB405400
CHECKING THE FRICTION PLATES
The following procedure applies to all of the fric-
tion plates.
1. Check:
friction plate
Damage / wear
Replace the friction
plates as a set.
2. Measure:
friction plate thickness
Out of specification
Replace the friction
plates as a set.
Measure the friction plate at four places.
Friction plate thickness
2.94
3.06 mm
<Limit>: 2.8 mm
EB405410
CHECKING THE CLUTCH PLATES
The following procedure applies to all of the
clutch plates.
1. Check:
clutch plate
Damage
Replace the clutch plates as a
set.
2. Measure:
clutch plate warpage
(with a surface plate and thickness gauge
1
)
Out of specification
Replace the clutch
plates as a set.
Clutch plate warpage limit
Less than 0.1 mm
Summary of Contents for 1998 FZS600 5DM1-AE1
Page 1: ......
Page 2: ......
Page 8: ......
Page 9: ...GEN INFO 1 ...
Page 11: ...GEN INFO ...
Page 20: ...SPEC 2 ...
Page 22: ...SPEC ...
Page 46: ...2 24 1 2 LUBRICATION DIAGRAMS SPEC 1 Camshaft 2 Crankshaft ...
Page 54: ...SPEC ...
Page 55: ...CHK ADJ 3 ...
Page 57: ...CHK ADJ ...
Page 109: ...CHK ADJ ...
Page 110: ...ENG 4 ...
Page 189: ...COOL 5 ...
Page 191: ...COOL ...
Page 202: ...CARB 6 ...
Page 204: ...CARB ...
Page 216: ...6 12 CARB ...
Page 217: ...CHAS 7 ...
Page 288: ...ELEC 8 ...
Page 290: ...ELEC ...
Page 292: ...8 2 CIRCUIT DIAGRAM ELEC CIRCUIT DIAGRAM ...
Page 326: ...8 36 SIGNAL SYSTEM ELEC EB806000 SIGNAL SYSTEM CIRCUIT DIAGRAM ...
Page 355: ...TRBL SHTG 9 ...
Page 357: ...TRBL SHTG ...
Page 363: ...TRBL SHTG ...


