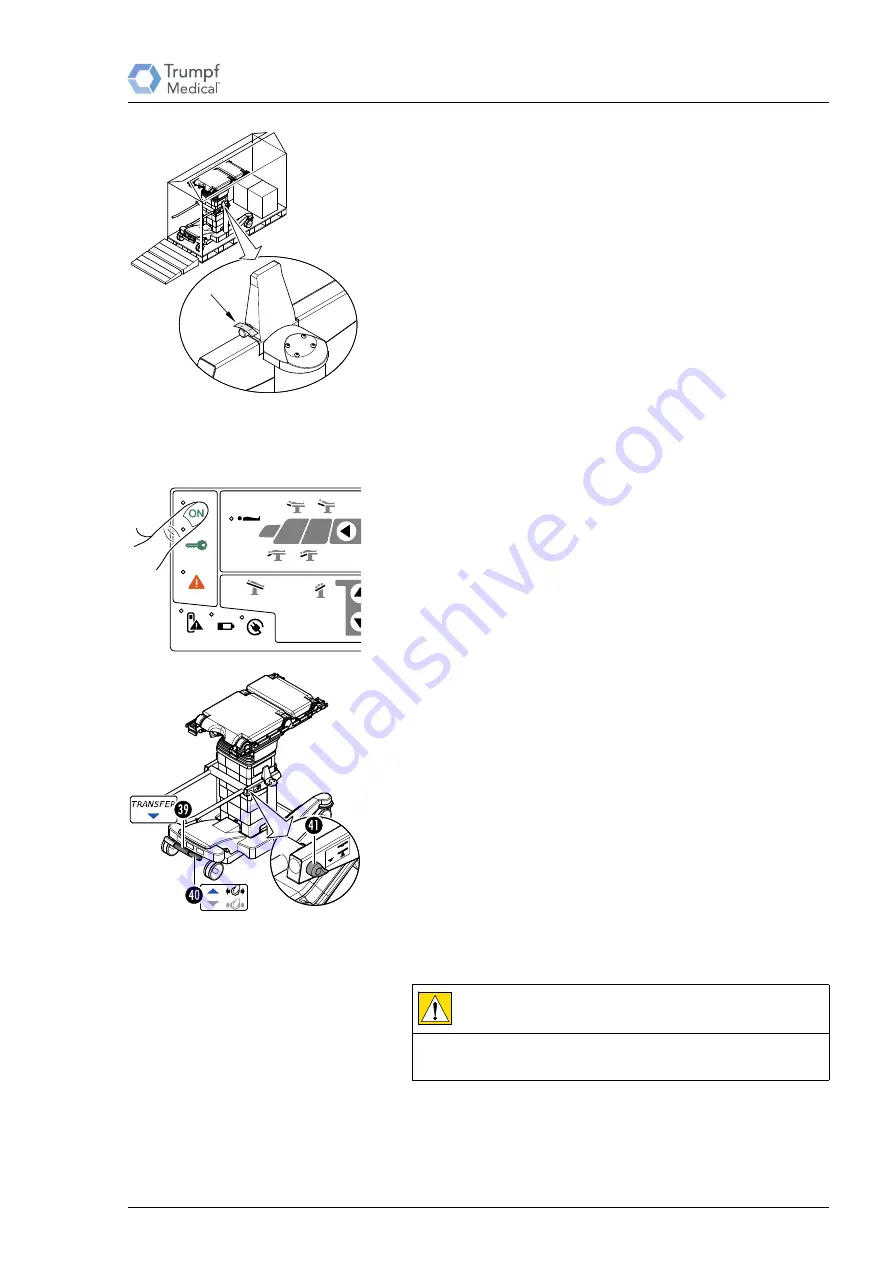
Unpacking and setting up the operating table column
4990113_030_01 — 2069106 — 2017–11–02
23
3. Lift and remove the two-part ramp and position it at the front
edge of the pallet as shown.
4. Remove the box fasteners below at the pallet.
5. Lift and remove the box.
6. Remove the delivered parts.
7. Take off the straps.
8. Remove the wooden chocks.
9. On the shuttle, remove the protective film on the bolts of the two
receiving wedges.
10. Do not begin using the operating table immediately. When
transitioning from a cold to a warm environment or vice versa,
moisture can form inside the operating table and cause a short
circuit. Consequently, the operating table must be allowed to
warm/cool prior to use (at least 12 hours).
11. Switch on the operating table column at the column keypad.
Press the
O
N
key.
12. Press and hold the center pedal [41] at the shuttle. Move the
operating table column to the most elevated position.
13. Press and hold the selection key [43] down to the position
OPERATING
TABLE
.
14. Press and hold the center pedal [41] at the shuttle until the
transfer is complete.
The operating table column moves downwards until the
operating tabletop rests on the shuttle and the column foot lifts
off a little from the floor. A double beep indicates the end of
the transfer.
15. Release selection key [43] and pedal [41].
16. Move the right pedal [42] upwards. The shuttle is ready to be
moved.
Carefully move the shuttle from the pallet using the ramp. This
requires at least 2 people.
17.
CAUTION
Risk of injury for personnel:
The shuttle can tip over and cause injury if it is moved over the
lateral edge of the pallet.


