427
8
COROLLA HV_ 国瑞 _GE
8-2. Steps to take in an emergency
W
hen tr
oubl
e aris
es
22
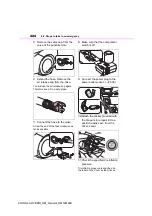
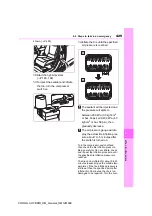
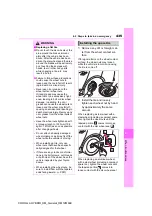
Turn the compressor switch on
to inflate the tire until the speci-
fied air pressure is reached.
Drive for about 5 km (3 miles)
and then perform step
20
.
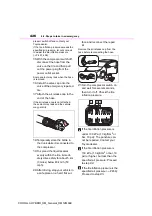
23
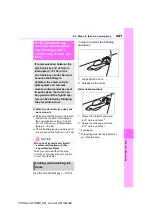
Attach the air release cap to the
end of the hose.
If the air release cap is not attached,
the sealant may leak and the vehicle
may get dirty.
24
Store the bottle in the trunk
while it is connected to the com-
pressor.
25
Taking precautions to avoid sud-
den braking, sudden accelera-
tion and sharp turns, drive
carefully at under 80 km/h (50
mph) to the nearest Toyota
dealer that is less than 100 km
(62 miles) away for tire repair or
replacement.
When having the tire repaired or
replaced, make sure to tell the Toyota
dealer that the sealant is injected.
■
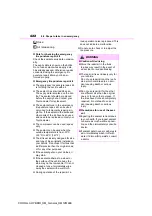
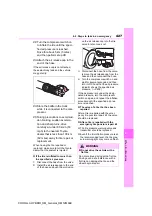
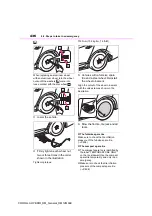
If the tire is inflated to more than
the specified air pressure
1
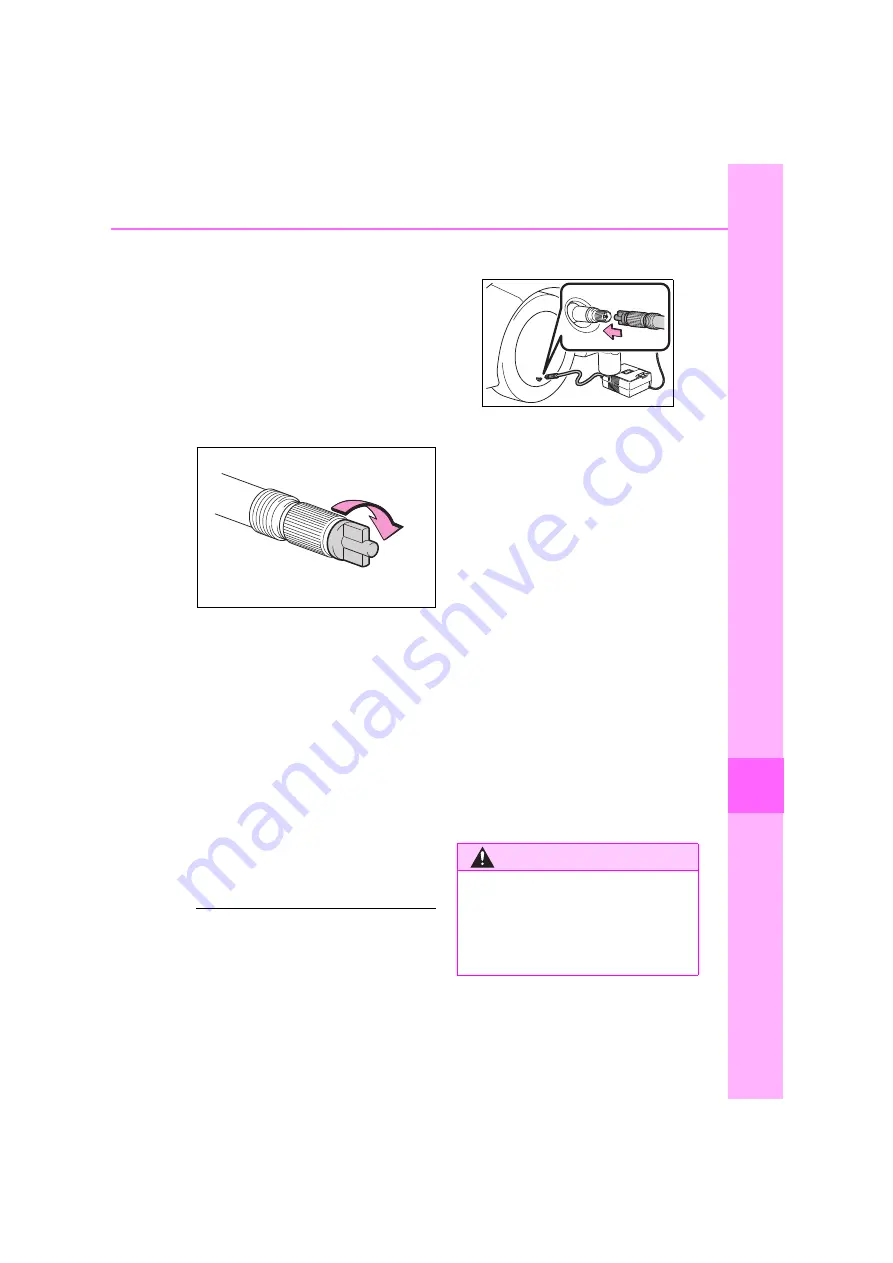
Disconnect the hose from the valve.
2
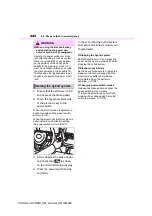
Install the air release cap to the end
of the hose and push the protrusion
on the air release cap into the tire
valve to let some air out.
3
Disconnect the hose from the valve,
remove the air release cap from the
hose and then reconnect the hose.
4
Turn the compressor switch on and
wait for several seconds, and then
turn it off. Check that the air pressure
indicator shows the specified air
pressure. (
If the air pressure is under the desig-
nated pressure, turn the compressor
switch on again and repeat the inflation
procedure until the specified air pres-
sure is reached.
■
The valve of a tire that has been
repaired
After a tire is repaired with the emer-
gency tire puncture repair kit, the valve
should be replaced.
■
After a tire is repaired with the
emergency tire puncture repair kit
●
The tire pressure warning valve and
transmitter should be replaced.
●
Even if the tire inflation pressure is at
the recommended level, the tire pres-
sure warning light may come on/flash.
WARNING
■
Do not drive the vehicle with a
flat tire
Do not continue driving with a flat tire.
Driving even a short distance with a
flat tire can damage the tire and the
wheel beyond repair.
COROLLA HYBRID_OM_General_OM12M44E
Summary of Contents for Corolla Hybrid 2019
Page 1: ......
Page 2: ......
Page 22: ...20 COROLLA HV_ 国瑞 _GE Pictorial index 3 If equipped COROLLA HYBRID_OM_General_OM12M44E ...
Page 27: ...25 COROLLA HV_ 国瑞 _GE Pictorial index If equipped COROLLA HYBRID_OM_General_OM12M44E ...
Page 30: ...28 COROLLA HV_ 国瑞 _GE Pictorial index COROLLA HYBRID_OM_General_OM12M44E ...
Page 120: ...118 COROLLA HV_ 国瑞 _GE 2 1 Instrument cluster COROLLA HYBRID_OM_General_OM12M44E ...
Page 280: ...278 COROLLA HV_ 国瑞 _GE 4 6 Driving tips COROLLA HYBRID_OM_General_OM12M44E ...
Page 348: ...346 COROLLA HV_ 国瑞 _GE 6 4 Other interior features COROLLA HYBRID_OM_General_OM12M44E ...
Page 474: ...472 COROLLA HV_ 国瑞 _GE 9 3 Initialization COROLLA HYBRID_OM_General_OM12M44E ...
Page 491: ......

