1-52
BEFORE USING THE MACHINE
Contents
4
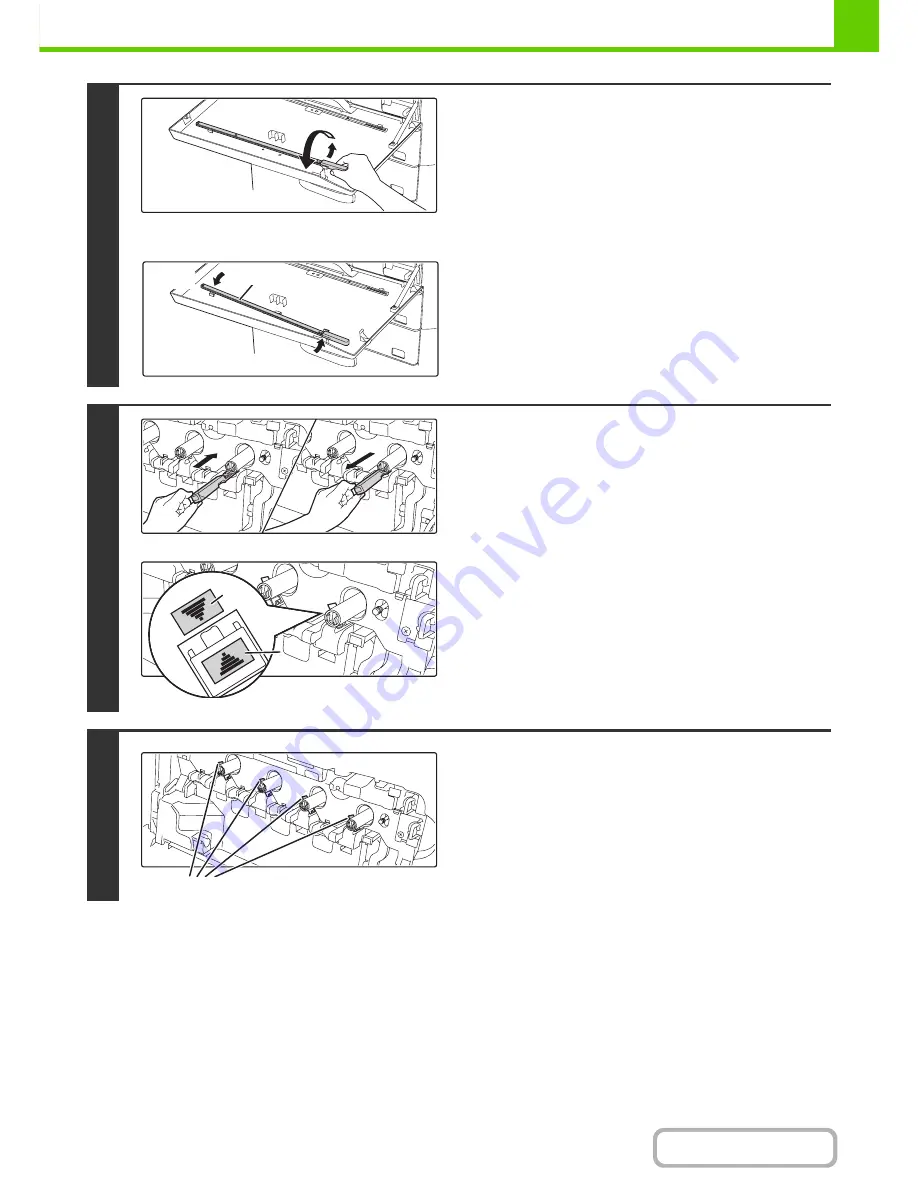
Remove the charger cleaner
The charger cleaner is attached to the front cover of the
machine.
(1) Unfasten it from the claw by pressing the
right side of the charger cleaner.
(2) Place it in the front spread across the top of
the claw.
(3) Unfasten the charger cleaner rotating
around the boss from the claw on the left
side.
5
Clean the main charger.
(1) Gently push the charger cleaner all the way
in.
(2) Gently pull the charger cleaner out.
Insert so that the cleaning location label (A) and the charger
cleaner label (B) are oriented as shown.
6
Repeat step 4 with each of the other
main chargers.
There are a total of 4 places to be cleaned in the machine as
shown.
(2)
(1)
(3)
Boss
(B)
(B)
(A)
Main charger
Summary of Contents for MX-2010U
Page 11: ...Conserve Print on both sides of the paper Print multiple pages on one side of the paper ...
Page 35: ...Organize my files Delete a file Delete all files Periodically delete files Change the folder ...
Page 283: ...3 19 PRINTER Contents 4 Click the Print button Printing begins ...
Page 832: ...MX2010 EX ZZ Operation Guide MX 2010U MX 2310U MODEL ...


