2-128
COPIER
Contents
7
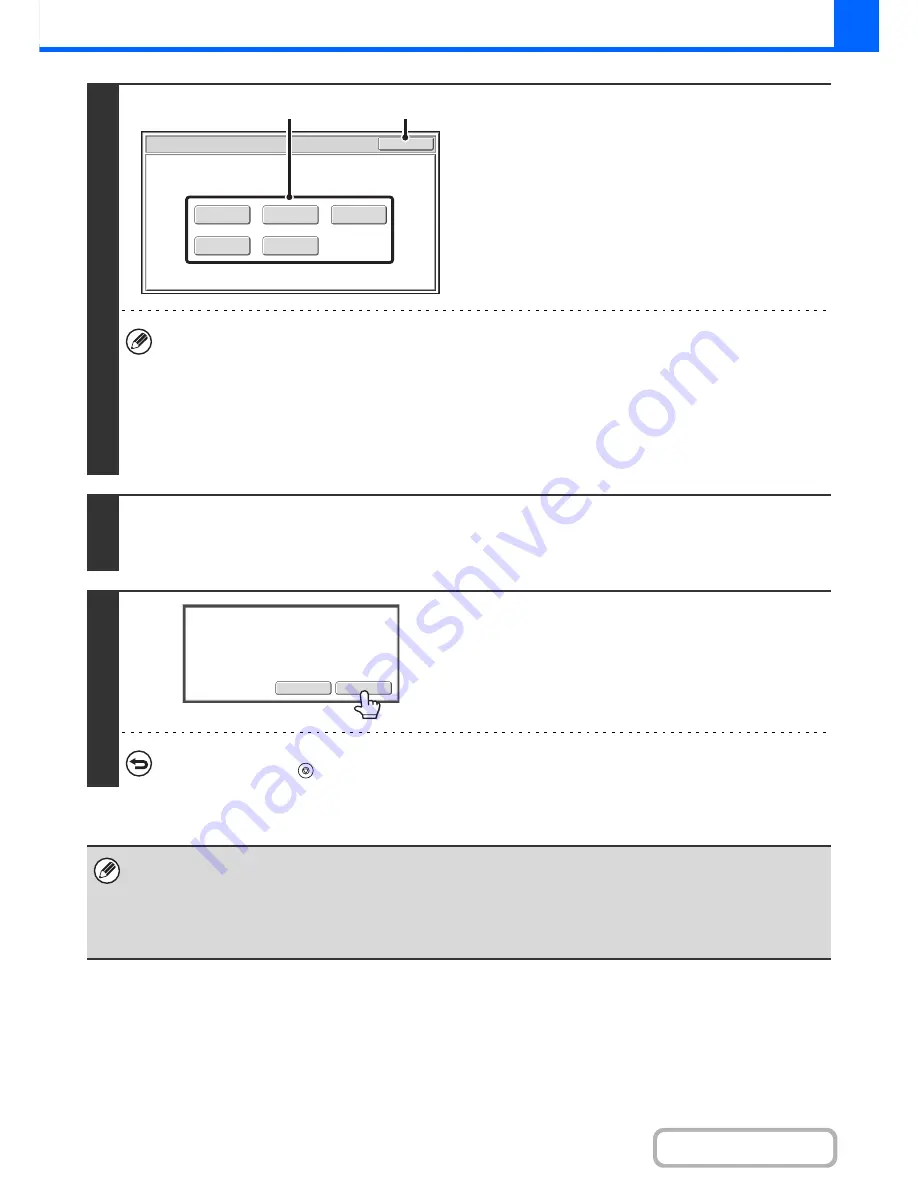
Change the settings.
(1) Touch the key of the setting that you want
to change.
The setting screen of the touched key opens. Change the
settings and touch the [OK] key.
(2) Touch the [OK] key.
• To change the number of sets printed, set the desired number of copies (sets) with the numeric keys. After changing
the number of sets, touch the [End] key in the touch panel (not the [START] key) to print the sets.
• Special modes that can be adjusted are Margin Shift, Pamphlet Copy, Tandem Copy, Covers/Inserts, Transparency
Inserts, Multi-Shot, and Stamp.
• For Pamphlet Copy, Covers/Inserts, and Multi Shot, only changes to the settings of the functions can be made; the
functions cannot be newly added or deleted.
• When transparency film is used, the settings can be changed, new settings can be added, and the function can be
cancelled. However, this is not possible when pamphlet copying is enabled.
8
Press the [COLOUR START] key or the [BLACK & WHITE START] key.
One set of copies is printed again using the adjusted settings. Check the results. If further adjustments are needed, repeat
steps 6 through 8. (Repeating Proof Copy does not decrease the remaining number of sets to be printed.)
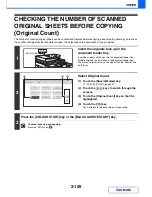
9
Touch the [End] key.
You will return to the base screen of copy mode and the
remaining sets will be printed.
To cancel scanning and copying...
Press the [STOP] key (
).
If Proof Copy is executed while the machine is printing another job, the other job is interrupted and the proof copies are
printed. The previous job will resume after the proof copies are printed.
However, if proof copy is executed during output of a job for which both two-sided printing and stapling are enabled, the proof
copy will be output after the job in progress is finished.
If the [End] key is touched to execute printing of the remaining sets while the machine is printing another job, the remaining
sets will be printed after all previously reserved jobs are completed.
Paper Select
2-Sided Copy
Colour Mode
Special Modes
Output
OK
Proof Copy
(2)
(1)
End
Change
Press [End] to continue.
To make a proof copy again, press
[Start].
Summary of Contents for MX-2010U
Page 11: ...Conserve Print on both sides of the paper Print multiple pages on one side of the paper ...
Page 35: ...Organize my files Delete a file Delete all files Periodically delete files Change the folder ...
Page 283: ...3 19 PRINTER Contents 4 Click the Print button Printing begins ...
Page 832: ...MX2010 EX ZZ Operation Guide MX 2010U MX 2310U MODEL ...


