English Englis_
English
_151
ACCESS CONTROL
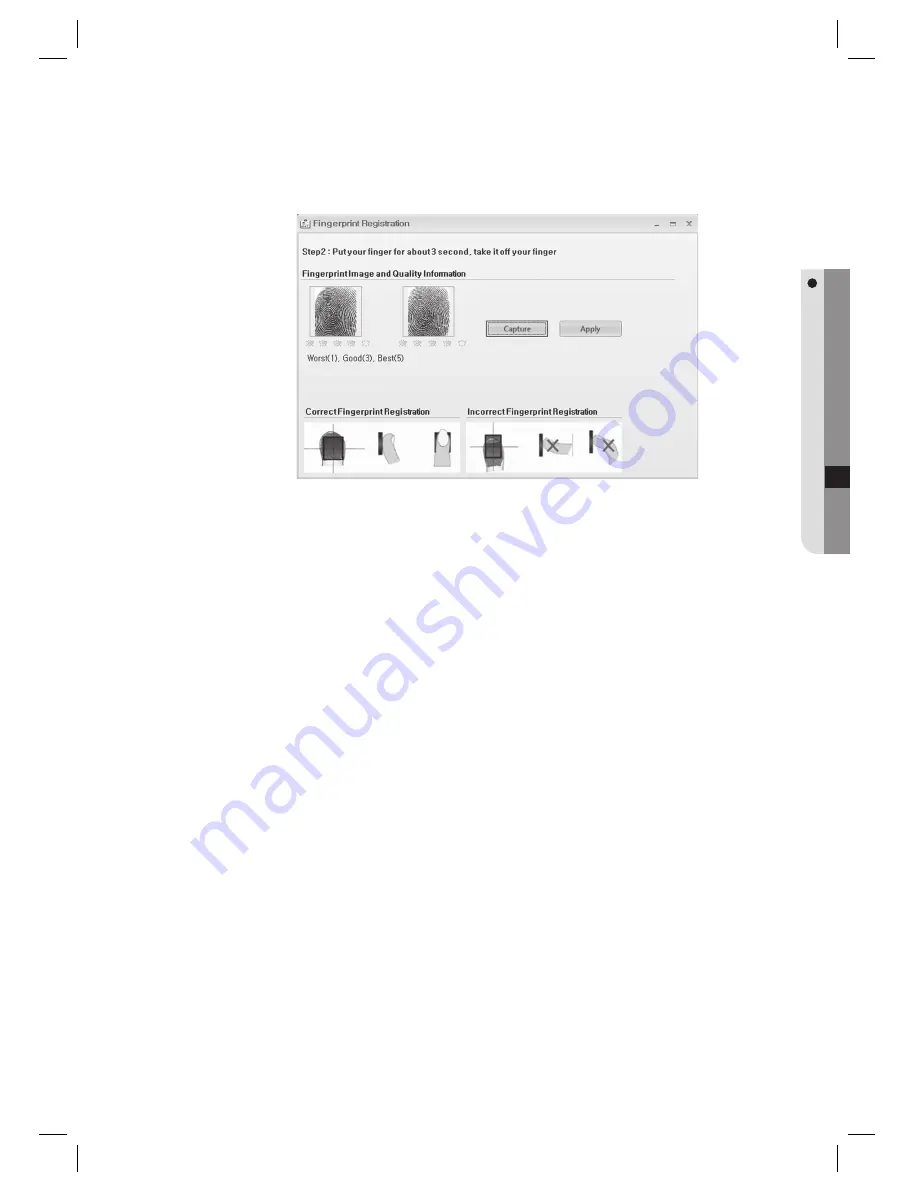
To register fi ngerprints, click [Fingerprint Registration].
Click [Capture] button. When the button is pressed, the red indicator of the fi ngerprint scanner turns on. Place
the fi nger on the scanner to register the fi rst fi ngerprint template. Once the red indicator turns off, release your
fi nger and then put the same fi nger onto the fi ngerprint scanner again when the light turns on. As shown in the
fi gure, the registered fi ngerprint is scanned properly if the fi ngerprint is clear and marked with stars more than 3.
Once completed with the fi rst fi ngerprint scanning, release your fi nger from the scanner and wait until the red
indicator turns on before the second fi ngerprint scanning. If the scanned fi ngerprint is marked with 1 or 2 stars, try
again or use another fi nger.
Click [Apply].
Check [Use Biometric Information] to apply the scanned fi ngerprint in [Fingerprint Management]. You may not
select this option for a bad-quality fi ngerprint that can be hardly used for the fi ngerprint data. If this is the case,
you can get access through the card and password authentication. Check this option if you want to use the
fi ngerprint data.
Move to the [User Defi ned Field] tab. You can use the User Defi ned Field if you need to enter additional
information.
To use the User Defi ned Field, you must have specifi ed necessary items in [Tool] > [Option]. You can create up to 9
user defi ned fi elds, to each of which you can specify the use, the input fi eld type and the label name.
Move to the [Event and Alarm Status] tab. Use this fi eld if you want to check the event history of card holders.
Move to the [Time and Attendance Setting] tab. Use this fi eld if you want to confi gure the time and attendance
settings.
To enable the time and attendance function, you should have specifi ed necessary settings in advance using the
[Attendance] menu in the upper corner. For more information about the time and attendance function, refer to the
time and attendance section in this manual.
31.
32.
J
33.
34.
35.
J
36.
37.
J


