


23
Intera 5.3
Getting Started with Sawyer
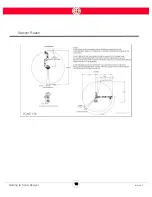
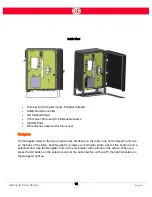
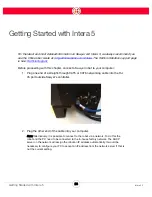
Sawyer ships with an E-Stop device that may be used in the event of emergency to remove power
from Sawyer’s actuators. The E-Stop device is connected to Sawyer’s controller box by a cable
which allows for flexibility in its positioning. Ensure that the E-Stop device is not positioned in a
manner that will make it difficult for an operator to access it during Sawyer’s operation.
Sawyer’s power cord may be disconnected from the AC outlet to disconnect power to the entire
system in the event of emergency. Ensure that the power plug is not connected to an outlet that is
difficult to access during Sawyer’s operation.
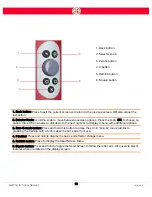
Turning On Sawyer
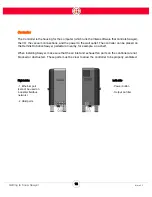
Press and release the power button on the controller. The lights on the head turn on, the main
screen appears on the Sawyer display, and the robot begins its boot up sequence.
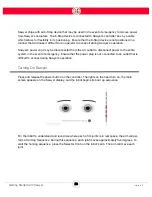
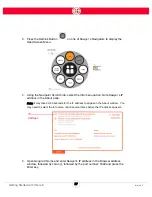
For the robot to understand and recognize where each of its joints is in real space, the arm will per-
form a Homing Sequence. During this sequence, each joint moves approximately five degrees. To
start the homing sequence, press the Selector Knob on the robot’s arm. The arm will move each
joint.
Summary of Contents for Sawyer
Page 15: ...8 Intera 5 3 Getting to Know Sawyer Hardware Overview of Your Robot ...
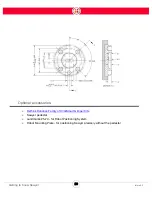
Page 16: ...9 Intera 5 3 Getting to Know Sawyer Dimensions ...
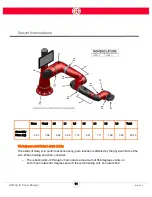
Page 17: ...10 Intera 5 3 Getting to Know Sawyer Sawyer Reach ...
Page 93: ...86 Intera 5 3 Train Pick and Place Patterns on the Head 11 Press OK to go to the next step ...
Page 104: ...97 Intera 5 3 Train Pick and Place Patterns on the Head You may now run the task ...
Page 134: ...127 Intera 5 3 TCP IP The Set To node in the Behavior Editor is used to output information ...
Page 138: ...131 Intera 5 3 Fieldbus Devices 3 Using a keyboard navigate to CONFIGURATION and press ENTER ...
Page 155: ...148 Intera 5 3 ...
Page 156: ...149 Intera 5 3 ...
Page 180: ...173 Intera 5 3 ...
Page 190: ...183 Intera 5 3 Fixed Data 112 From Robot ...
Page 206: ...199 Intera 5 3 Small Assembly 114 From Robot 115 To Robot ...
Page 207: ...200 Intera 5 3 Large Assembly 116 From Robot 117 To Robot ...
Page 208: ...201 Intera 5 3 Floats 118 From Robot 119 To Robot ...
Page 209: ...202 Intera 5 3 Strings 120 From Robot 121 To Robot ...
Page 218: ...Z Zero G button 16 17 Zero G mode 24 Zero Gravity mode 17 zoom reset 42 ...
Page 219: ......
Page 220: ...Last updated June 18 2018 Intera 5 3 User Guide Getting Started Rev A ...