User's Manual PNVR500 series
35
3.
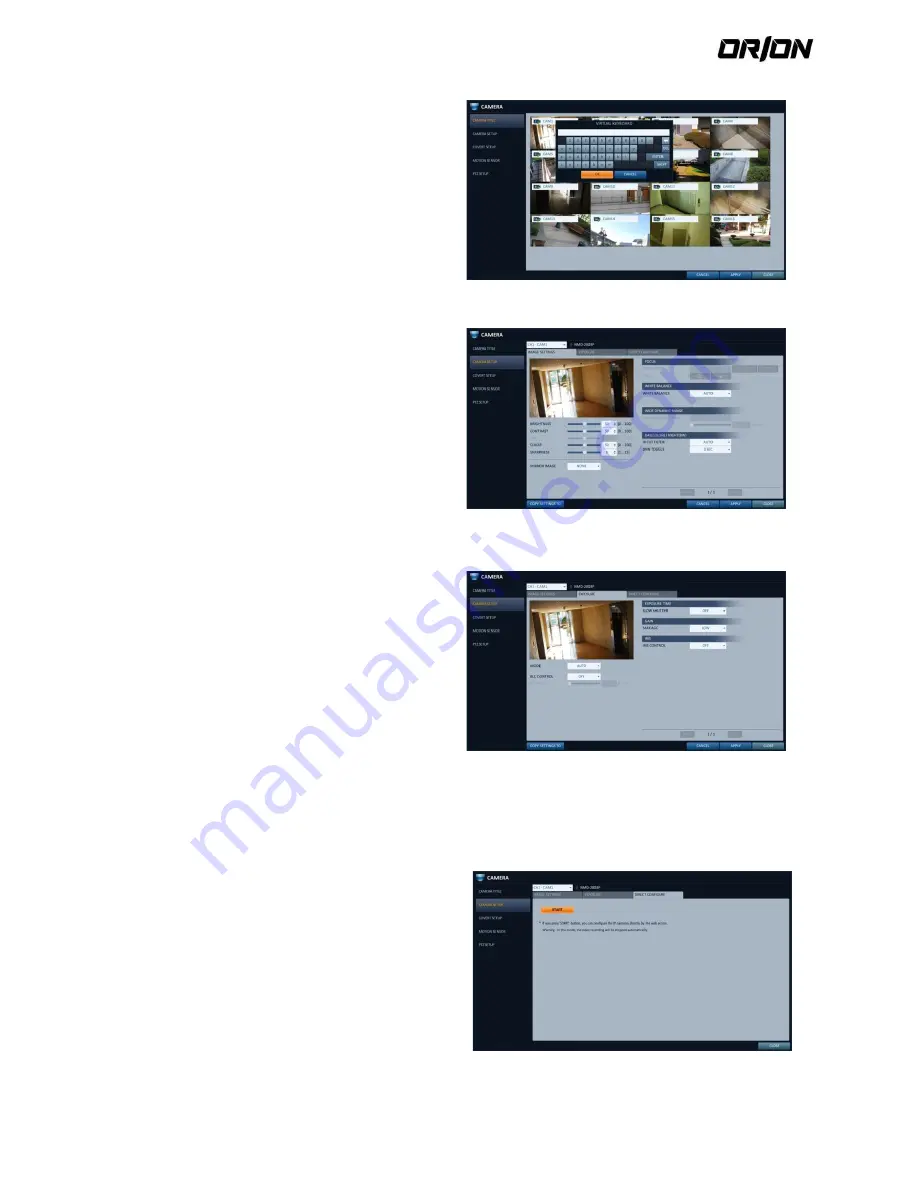
With the virtual keyboard that appears, enter a
camera title and click <OK>.
4.
To apply the change, click <APPLY> in the bottom of
the screen.
5.
When done, press the [EXIT] button on the remote
control or click <CLOSE> in the lower screen to return
to the previous menu
Camera Setup
4.2.2.
Adjust the brightness, contrast, color and quality for each
channel to your preference.
1.
From <
SYSTEM SETUP
> - <
CAMERA
>, select
<
CAMERA SETUP
>.
2.
Use the [
▲▼
◀▶
/
ENTER
] buttons on the remote
control or use the mouse to set each option of the
camera setup menu.
> IMAGE SETTINGS : Configures detailed image
capturing setup for the camera.
> EXPOSURE : Controls the camera’s exposure
adaptively to ambient lighting condition of installed
location.
> DIRECT CONFIGURE : Connects to the IP camera via
web to manipulate directly.
3.
To apply the change, click <APPLY> in the bottom of
the screen.
4.
When done, press the [EXIT] button on the remote
control or click <CLOSE> in the lower screen to return
to the previous menu.
Direct Configuration
4.2.3.
Direct configuration support may differ from camera manufacturers.
If supported by the camera, you can access the camera via web to directly manipulate the camera, for updating the
camera’s firmware for example.
For cameras not supporting direct configuration over
web, use the computer connected to the camera for
configuring it.
1.
Select <DIRECT CONFIGURE> from the <CAMERA
SETUP>.
2.
Press the <START> button to display a popup
message.
! Recording stops for the corresponding channel
during manipulating the camera.


