User's Manual PNVR500 series
27
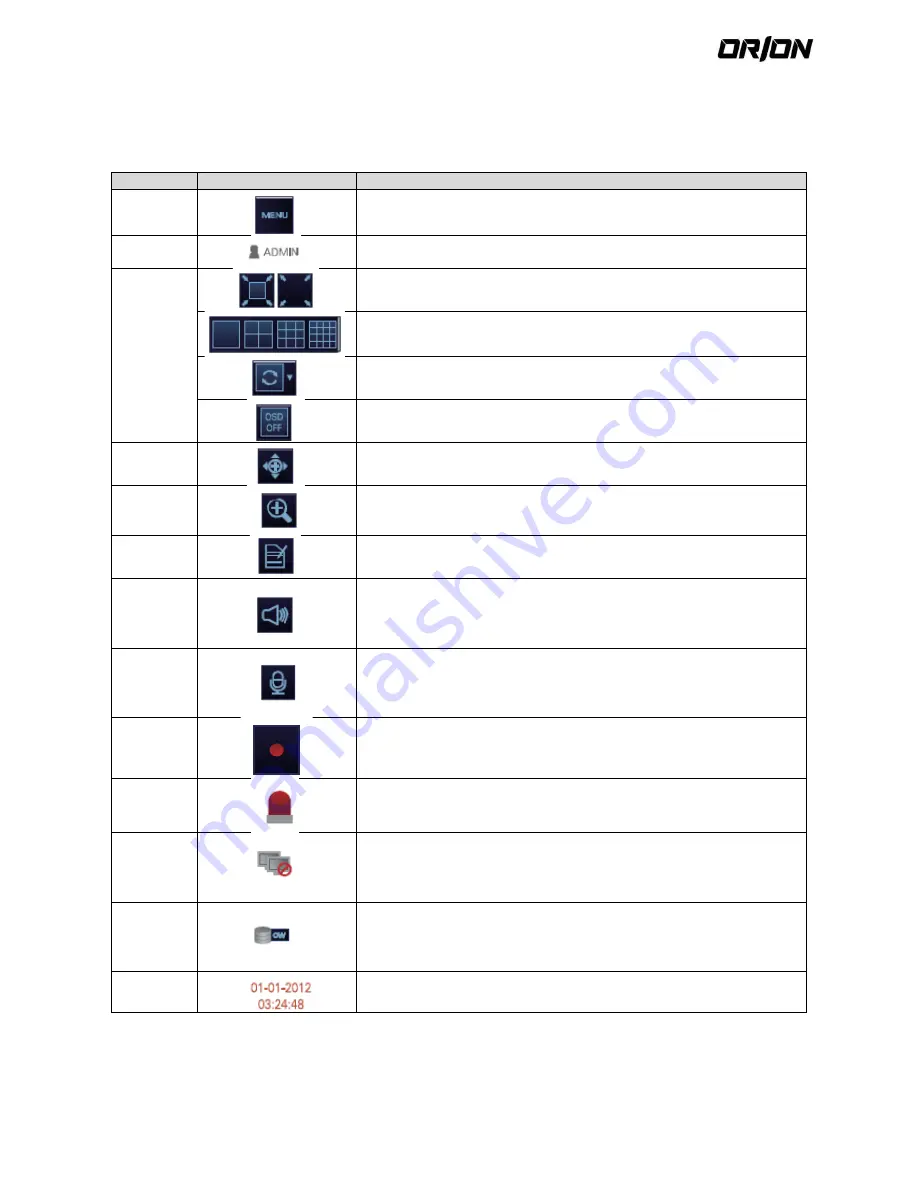
Status bar
3.1.2.
Press the
▼
button on the remote control, or place the mouse in the lower area of the screen to display the status
bar.
Item
Description
Menu
Button
Select one of the system setup, search and backup menu items before
accessing it.
User ID
Show the ID of the user who has currently logged in
Screen
Control
Buttons
Edit the screen layout to show the status bar and timeline at all times or
only when the mouse cursor hovers on the status bar/timeline.
Select a split mode.
Select Auto Sequence or Special Split Mode.
Display or hide the OSD menu on the screen.
PTZ
Move to the PTZ screen. You can control the PTZ operations of a PTZ-
compliant cameraon the PTZ screen.
Zoom
Move to the Digital Zoom.
Quick Log
Display the log list of the recent recording events.
Audio
Channel
Selection
Button
You can use the camera supporting the audio input to listen to the audio.
Microphone
Channel
Selection
Button
Select a camera to which the audio signal will be transferred from the
connected
microphone.
Panic
Record
Start the panic recording.
Alarm
Indicator
Turns on if an event occurs. It does not turn on if no reaction to the event is
yet defined.
Click this to check the information of the event that occurred.
Network
Connection
Status
Check if network connection is made via an external PC or mobile device.
Click this to view the details of the concurrent users and to check the
network connection status. For more information, refer to "Network
Setup".
Disk Space
Show the disk space information. If you have set the disk overwrite mode, it
will be displayed "OW" (Over Write) from the start point of the overwriting.
Click this to view the details of the disk status. For more information, refer
to "Record Setup".
Date &
Time
Display the current time and date.


