CS240
5-51
Network settings
5
12
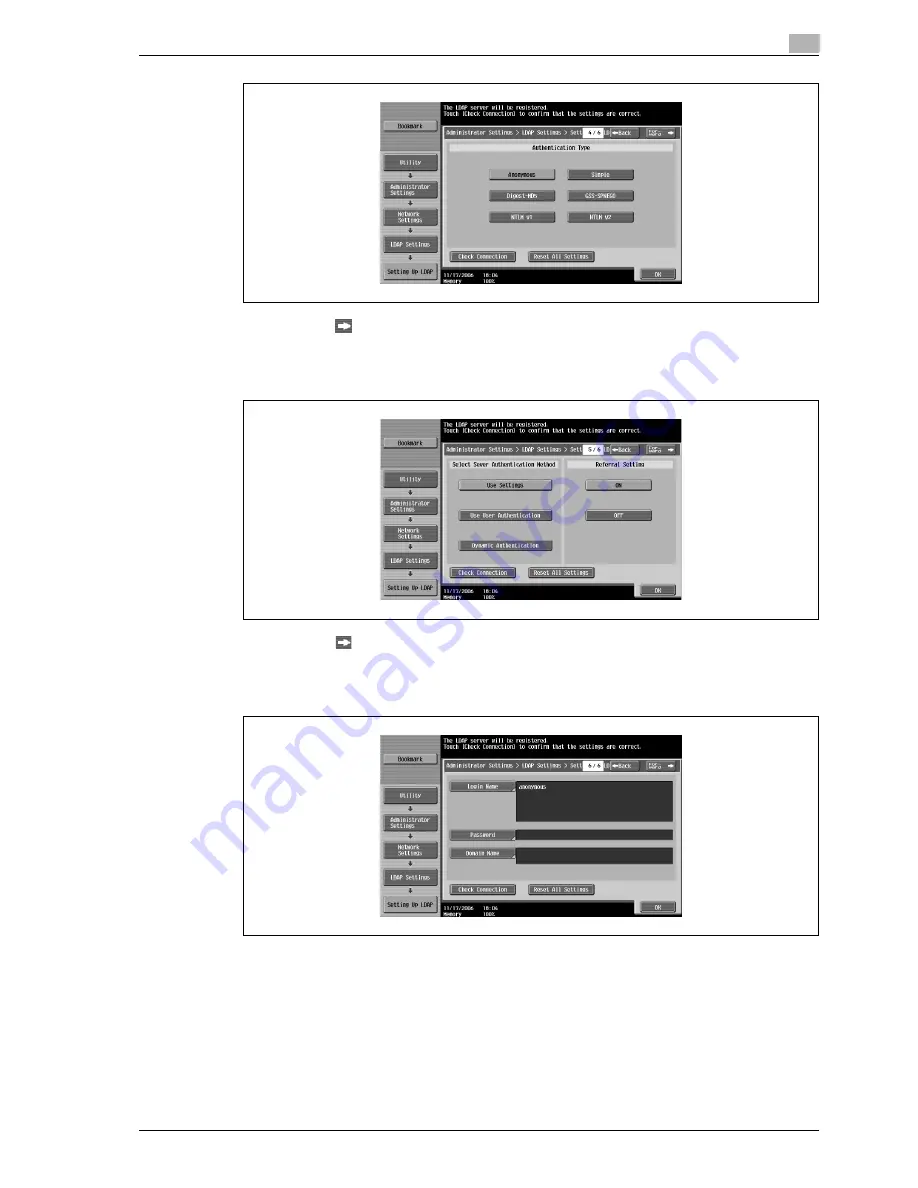
Touch [Forward
].
Setup LDAP screen 5/6 appears.
13
Specify the desired settings.
14
Touch [Forward
].
Setup LDAP screen 6/6 appears.
15
Specify the desired settings.
16
Touch [OK].
17
Touch [Close], and then touch [Close] in the next screen that appears.
–
To cancel changes to the settings, touch the menu item name in the Bookmark screen to return to
the selected screen without applying the changes to the settings.
The LDAP server is registered, and the authentication settings are specified.
Summary of Contents for Linium PRO C6500
Page 1: ...Océ CS240 User Manual Network scanner operations ...
Page 2: ......
Page 8: ...Contents 6 CS240 ...
Page 9: ...1 Introduction ...
Page 10: ......
Page 19: ...2 Before using scanning functions ...
Page 20: ......
Page 29: ...3 Scanning ...
Page 30: ......
Page 105: ...4 Specifying utility mode parameters ...
Page 106: ......
Page 155: ...5 Network settings ...
Page 156: ......
Page 256: ...5 Network settings 5 102 CS240 ...
Page 257: ...6 Scan function troubleshooting ...
Page 258: ......
Page 260: ...6 Scan function troubleshooting 6 4 CS240 ...
Page 261: ...7 Appendix ...
Page 262: ......
Page 272: ...7 Appendix 7 12 CS240 ...
Page 273: ...8 Index ...
Page 274: ......


