Change Both UV Lamp Bulbs
Introduction
The printer uses two UV lamps, one on each side of the carriage, to cure the UV ink during
printing. The bulbs in these UV lamps have a limited lifetime and must be replaced by the
operator if they fail or when they can no longer cure the ink at maximum available power.
When to do
Although the expected life of the UV lamp bulbs is 500 hours, there are factors that can reduce
that time. Operational practices, such as turning the lamps off and on frequently, using them at
high intensity all of the time, or touching the bulbs with your fingers, can shorten their life. Océ
recommends that both UV Lamp bulbs be replaced at the same time to ensure that the curing
effect is balanced when printing in both directions. In the case of a premature failure or accidental
breakage of one lamp, the operator can decide to replace only one lamp but should confirm
image consistency after the replacement. Uneven curing can cause gloss banding in the printed
image.
NOTE
The Flatbed Settings icon on the printer interface allows the operator to control the power
output of each UV lamp independently. To extend lamp life, use the lowest setting that provides
adequate curing for a particular media. However, avoid handling media with insufficient curing
as partially cured UV ink on your skin can cause irritation and sensitization.
Replace both lamp bulbs after 500 hours of use to help ensure that the UV ink is fully and evenly
cured.
Note Attention Caution
CAUTION
The UV lamps and the carriage may be hot if the printer has been active. Avoid touching the
lamp assembly until it is cool.
These UV lamp bulbs contain mercury, and if they are broken the vapor is toxic if inhaled. The
lamp bulbs must be disposed of according to local environmental regulations.
How to Access the Lamp Housings
The housings for the two UV lamps are located on each side of the carriage. When you view the
printer from the end where the Start button is located, the Right lamp is located on the Home side
where the carriage parks when it is not printing. The Left lamp is located on the other (Away) side
of the carriage. To access the Right lamp, make sure the carriage is in its parked position and
follow the instructions below to remove a bulb.
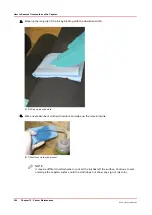
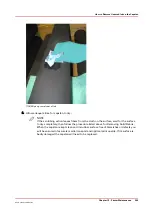
How to Remove the UV Lamp Bulb
It is not necessary to shut the printer power off the while replacing the UV lamp bulbs. However,
make sure you turn them off by de-selecting the lamp icon in the user interface before you start
and allow a few minutes for the bulbs to cool down.
NOTE
Wear cotton or nitrile gloves when handling UV lamp bulbs. Avoid bare skin contact with the UV
lamp bulbs. When heated, compounds from the skin can form permanent etching on the surface
of the UV bulb. A contaminated bulb may fail prematurely.
Change Both UV Lamp Bulbs
Chapter 12 - Printer Maintenance
195
Océ Arizona 1200 Series
Summary of Contents for arizona 1240 GT
Page 1: ...User guide Oc Arizona 1200 Series Revision 3010121377...
Page 6: ...Contents 6 Oc Arizona 1200 Series...
Page 7: ...Chapter 1 Introduction...
Page 11: ...Chapter 2 Product Compliance...
Page 15: ...Chapter 3 Safety Information...
Page 34: ...Roll Media Safety Awareness 34 Chapter 3 Safety Information Oc Arizona 1200 Series...
Page 35: ...Chapter 4 How to Navigate the User Interface...
Page 56: ...Software Update Module 56 Chapter 4 How to Navigate the User Interface Oc Arizona 1200 Series...
Page 57: ...Chapter 5 How to Operate Your Oc Arizona Printer...
Page 78: ...Media Registration 78 Chapter 5 How to Operate Your Oc Arizona Printer Oc Arizona 1200 Series...
Page 79: ...Chapter 6 Operating the Oc Arizona 1200 XT...
Page 85: ...Chapter 7 Roll Media Option...
Page 109: ...Chapter 8 Static Suppression Option...
Page 113: ...Chapter 9 How to Manage a White Ink Workflow...
Page 157: ...Chapter 10 Ink System Management...
Page 161: ...Chapter 11 Troubleshooting...
Page 163: ...Chapter 12 Printer Maintenance...
Page 207: ...Appendix A Application Information...

