Hardware Installation
2-13
For more information and device specifications for the Power Injector, refer to the
Power Injector
Quick Install Guide
(Part No. 72-70762-01) available from the Motorola Web site.
2.7 Mounting an AP-5131
The AP-5131 can rest on a flat surface, attach to a wall, mount under a suspended T-Bar or above a
ceiling (plenum or attic). Choose one of the following mounting options based on the physical
environment of the coverage area. Do not mount the AP-5131 in a location that has not been approved
in a site survey.
Refer to the following, depending on how you intend to mount the AP-5131:
•
Desk Mounted Installations
•
Wall Mounted Installations
•
Suspended Ceiling T-Bar Installations
•
Above the Ceiling (Plenum) Installations
2.7.1 Desk Mounted Installations
The desk mount option uses rubber feet allowing the unit to sit on most flat surfaces. The four (4)
round rubber feet can be found in the AP-5131 (main) box in a separate plastic bag.
To install the AP-5131 in a desk mount orientation:
1.
Turn the AP-5131 upside down.
2.
Attach the radio antennae to their correct connectors.
The antenna protection plate cannot be used in a desk mount configuration, as the plate only
allows antennas to be positioned in a downward orientation.
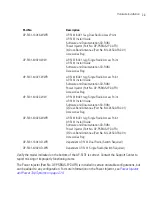
LED AC
(Main)
Port
Green
(Steady)
Power Injector is receiving power from an
AC outlet.
Indicates a device is connected to the
Power Injector’s outgoing Data & Power
cable.
Green
(Blinking)
Output voltage source is out of range.
The Power Injector is overloaded or has a
short circuit.
Summary of Contents for AP 5131 - Wireless Access Point
Page 1: ...AP 51xx Access Point Product Reference Guide ...
Page 3: ...AP 51xx Access Point Product Reference Guide 72E 103901 01 January 2008 ...
Page 4: ......
Page 44: ...AP 51xx Access Point Product Reference Guide 1 28 ...
Page 76: ...AP 51xx Access Point Product Reference Guide 2 32 ...
Page 92: ...AP 51xx Access Point Product Reference Guide 3 16 ...
Page 588: ...AP 51xx Access Point Product Reference Guide 8 254 ...
Page 610: ...AP 51xx Access Point Product Reference Guide 9 22 3 Define a mesh supported WLAN ...
Page 623: ...Configuring Mesh Networking 9 35 3 Determine the Radio MAC Address and BSSID MAC Addresses ...
Page 653: ...Adaptive AP 10 25 line con 0 line vty 0 24 end ...
Page 654: ...AP 51xx Access Point Product Reference Guide 10 26 ...
Page 666: ...AP 51xx Access Point Product Reference Guide A 12 ...
Page 690: ...AP 51xx Access Point Product Reference Guide C 4 ...
Page 696: ...AP 51xx Access Point Product Reference Guide IN 10 ...
Page 697: ......


