4-8 Exam Preparation
4.3
Select Exam Mode and Probe
CAUTION:
If the exam mode is changed during a measurement, all
measurement calipers on the image will be cleared. The general
measurement data will be lost, but application measurement data
will be stored in the reports.
Selecting exam mode
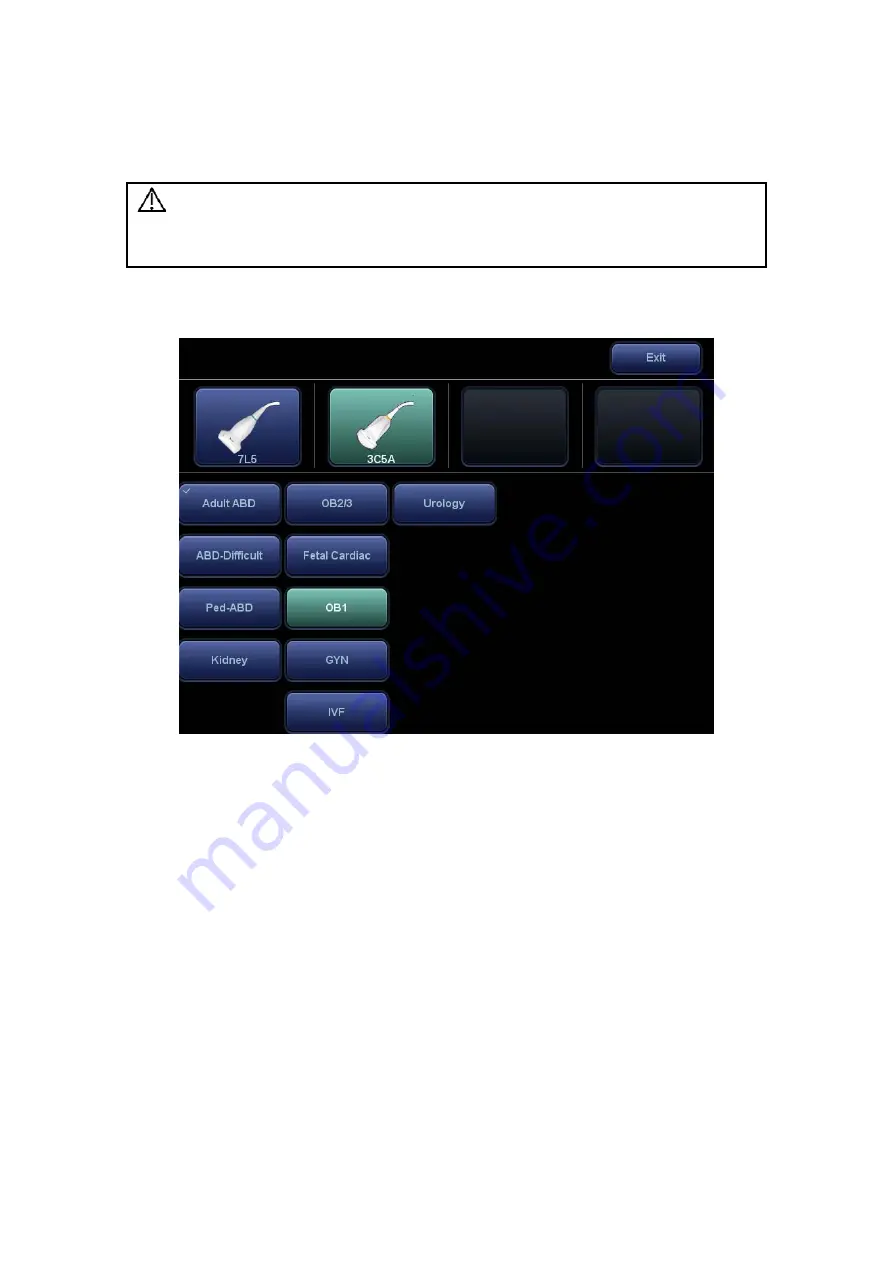
1. Connect suitable probes to the system and press <Probe> on the control panel. The
touch screen displays the following dialog box:
2. Tap the screen to select the probe type and exam mode. The system exits the dialog
box and enters the selected exam mode and probe.
Click [Exit] or press <Probe> again to cancel the selection and exit the screen.
4.3.1 Dual-probe
Switch
A user-defined key for dual-probe switch can be defined in preset, by which you can fast
switch the probe under B/ Color/ Power mode.
This function applies only to probes with the same exam modes.
1. Scan to obtain the image by current probe.
2. Press the user-defined key. The available probes appear on the screen.
3. Choose the probes to be compared. The system enters dual-probe mode. The image
from previous probe is frozen.
4. Scan and obtain the required image from the current probe.
5. Press the user-defined key to switch the images of two probes.
The path for setting the keys: <F10 Setup>
Æ
[System Preset]
Æ
[Key Config].
1. Select the key to be defined from [Key] tab on the left side. Or, select a key from
[Footswitch] tab.


