CHAPTER 2
BASIC OPERATION
2-21
Preparation of the Tools
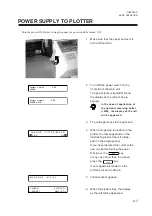
Although the tools to be used would be set into a magazine in advance and allowed to be installed onto the UNIT
as it is, the explanation shall be prepared herein with the procedure to install after applying the power to the UNIT.
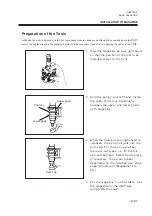
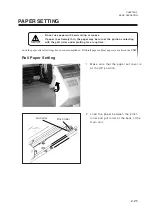
1
Hold the magazine by your right hand
so that the pen No. of the tool to be
installed comes to the front.
2
Hold the pen by your left hand, install
the collar of the tool horizontally
between the upper and lower pawls
of th magazine.
3
When the thumb of your right hand is
released, the pen point gets into the
auto cap. For the pen cap rubber,
there are two types, i.e. for the ink
pen and ball pen. Select and replace,
if necessary, the proper rubber
depending on the installed pen. (See
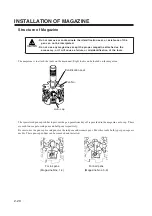
page "Structure of "Magazine" P.2-
20.)
4
Put the magazine on a flat table. Set
the magazine on the UNIT with
turning ON the power.
INSTALLATION OF MAGAZINE
The tool
Auto cap
Lower pawl
Upper pawl
Summary of Contents for cg-100AP
Page 16: ...xiv ...
Page 70: ...1 54 ...
Page 108: ...2 38 ...
Page 145: ...CHAPTER 4 SELF DIAGNOSIS FUNCTION 4 9 DEMONSTRATION PATTERN 1 2 Demonstration Pattern 1 ...
Page 146: ...4 10 Demonstration Pattern 2 ...
Page 173: ...CHAPTER 6 APPENDIX 6 13 Table of 82 special character codes supported ...
Page 179: ...D200310MAC 2 00 09061999 ...
Page 180: ... MIMAKI ENGINEERING CO LTD 1999 6 Printed in japan ...

