10-13
Troubleshooting > Troubleshooting
Troubleshooting
Solving Malfunctions
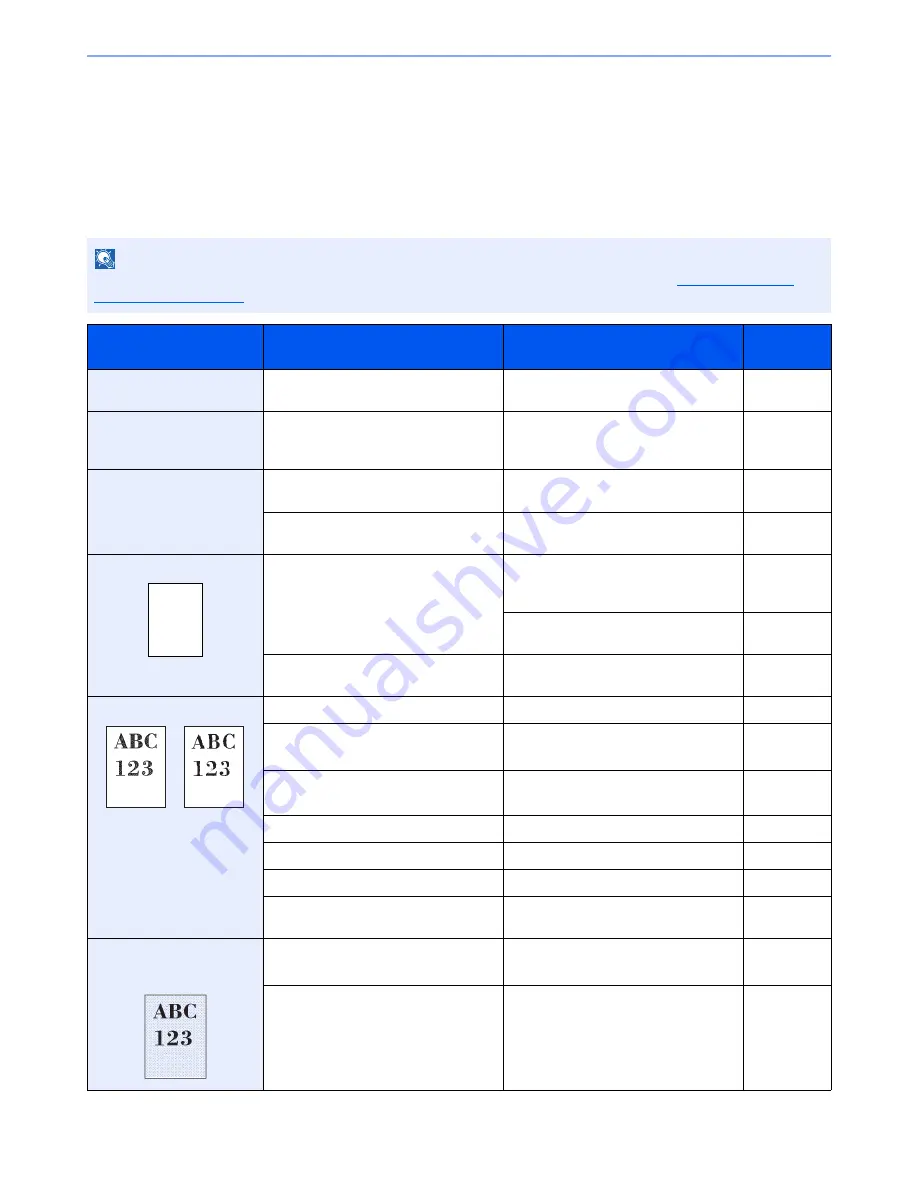
The table below provides general guidelines for problem solving.
If a problem occurs with your machine, look into the checkpoints and perform procedures indicated on the following
pages. If the problem persists, contact your Service Representative.
NOTE
When contacting us, the serial number will be necessary. To check the serial number, refer to
Display for Device
Information on page 3-7
.
Symptom
Checkpoints
Corrective Actions
Reference
Page
An application does not
start.
Is the Auto Panel Reset time short?
Set the Auto Panel Reset time to 30
seconds or more.
page 8-53
The screen does not
respond when the main
power switch is turned on.
Is the machine plugged in?
Plug the power cord into an AC outlet.
page 2-9
Pressing the [
Start
] key
does not produce copies.
Is there a message on the screen?
Determine the appropriate response to
the message and respond accordingly.
page 10-19
Is the machine in Sleep mode?
Press the [
Power
] key to recover the
machine from Sleep mode.
page 2-32
Blank sheets are ejected.
Are the originals loaded correctly?
When placing originals on the platen,
place them face-down and align them
with the original size indicator plates.
page 5-2
When placing originals in the document
processor, place them face-up.
page 5-3
―
Check that the settings of the
application software.
―
Printouts are totally too light.
Is the paper damp?
Replace the paper with new paper.
page 3-14
Have you changed the density?
Select appropriate density level.
page 6-21
page 8-56
Is the toner distributed evenly within the
toner container?
Shake the toner container from side to
side several times.
page 10-6
Is EcoPrint mode enabled?
Disable [EcoPrint] mode.
page 8-18
―
Run [Developer Refresh].
page 10-35
―
Run [Laser Scanner Cleaning].
page 10-35
―
Make sure the paper type setting is
correct for the paper being used.
page 8-11
Printouts are too dark even
though the background of
the scanned original is white.
Have you changed the density?
Select appropriate density level.
page 6-21
page 8-56
―
Run [Developer Refresh].
page 10-35
Summary of Contents for TASKalfa 2551ci
Page 1: ...OPERATION GUIDE TASKalfa 2551ci ...
Page 17: ...xvi About the Operation Guide this Guide ...
Page 24: ...xxiii Glossary 11 28 Index Index 1 ...
Page 44: ...xliii Menu Map ...
Page 62: ...1 18 Legal and Safety Information Notice ...
Page 116: ...2 54 Installing and Setting up the Machine Transferring data from our other products ...
Page 166: ...3 50 Preparation before Use Registering Destinations in the Address Book ...
Page 178: ...4 12 Printing from PC Printing Data Saved on the Printer ...
Page 322: ...6 72 Using Various Functions Functions ...
Page 444: ...10 4 Troubleshooting Regular Maintenance DP 772 1 2 3 4 ...
Page 445: ...10 5 Troubleshooting Regular Maintenance DP 773 1 2 ...
Page 447: ...10 7 Troubleshooting Regular Maintenance 3 4 5 6 ...
Page 478: ...10 38 Troubleshooting Troubleshooting Cassette 2 1 2 ...
Page 480: ...10 40 Troubleshooting Troubleshooting Large Capacity Feeder 1 500 sheet x 2 1 2 3 B1 B2 ...
Page 481: ...10 41 Troubleshooting Troubleshooting Multi Purpose Tray 1 2 3 4 ...
Page 482: ...10 42 Troubleshooting Troubleshooting Duplex unit 1 2 ...
Page 483: ...10 43 Troubleshooting Troubleshooting Inner Tray Fixing unit 1 2 3 ...
Page 487: ...10 47 Troubleshooting Troubleshooting Job Separator 1 2 3 Bridge Unit Option 1 2 ...
Page 488: ...10 48 Troubleshooting Troubleshooting 1 000 Sheet Finisher Option 1 2 3 D1 D2 2 1 D3 ...
Page 489: ...10 49 Troubleshooting Troubleshooting Clearing a Staple Jam 1 2 3 2 1 CLICK ...
Page 490: ...10 50 Troubleshooting Troubleshooting ...
Page 522: ...11 32 Appendix Glossary ...
Page 531: ...Index 9 ...
Page 532: ...Index 10 ...
Page 533: ......
Page 536: ...First edition 2013 7 2NPKDEN000 ...


