5-23
Operation on the Machine > Sending
Sending
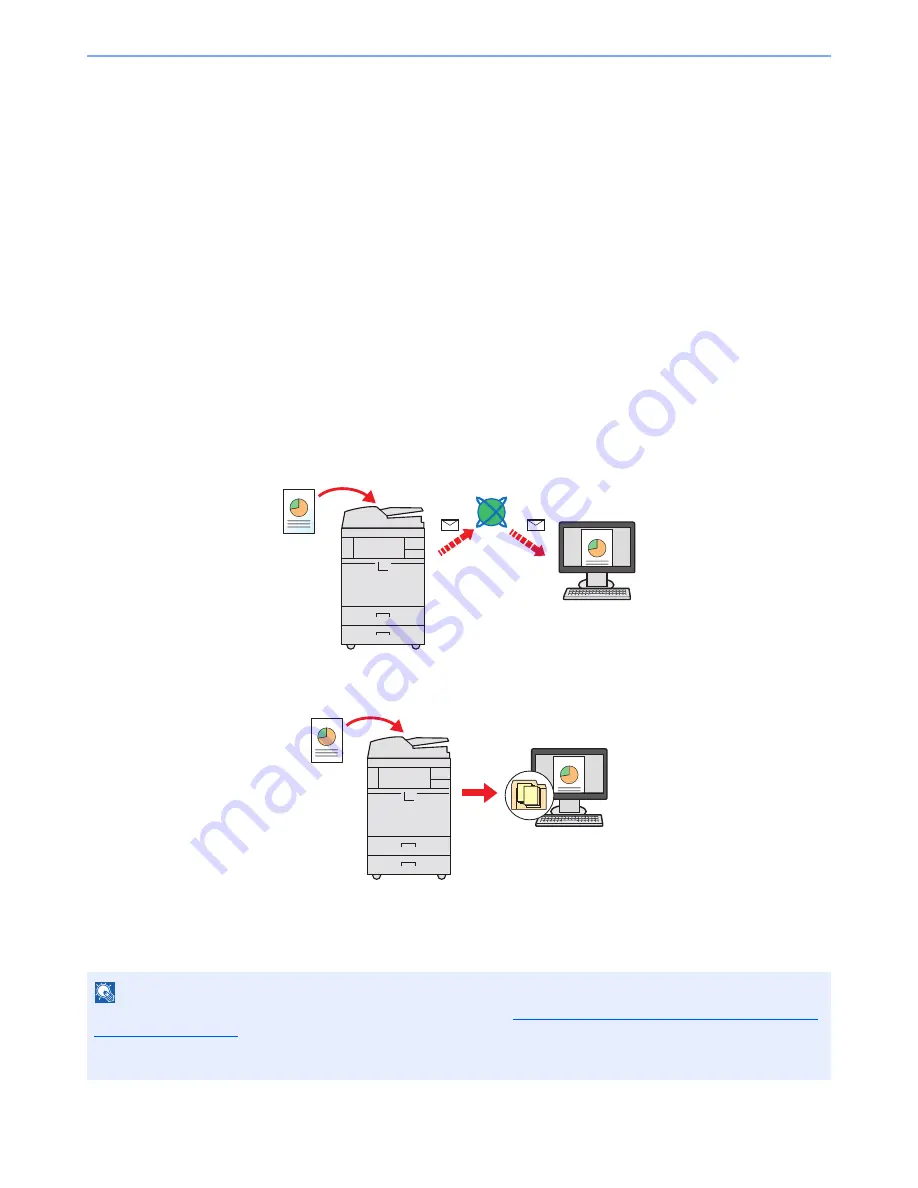
This machine can send a scanned image as an attachment of an E-mail message or to a PC linked to the network. In
order to do this, it is necessary to register the sender and destination (recipient) address on the network.
A network environment which enables the machine to connect to a mail server is required in order to send E-mail. It is
recommended that a Local Area Network (LAN) be used to assist with transmission speed and security issues.
At the same time as you send a scanned image, you can also print the image or send it to the Job Box.
To use the transmission function, verify the following:
• Program the settings, including the E-mail setting on the machine.
• Use Command Center RX (the internal HTML web page) to register the IP address, the host name of the SMTP
server, and the recipient.
• Register the destination in the Address Book or One Touch keys.
• Create a share folder in the destination computer, when a folder (SMB/FTP) is selected as the destination.
Consult your network administrator concerning destination folder sharing settings.
• Create/Register a Custom Box (Using a custom box for sending).
• Select detailed transmission settings (to select a Document Box as the destination or to print and send the image at
the same time).
Follow the steps below for basic sending. The following five options are available.
• Send as E-mail (E-mail Addr Entry): Sends a scanned original image as an E-mail attachment. (Refer to page 5-29.)
• Send to Folder (SMB): Stores a scanned original image in a shared folder of any PC. (Refer to page 5-32.)
• Send to Folder (FTP): Stores a scanned original image in a folder of an FTP server. (Refer to page 5-33.)
• Send to Custom Box: Sends a document stored in a document box on this machine. (Refer to page 5-58.)
• Image Data Scanning with TWAIN / WIA: Scan the document using a TWAIN or WIA compatible application program.
(Refer to page 5-41.)
NOTE
Different sending options can be specified in combination. Refer to
Sending to Different Types of Destinations (Multi
Sending) on page 5-36
.
The fax function can be used when the optional fax kit has been installed. For details about this function, refer to the
FAX Operation Guide
.
Summary of Contents for TASKalfa 2551ci
Page 1: ...OPERATION GUIDE TASKalfa 2551ci ...
Page 17: ...xvi About the Operation Guide this Guide ...
Page 24: ...xxiii Glossary 11 28 Index Index 1 ...
Page 44: ...xliii Menu Map ...
Page 62: ...1 18 Legal and Safety Information Notice ...
Page 116: ...2 54 Installing and Setting up the Machine Transferring data from our other products ...
Page 166: ...3 50 Preparation before Use Registering Destinations in the Address Book ...
Page 178: ...4 12 Printing from PC Printing Data Saved on the Printer ...
Page 322: ...6 72 Using Various Functions Functions ...
Page 444: ...10 4 Troubleshooting Regular Maintenance DP 772 1 2 3 4 ...
Page 445: ...10 5 Troubleshooting Regular Maintenance DP 773 1 2 ...
Page 447: ...10 7 Troubleshooting Regular Maintenance 3 4 5 6 ...
Page 478: ...10 38 Troubleshooting Troubleshooting Cassette 2 1 2 ...
Page 480: ...10 40 Troubleshooting Troubleshooting Large Capacity Feeder 1 500 sheet x 2 1 2 3 B1 B2 ...
Page 481: ...10 41 Troubleshooting Troubleshooting Multi Purpose Tray 1 2 3 4 ...
Page 482: ...10 42 Troubleshooting Troubleshooting Duplex unit 1 2 ...
Page 483: ...10 43 Troubleshooting Troubleshooting Inner Tray Fixing unit 1 2 3 ...
Page 487: ...10 47 Troubleshooting Troubleshooting Job Separator 1 2 3 Bridge Unit Option 1 2 ...
Page 488: ...10 48 Troubleshooting Troubleshooting 1 000 Sheet Finisher Option 1 2 3 D1 D2 2 1 D3 ...
Page 489: ...10 49 Troubleshooting Troubleshooting Clearing a Staple Jam 1 2 3 2 1 CLICK ...
Page 490: ...10 50 Troubleshooting Troubleshooting ...
Page 522: ...11 32 Appendix Glossary ...
Page 531: ...Index 9 ...
Page 532: ...Index 10 ...
Page 533: ......
Page 536: ...First edition 2013 7 2NPKDEN000 ...


