113
Sampling
P0
P1
P2
P3
P4
P5
P8
P9
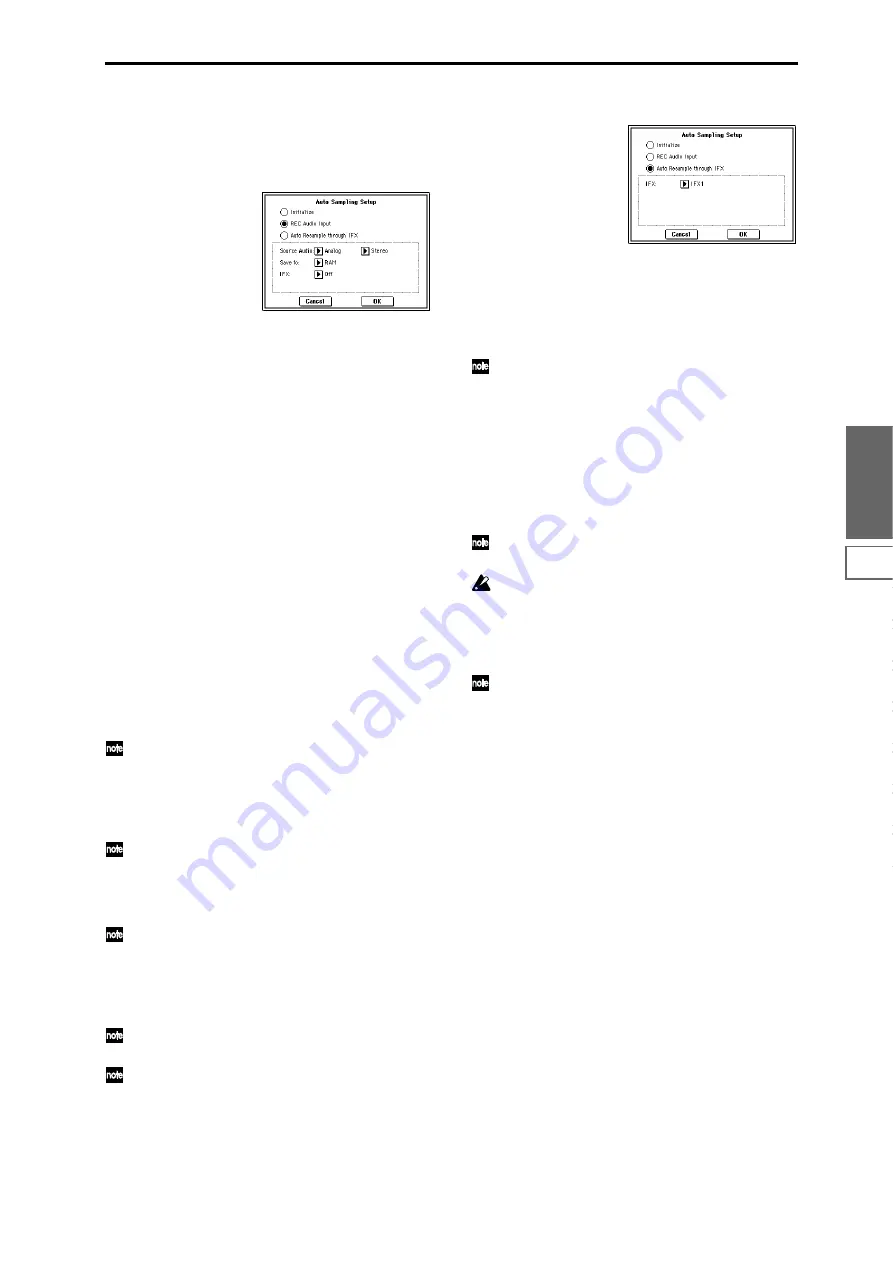
If you select Initialize:
Press the OK button to initialize the settings, or press the
Cancel button
if you decide not to execute. (
☞
For the
parameters and values that will be set, refer to p.114)
If you select REC Audio Input:
1)
Use “Source Audio” to select the external audio input
source.
Analog:
Selects the analog audio output of an instrument
or other audio source connected to the AUDIO INPUT 1
and AUDIO INPUT 2 jacks.
S/P DIF:
Selects the digital audio output from an instru-
ment or DAT etc. connected to the S/P DIF jack. (0–2a
“Input”)
2)
Use “Mono-1/Mono-2/Stereo” to select the input
source, and either mono or stereo as the number of chan-
nels that will be sampled.
Mono-1
will make settings for sampling from Input 1 to
L-MONO. Mono-2 uses Input 2 and samples to R-
MONO. Stereo uses Input 1, 2 and samples in stereo.
3)
Use “Save to” to specify the destination to which the
sampled data will be written. RAM writes the data into
sample memory (RAM). MEDIA creates a Wave file from
the sampled data and saves it to media.
4)
If you want to apply an insert effect to the external
audio input source while it is being sampled, use “IFX”
to specify the insert effect that you want to use. If you
don’t want to use an insert effect, set this Off.
5)
Press the OK button to execute the REC Audio Input
command, or press the Cancel button if you decide not
to execute. (
☞
For the parameters and values that will be
set, refer to p.114)
When you are ready to sample (after executing REC
Audio Input), press the SAMPLING [REC] key and
then the SAMPLING [START/STOP] key to begin sam-
pling. (This is because “Trigger” is set to Sampling
START SW.) When you’ve finished performing, press
the SAMPLING [START/STOP] key to stop sampling.
Here’s how to check the data you just sampled.
If you specified “Save to” RAM, play the C2 note of the
keyboard to hear the sample. If you specified “Save to”
MEDIA
, use the page menu command “Select Direc-
tory” (0–1N) to hear the sample.
If you specified “Save to” RAM and want to change the
RAM bank used for sampling, change the “Bank” (0–
1c) setting.
If you specified “Save to” MEDIA and want to change
the save-destination for the Wave files, use the page
menu command “Select Directory” (0–1N).
If you want to change the way in which sampling is ini-
tiated, change the “Trigger” setting.
If you selected S/P DIF for “Source Audio,” use “Sys-
tem Clock” (Global P0: 0–2a) to change the system
clock.
If you select Auto Resample through IFX:
1)
Use “IFX” to select the effect that you want to apply to
the sample.
2)
Press the OK button to execute Auto Sampling Setup
(Auto Resample through IFX), or press the Cancel button
if you decide not to execute. (
☞
For the parameters and
values that will be set, refer to p.114)
When you are ready to resample (after executing Auto
Resample through IFX), perform the following steps.
1)
Use “Key” (0–2b) to specify the key to which the
sample you want to resample is assigned.
2)
Use P8: Insert Effect to make effect settings. To hear
the sound, play the note you specified in “Key.”
3)
To begin resampling, press the SAMPLING [REC]
key and then the SAMPLING [START/STOP] key. (This
is because “Trigger” is set to Sampling START SW.) The
sample will play, and when playback ends, it will be
resampled.
To check the resampled data, play the key you specified
in Key.
To prevent the insert effect from being applied “in
duplicate” when you listen to the resampled data, “BUS
(IFX) Select” (8–1b) will automatically be set to L/R
when resampling ends. If you want to apply IFX and
resample once again, you will need to change this set-
ting back to the same IFX.
Use “Bank” (0–1c) to specify the sampling-destination
sample memory (RAM).
Summary of Contents for TRITON Extreme
Page 1: ...2 E ...
Page 11: ...xii ...
Page 111: ...100 9 5 Page Menu Command 0 1A 0 1I 0 1J Program 9 5A ...
Page 185: ...174 ...
Page 215: ...204 ...
Page 281: ...270 ...
Page 349: ...338 ...
Page 350: ...339 ...
Page 351: ...340 ...
Page 352: ...341 ...
Page 353: ...342 ...


