8
1
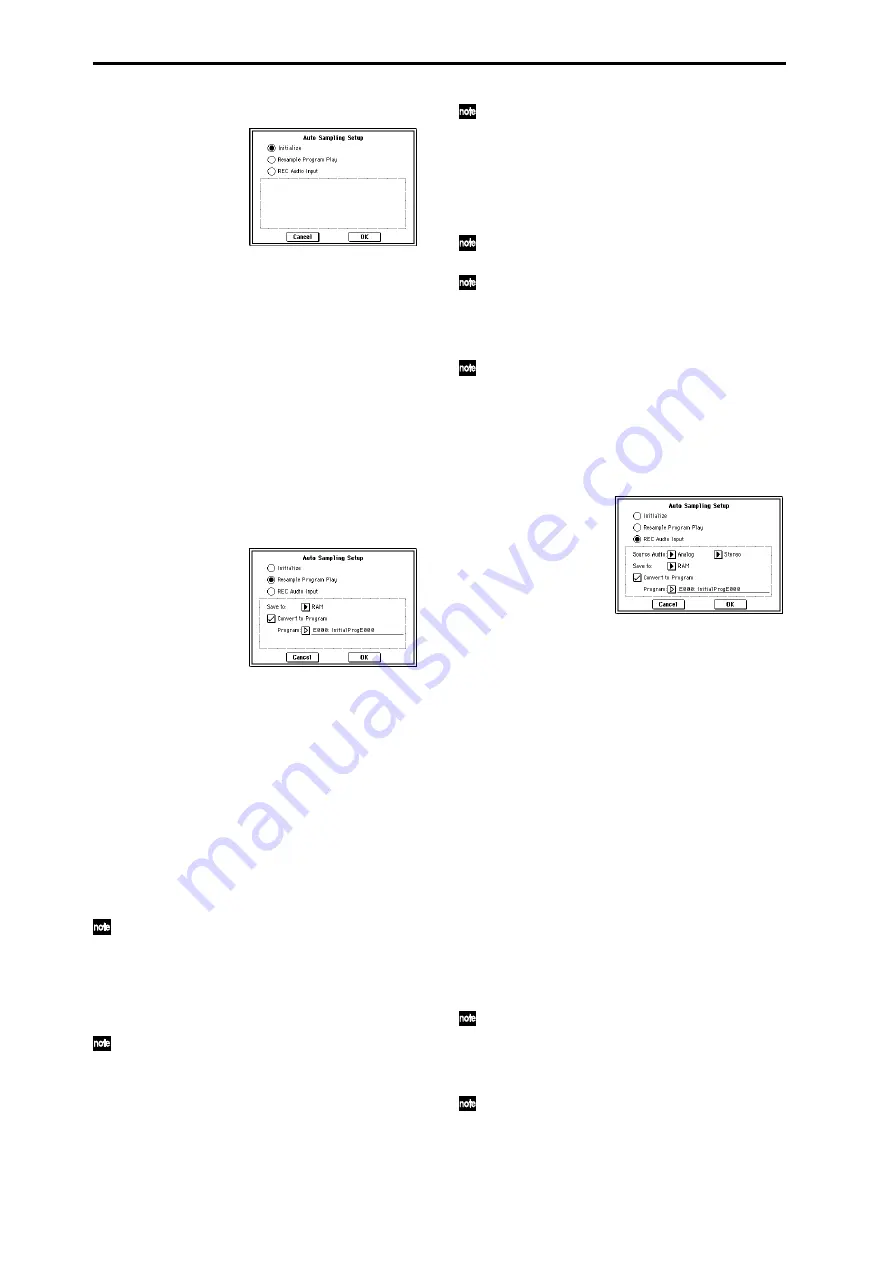
Select “Auto Sampling Setup” to open the dialog box.
2
Press a radio button to select the type of settings you
want to make.
Initialize:
Initialize the sampling-related parameters to
their default state.
Resample Program Play:
Sets the sampling related
parameters to allow you to play a program and resample
your performance.
REC Audio Input:
Sets the sampling-related parameters
to allow you to sample an external audio source while lis-
tening to yourself play a program.
3
These settings will depend on the choice you make in
step
2
.
If you selected Initialize:
Press the OK button to execute the Initialize operation,
or press the Cancel button if you decide not to execute.
(
☞
For the parameters and values that will be set, refer to
If you selected Resample Program Play:
1)
Use “Save to” to select either RAM or MEDIA as the
destination to which the resampled data will be written.
RAM
will write the data to sample memory (RAM).
MEDIA
will write the data to media as a WAVE file
2)
If you selected RAM for “Save to,” you can also spec-
ify whether the sample will be automatically converted
to a program after resampling. If you want to convert the
sample, check the “Convert to Program” option, and use
“Program” to specify the desired convert-destination
program.
3)
Press the OK button to execute Resample Program
Play. If you decide not to execute, press the Cancel but-
ton
. (
☞
For the parameters and values that will be set,
a)
To resample, execute Resample Program Play. Then
press SAMPLING [REC] and then SAMPLING
[START/STOP], and play the program from the key-
board etc. Since “Trigger” (0–3b) is set to Note On, sam-
pling will begin at the first note-on. When you’ve
finished playing, press the SAMPLING [START/STOP]
key to stop resampling.
b)
Verify that your performance was resampled cor-
rectly.
If you executed with “Save to” RAM and “Convert to
Program
” checked, select the program you specified as
the convert-destination and play the C2 note of the key-
board to hear the sample. If you didn’t check “Convert
to Program
,” use Sampling mode to select the sample
and listen to it.
If you selected “Save to: MEDIA,” use the page menu
command “Select Directory” to hear the results. (
c)
If you want to change the RAM bank into which the
data will be sampled (when using “Save to” RAM), use
the page menu command “Select Bank & Smpl No.” (0–
3C).
To change the save-destination for WAVE files or (when
using “Save to” MEDIA) to specify the save-destination
for WAVE files, use the page menu command “Select
Directory” (0–3D).
d)
You can use the “Trigger” setting to change the way
in which sampling will be started.
e)
If you want to simultaneously sample both an exter-
nal audio source from AUDIO INPUT together with
your own playing on a program, go to the Sampling
page, and set the Input 1, 2 setting “BUS (IFX/Indiv.)
Select” to L/R, and the “Source BUS” to L/R.
f)
If you execute Auto Sampling Setup with “Save to”
RAM and the “Convert to Program” option checked,
and you continue sampling, each successive sample
will be automatically assigned to C2, C#2, D2, ... to cre-
ate a multisample. A new multisample will be created
the next time you execute “Auto Sampling Setup” and
start sampling.
If you selected REC Audio Input:
1)
Use “Source Audio” to select the external audio input
source.
Analog:
Selects the analog audio source connected to the
AUDIO INPUT 1 and AUDIO INPUT 2 jacks.
S/P DIF:
Selects the digital audio source connected to the
S/P DIF jack.
2)
Use “Mono-1/Mono-2/Stereo” to specify whether the
input source is mono or stereo.
Mono-1
Input 1 will be used to sample to L-MONO.
Mono-2
Input 2 will be used to sample to R-MONO.
Stereo
Inputs 1 and 2 will be used to sample in stereo.
3)
Use “Save to” to specify the writing-destination for
the sampled data. RAM will write the data into sample
memory (RAM). MEDIA will create a WAVE file of the
sampled data, and save it to media.
4)
If you’ve selected “Save to” RAM, you can specify
whether the sample will automatically be converted to a
program. If you want the sample to be converted to a
program, check “Convert to Program” and use the “Pro-
gram” field to specify the convert-destination program.
5)
Press the OK button to execute REC Audio Input. If
you decide not to execute, press the Cancel button.
(
☞
For the parameters and values that will be set, refer to
To sample, execute REC Audio Input, then press SAM-
PLING [REC], and then [START/STOP] to begin sam-
pling. (This is because “Trigger” is set to Sampling
START SW.) When you’re finished, press the SAM-
PLING [START/STOP] key to stop sampling.
If you want to hear an arpeggiated performance while
you sample it, check “Latch” and start sampling while
the arpeggio plays.
Summary of Contents for TRITON Extreme
Page 1: ...2 E ...
Page 11: ...xii ...
Page 111: ...100 9 5 Page Menu Command 0 1A 0 1I 0 1J Program 9 5A ...
Page 185: ...174 ...
Page 215: ...204 ...
Page 281: ...270 ...
Page 349: ...338 ...
Page 350: ...339 ...
Page 351: ...340 ...
Page 352: ...341 ...
Page 353: ...342 ...


