58
SOLO ON/OFF
[SOLO ON, SOLO OFF]
This turns the Solo function on/off.
Only the track that is set to SOLO ON will sound. Other
tracks will be muted.
The setting will alternate on/off each time you press the
SOLO ON/OFF button
.
If MIDI tracks whose “Status” (2–1a/2a) is BTH, EXT,
or EX2 are muted by Mute or by the Solo function, note
on/off messages will not be transmitted on the MIDI
channel selected for those tracks.
When the page menu command “Solo Selected Track”
(0–1B) is on, its Solo status will be given priority (if
ON). When you press “SOLO ON/OFF” or the parame-
ter of another track, only that track will be soloed, and
will sound.
▼
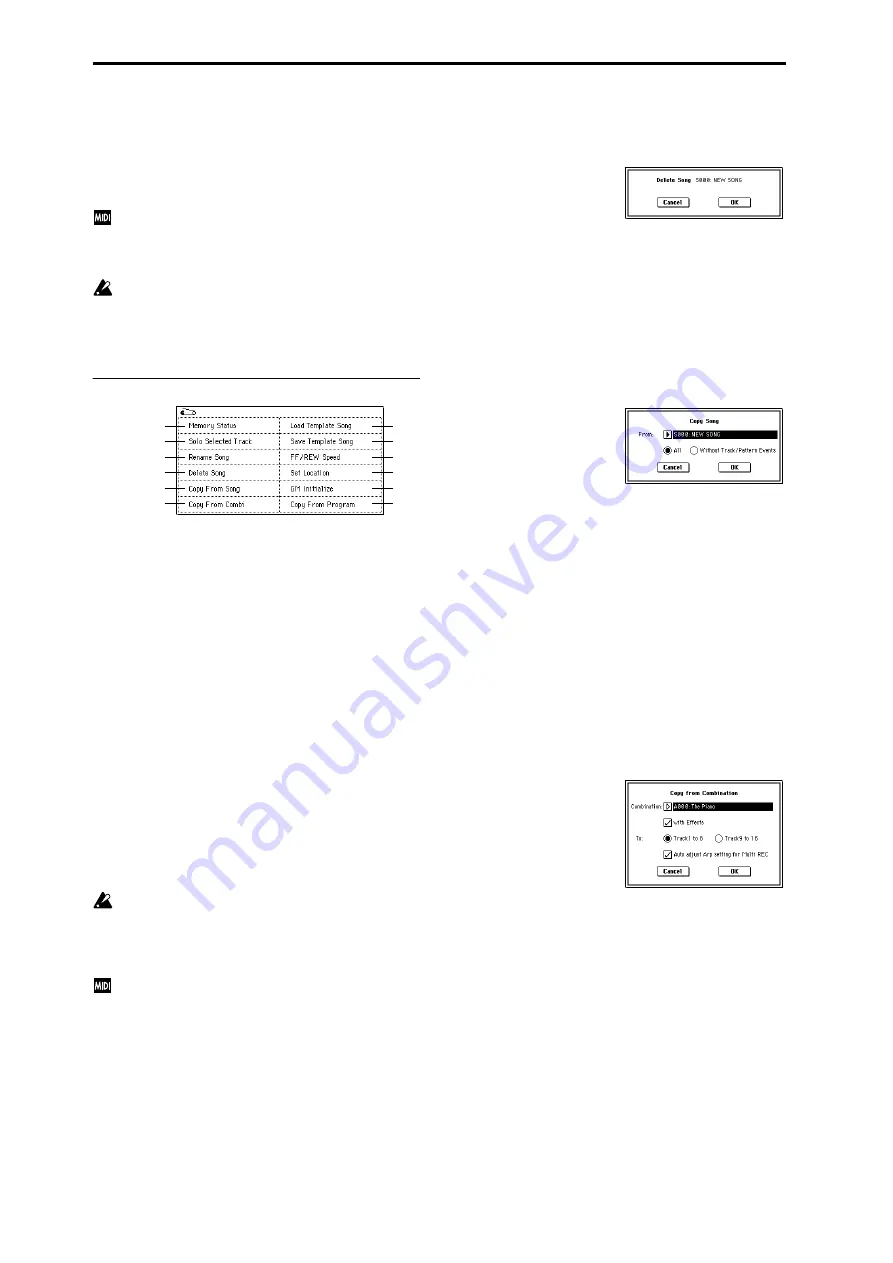
0–1: Page Menu Command
0–1A: Memory Status
This displays the remaining amount of sequencer memory.
0–1B: Solo Selected Track
The Solo function will alternate on/off each time you select
this command.
1
Select the page menu command “Solo Selected Track.”
When you select this command, a check mark will be
added at the left of the “Solo Selected Track” in the menu,
and the Solo function will be turned on.
2
In a page that displays parameters for each track, select
the track that you want to solo (e.g., by using “Program
Select” in the P0: Play, Program Select page), and only
that track will sound, while the other tracks will be
muted. The “Selected Track Information” (0–1b/2b) in
each page will indicate [Solo]. This function cannot be
selected in pages that do not contain parameters for indi-
vidual tracks.
If you want to solo another track, select a parameter of
that track.
3
To cancel the Solo function, once again choose “Solo
Selected Track.”
When this Solo function is on, only the selected track
will be soloed and will sound when you press “SOLO
ON/OFF” (0–1c/2c) or a parameter of another track –
even if two or more “SOLO ON/OFF” buttons are
turned on.
If the tracks that have been muted by the Solo function
have a “Status” (2–1a) setting of EXT, EX2, or BTH, the
MIDI note-on/off messages of that track will not be
transmitted.
0–1C: Rename Song
Here you can rename the selected song. A name of up to six-
teen characters can be input. (
0–1D: Delete Song
This command deletes the currently selected song.
1
Select “Delete Song” to access the dialog box.
2
If you wish to execute the Delete Song command, press
the OK button. To cancel, press the Cancel button.
When you execute this command, the musical data, set-
ting data, and patterns etc. of the currently selected song
will be erased, and the memory area allocated to that
song will be freed.
0–1E: Copy From Song
This command copies all of the setting data and musical
data from the specified song to the currently selected song.
1
Select “Copy From Song” to access the dialog box.
2
In “From,” specify the copy source song number.
3
Select the data that you wish to copy.
All:
will copy all setting data and musical data (track
events and patterns, etc.).
Without Track/Pattern Events:
will copy only the setting
data of songs, except for Play Loop and RPPR data.
4
To execute the Copy Song operation, press the OK but-
ton
. To cancel, press the Cancel button.
Be aware that if you execute “All,” all setting data and
musical data of the currently selected song will be erased
and rewritten by the data from the copy source song. If
you execute “Without Track/Pattern Events,” song setting
data other than Play Loop and RPPR will be rewritten.
0–1F: Copy From Combi (Copy from Combination)
This command copies the parameters of the specified combi-
nation to the setting data of the currently selected song.
1
Select “Copy From Combi” to access the dialog box.
2
In “Combination,” select the copy source destination.
3
Use “with Effects” to specify whether effect and EQ set-
tings will also be copied.
If this is checked, insert effects, master effects, and mas-
ter EQ settings will also be copied.
4
Use “To” to select the copy-destination tracks (1–8 or 9–
16).
5
If you selected Track 1 to 8 as the “To” setting, you have
the option of checking “Auto adjust Arp setting for
Multi REC
.” As necessary, this function will adjust the
MIDI channel etc. of any tracks that need to be changed,
and/or add new tracks, in order to ensure that when you
perform multi-recording with the arpeggiator on, the
same sound will be reproduced during recording as dur-
ing playback.
0–1A
0–1B
0–1C
0–1D
0–1E
0–1G
0–1H
0–1I
0–1J
0–1K
0–1F
0–1L
Summary of Contents for TRITON Extreme
Page 1: ...2 E ...
Page 11: ...xii ...
Page 111: ...100 9 5 Page Menu Command 0 1A 0 1I 0 1J Program 9 5A ...
Page 185: ...174 ...
Page 215: ...204 ...
Page 281: ...270 ...
Page 349: ...338 ...
Page 350: ...339 ...
Page 351: ...340 ...
Page 352: ...341 ...
Page 353: ...342 ...


