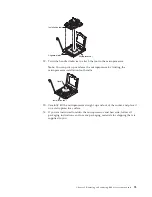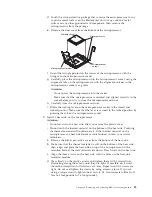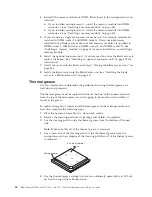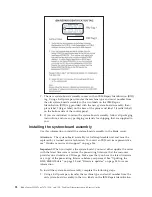
Note:
0.01mL is one tick mark on the syringe. If the grease is properly applied,
approximately half (0.22 mL) of the grease will remain in the syringe.
6.
Continue with step 2 on page 94.
Removing the system-board assembly
Use this information to remove the system-board assembly from the blade server.
Attention:
The system-board assembly is a field-replaceable unit (FRU) and must
be replaced by a trained service technician. To contact an IBM service
representative, see “Hardware service and support” on page 236.
When you replace the system board, you will replace the system board and blade
base as one assembly. After replacement, you must either update the blade server
with the latest firmware or restore the pre-existing firmware that the customer
provides on a diskette or CD image.
Note:
See “Blade server system-board layouts” on page 15 for more information
on the locations of the connectors, jumpers and LEDs on the system board.
To remove the system-board assembly, complete the following steps:
1.
Before you begin, read “Safety” on page v and “Installation guidelines” on
page 49.
2.
If the blade server is installed in a BladeCenter unit, remove it (see “Removing
the blade server from the BladeCenter unit” on page 52 for instructions).
3.
Carefully lay the blade server on a flat, static-protective surface.
4.
Remove the blade server cover (see “Removing the blade server cover” on page
55).
5.
If an optional expansion unit is installed, remove the expansion unit (see
“Removing an optional expansion unit” on page 84).
6.
Remove all of the installed components in the following list from the
system-board assembly; then, place them on a static-protective surface or install
them on the new system-board assembly.
v
DIMMs. See “Removing a memory module” on page 64.
v
USB module. See “Removing a USB Flash key” on page 68.
v
I/O expansion cards. See “Removing a CIOv-form-factor expansion card” on
page 71, “Removing a horizontal-compact-form-factor expansion card” on
page 72, and “Removing a storage interface card” on page 73.
v
Storage drives. See “Removing a hot-swap storage drive” on page 62.
v
Microprocessors and heat sinks. See “Removing a microprocessor and heat
sink” on page 90.
Chapter 5. Removing and replacing blade server components
97
Summary of Contents for 7870B4U
Page 1: ...BladeCenter HS22 Type 7870 1936 and 1911 Problem Determination and Service Guide...
Page 2: ......
Page 3: ...BladeCenter HS22 Type 7870 1936 and 1911 Problem Determination and Service Guide...
Page 14: ...xii BladeCenter HS22 Type 7870 1936 and 1911 Problem Determination and Service Guide...
Page 20: ...6 BladeCenter HS22 Type 7870 1936 and 1911 Problem Determination and Service Guide...
Page 34: ...20 BladeCenter HS22 Type 7870 1936 and 1911 Problem Determination and Service Guide...
Page 248: ...234 BladeCenter HS22 Type 7870 1936 and 1911 Problem Determination and Service Guide...
Page 252: ...238 BladeCenter HS22 Type 7870 1936 and 1911 Problem Determination and Service Guide...
Page 260: ...246 BladeCenter HS22 Type 7870 1936 and 1911 Problem Determination and Service Guide...
Page 266: ...252 BladeCenter HS22 Type 7870 1936 and 1911 Problem Determination and Service Guide...
Page 267: ......
Page 268: ...Part Number 90Y5614 Printed in USA 1P P N 90Y5614...


