


SmartPAC 2 with WPC Integration
1126800
SmartPAC 2 Run Mode
Chapter 6
page 359
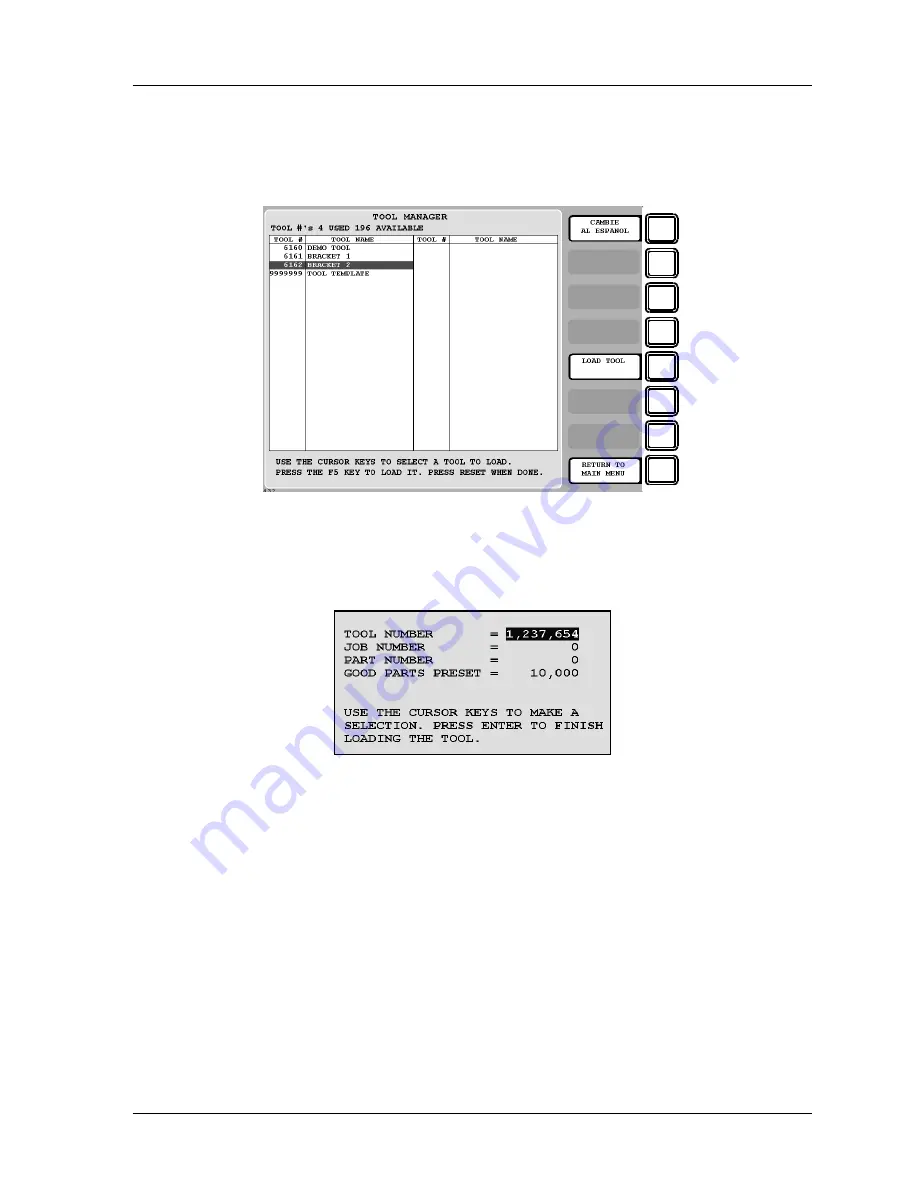
Select a Tool to Load
1.
The Tool Manager screen appears, similar to the next figure.
F1
F2
F3
F4
F5
F6
F7
F8
Figure 6 - 26. Tool Manager Screen
2.
In this display, highlight the tool number you want to load. Then press
F5
-“Load
Tool.” The following box appears.
Figure 6 - 27. Tool to Be Loaded
3.
In this box you can enter values for job number, part number and good parts preset. Use
the cursor keys to select any of those items you want to change. A numeric entry box
appears. Enter the number and then press ENTER to accept it. When you are done
changing items, highlight the tool number and press ENTER. The following warning box
appears.
Summary of Contents for SmartPAC 2
Page 192: ...1126800 SmartPAC 2 with WPC Integration Page 170 Chapter 2 Installing SmartPAC 2 and WPC ...
Page 294: ...1126800 SmartPAC 2 with WPC Integration Page 272 Chapter 4 SmartPAC 2 Initialization Mode ...
Page 342: ...1126800 SmartPAC 2 with WPC Integration page 320 Chapter 5 SmartPAC 2 Program Mode ...
Page 404: ...1126800 SmartPAC 2 with WPC Integration Page 382 Chapter 6 SmartPAC 2 Run Mode ...
Page 448: ...1126800 SmartPAC 2 with WPC Integration Page 426 Chapter 7 SmartPAC 2 Fault Messages ...
Page 476: ...1126800 SmartPAC 2 with WPC Integration page 454 Appendix C Updating SmartPAC 2 Firmware ...
Page 482: ...1126800 SmartPAC 2 with WPC Integration page 460 Appendix F Replacing SmartPAC 2 PC Board ...
Page 492: ...1126800 SmartPAC 2 with WPC Integration page 470 Glossary ...