6 SETTING
- 54 -
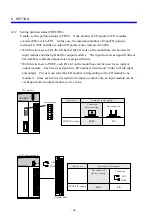
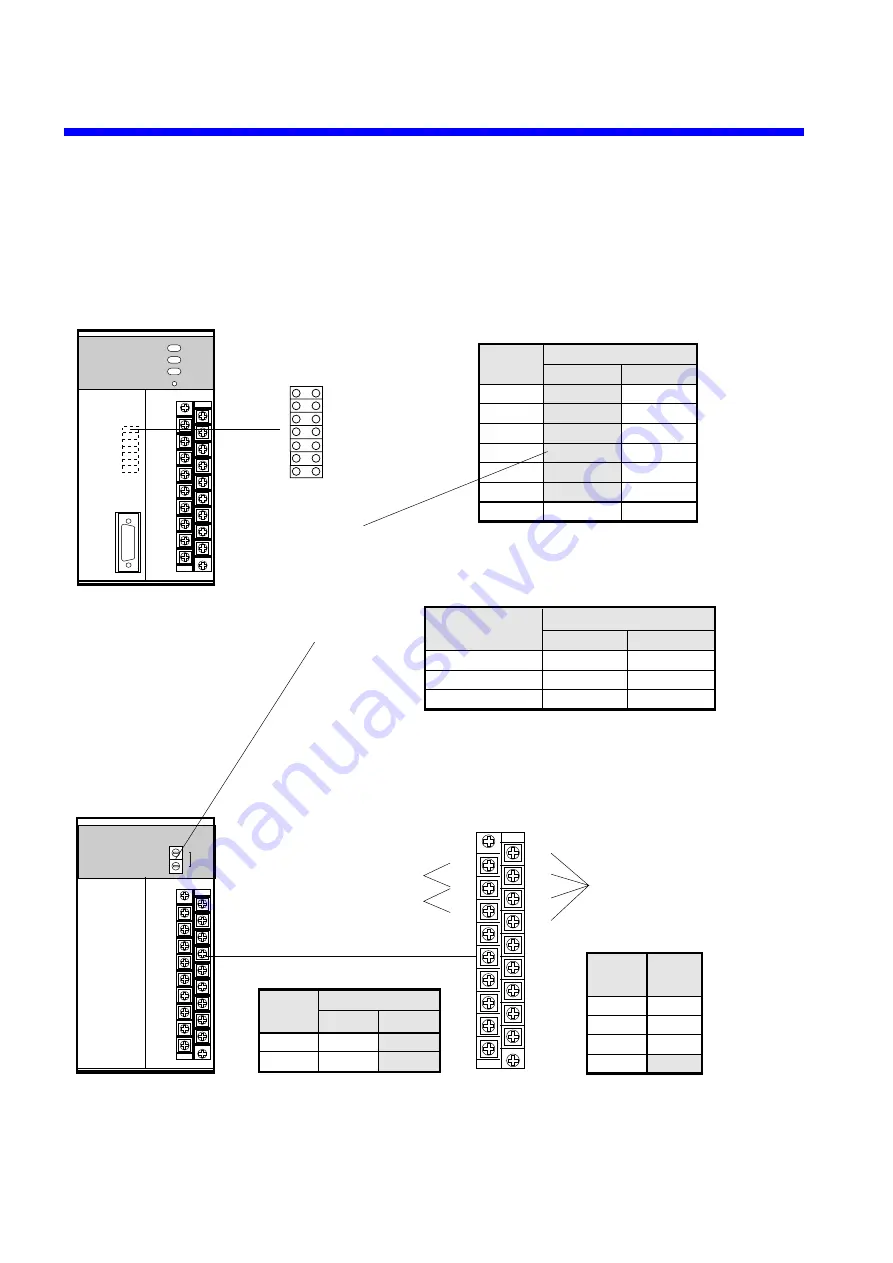
6.3 Setting I/O Numbers
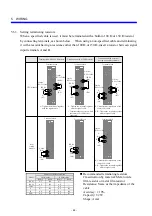
For the CPU module and remote I/O station module, set I/O numbers in the places shown
below. For information on how to connect terminating resistors to a remote I/O cable, see
“5.6.3 Setting terminating resistors.”
HITACHI
S10mini
LQP000
LADDER
MODE
PROTECT
RESET
STOP
RUN
SIMU
NORM
OFF
ON
CPU-S
LQS000
HITACHI
HSC-1000
RI/O
U
ST.NO
RI/O
1
2
3
4
5
6
7
FREE
RESET
16 points
16 points
16 points
PI/O not mounted
NC
FIX
HOLD
128 points
64 points
32 points
PI/O mounted
NC
B1
B2
B3
128 points
64 points
32 points
16
points
B1
B2
B3
B4
FIX
HOLD
FREE
RESET
A1
A2
A3
A1
A3
2
4
8
RI/O1
000 to 3E0
000 to 3C0
000 to 380
RI/O2
400 to 7E0
400 to 7C0
400 to 780
Number of I/O slots
on the mount base
Range of I/O numbers
CPU module
Jumper plugs
1: FREE/FIX
2: HOLD
3: 128 I/O points
4: 64 I/O points
5: 32 I/O points
6: PI/O mounting
7: Unused
Jumper
plug No.
Jumper plug
Connected
Not connected
Under the factory setting,
jumper plugs 1 to 6 are connected.
When any of jumper plugs 3 to 5
is connected, the 16-point setting is valid.
Station number setting
• As the station number, set the first two digits of
an I/O number.
• When "PI/O mounted" is set for the CPU module,
the value 00 cannot be used as this setting.
RI/O station module
FREE/FIX is set.
HOLD/RESET is set.
The number of I/O points occupied
by each slot on the mount base is set.
A2
short-circuited
to:
Setting
Connected
Not connected
The factory setting is "not connected."
B4
short-circuited
to:
Number
of I/O
points
Not connected
The factory setting is "not connected."
CPU RUN
L
Summary of Contents for S10mini D
Page 1: ......
Page 14: ...THIS PAGE INTENTIONALLY LEFT BLANK ...
Page 19: ...1 BEFORE USE ...
Page 28: ...THIS PAGE INTENTIONALLY LEFT BLANK ...
Page 29: ...2 OVERVIEW ...
Page 34: ...THIS PAGE INTENTIONALLY LEFT BLANK ...
Page 35: ...3 NAMES AND FUNCTIONS OF PARTS ...
Page 45: ...4 INSTALLATION ...
Page 54: ...THIS PAGE INTENTIONALLY LEFT BLANK ...
Page 55: ...5 WIRING ...
Page 68: ...THIS PAGE INTENTIONALLY LEFT BLANK ...
Page 69: ...6 SETTING ...
Page 84: ...THIS PAGE INTENTIONALLY LEFT BLANK ...
Page 85: ...7 OPERATION PROCEDURES ...
Page 91: ...8 EXPLANATION OF OPERATION ...
Page 111: ...9 MAINTENANCE ...
Page 128: ...THIS PAGE INTENTIONALLY LEFT BLANK ...
Page 129: ...10 SPECIFICATIONS ...


