94
starting value by pressing
CLEAR
… or re-start them by
moving the stick beyond the switching point again.
Tip:
When using an electric motor the motor run is usually li-
mited by the capacity of the battery, and in this case you
would normally set the stopwatch to “count down”. Simp-
ly enter the maximum permitted motor run in the “Timer”
column, e.g. “5 min.”. As described on pages 40 and 45,
the piezo buzzer starts to emit warning tones “30 sec”
before “zero”.
With the stopwatch halted, press the
CLEAR
button in
the basic display, so that the stopwatch switches to the
“Timer” function. The timer can now be started and stop-
ped using the throttle control.
Alternatively, if you control your motor with one of the
switches SW 1 … 4 or 6/7, as described in
Examples 2
and 3
, you do not need any of the previously described
control switches. All you need to do is locate the switch
which you use to turn your motor on and off, and assign
the same switch to the “Timers”, with the same switching
direction, so that they start running at the same moment
as you switch on the motor.
In contrast, if you have decided on the solution descri-
bed in
Example 1
, then unfortunately there is no alter-
native but to operate the motor and timers separately.
If, following on from the model programming described
on the preceding pages, you have decided on
Examp-
le 4
, or you are using the C1 stick (throttle / brake stick)
to control motor power – independently of this program-
ming example – then you can use the associated control
switch to turn the stopwatch on and off automatically.
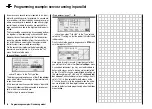
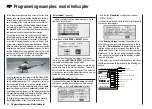
To assign this control switch, move the C1 stick to the
Idle position, and then move to the “Timers” line in the
menu …
»Base settings«
(page 38 ... 41)
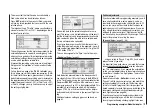
Press the
SELECT
button to activate the switch assi-
gnment, then select the switch symbol and move the
throttle / brake stick from its idle position in the direc-
tion of “full throttle”. After a short period the switch “G1l”
or “G2l” will appear on the screen as a switch at a parti-
cular position of the C1 stick. If you now move the stick
back towards idle, you will see that the switch symbol
changes again at around 80% of stick travel: between
the “idle position” and the switching point the switch
symbol is “open”, beyond this it is “closed” (“Control swit-
ches”: see pages 24 and 25.)
If you now return to the transmitter’s basic display to
check the system, you will see that the stopwatch and
fl ight timer start running when you move the stick past
the switching point in the direction of full-throttle, and
that the
stopwatch
halts again when you move the stick
back to the idle position.
When the stopwatch is halted, you can stop the fl ight ti-
mer by pressing
ESC
, and then reset both timers to their
Operating the timers using the C1 stick or a switch SW 1 … 7
Programming examples: Fixed-wing model
Summary of Contents for MX-16S
Page 1: ...1...
Page 17: ...17...
Page 31: ...31 Fixed wing models Installation and connections...
Page 35: ...35 Program description Reserving a new memory...
Page 47: ...47 Base settings Model helicopter...
Page 83: ...83 Fail safe...
Page 89: ...89 Programming examples Fixed wing model...
Page 109: ...109 Programming examples Model helicopter...
Page 112: ...112 112...
Page 116: ...116...


