104
Programming examples: model helicopter
In this programming example we assume that you have
already read and understood the descriptions of the in-
dividual menus, and are by now familiar with the ge-
neral handling of the transmitter. We also assume that
you have assembled and adjusted the helicopter exact-
ly according to the kit instructions. The electronic facili-
ties provided by the transmitter should never be used to
compensate for major mechanical inaccuracies.
As so often in life, there are various ways and means
of reaching a particular destination when programming
the mx-16s. In this example our intention is to provide
a sensibly structured course of action, so that you have
a clear idea of logical programming techniques. Where
there are several possible methods, we fi rst describe the
simplest and most easily understood solution. It is likely
that the helicopter will work perfectly when set up in this
way, but naturally you are still free to try out other soluti-
ons at a later stage, in case they suit you better.
As our programming example we take the GRAUPNER
STARLET 50 helicopter, with three swashplate linkage
points distributed evenly at 120°, a beginner’s set-up wi-
thout enhanced throttle curve, with no method of infl u-
encing the gyro from the transmitter, and with no speed
governor (regulator). We have deliberately chosen this
simple programming project in order to demonstrate that
it is possible to produce a helicopter which fl ies extreme-
ly well with relatively little programming effort.
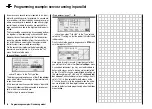
To initiate this sample programming exercise move to
the »
Model select
« menu, then to the sub-menu …
„Select model“
(page 36)
… where you select a empty model memory using the
right-hand rocker button:
A brief press of the
ENTER
or
SELECT
button ...
… selects the model type “Helicopter”. Confi rm your
choice by pressing
ENTER
or
SELECT
, and the screen
immediately switches to the basic display.
If the warning “Throttle too high” appears, move the col-
lective pitch stick to the minimum position – “forward” by
default – and the message will disappear. The next step
is to choose a name for the model memory you have se-
lected; the name is entered in the menu …
»Base settings«
(page 42 ... 46)
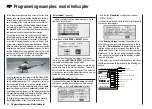
Once you have entered the “
Model name
” you should
check once more the base settings you have already
programmed, i.e. that the “
Stick
mode
” is correct, ...
... and that the “
Modulation
” matches your receiver
(“PPM” or “SPCM”).
In the next three lines we come to the fi rst settings which
are specifi c to helicopters:
In the “
Swashplate type
” line select the number of ser-
vos which are used to actuate the swashplate. In the se-
cond line – “
Rotor direction
” – we enter the direction of
rotation of the main rotor as viewed from above. In the
“
pitch min.
” line set “front” or “rear” to suit your personal
preference. It is vital that you do not change this setting
later, when you are programming the direction of collec-
tive pitch or throttle.
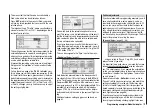
At this point, if you have not already done so, the servos
should be connected to the receiver in the following se-
quence:
Programming examples: Model helicopter
7
6
5
4
3
2
1
8/Ba
tt.
CRO-SUPERHET
6
FM
Best.-Nr.
7052
0-282/182-191
MHz/35MHz-B-Band
Made in Malaysia
S C A N
! #
Y-lead, Order No.
3936.11
or
3936.32
Battery
(Speed governor)
(Gyro gain)
Throttle servo (speed controller)
Free
Tail rotor servo (gyro system)
Roll 1 servo
Roll 2 servo
Pitch-axis servo
Summary of Contents for MX-16S
Page 1: ...1...
Page 17: ...17...
Page 31: ...31 Fixed wing models Installation and connections...
Page 35: ...35 Program description Reserving a new memory...
Page 47: ...47 Base settings Model helicopter...
Page 83: ...83 Fail safe...
Page 89: ...89 Programming examples Fixed wing model...
Page 109: ...109 Programming examples Model helicopter...
Page 112: ...112 112...
Page 116: ...116...


