79
when the fl aps are operated.
The fi rst step is to defi ne the
offset
(mixer neutral point):
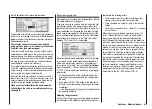
The dotted vertical line indicates the position of the mi-
xer neutral point (“offset”), i.e. that point along the con-
trol travel at which the mixer has no infl uence on the
channel connected to its output. By default this point is
set to the centre position.
However, in our example the neutral (retracted) positi-
on of the fl aps is located at the left-hand stop of the ro-
tary proportional control, and in this position the elevator
must not be affected. We therefore have to shift the mi-
xer neutral point exactly to that position. Turn the control
to the left-hand end-stop – if you have not already done
so, select
STO
using the right-hand rocker button, and
press
SELECT
. The dotted vertical line now moves to
this point – the new mixer neutral point – which always
retains the “OUTPUT” value of zero in accordance with
the mixer defi nition.
As it happens, this setting is diffi cult to show in a
screen shot, so we will change the “offset” value to
just -75%.
Note:
If you wish, you can move the mixer neutral point back to
centre by selecting
CLR
using the right-hand rocker but-
ton, and pressing
SELECT
.
tion.
Now we turn to the fi rst mixer on the screen on page 77,
which provides elevator trim correction. This is the mixer
6
ELE, to which switch 1 has been assigned:
Use the right-hand rocker button to move to the
symbol at bottom right of the screen. Pressing the
SE-
LECT
button now switches to the second screen page:
If this display does not appear, you have not activated
the mixer by operating the assigned external switch – in
this case “1”. To correct this, operate the switch:
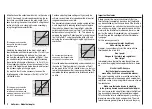
The solid vertical line in the graph represents the current
position of the transmitter control assigned to input 6.
(In the above graph this is located at the left-hand edge
because CTRL 7 is at its left-hand end-point, as alrea-
dy mentioned.) The solid horizontal line shows the mixer
ratio, which currently has the value zero over the whole
stick travel; this means that the elevator will not “follow”
Symmetrical mixer ratios
The next step is to defi ne the mixer values above and
below the mixer neutral point, starting from the current
position of the mixer neutral point. Select the
SYM
fi eld,
so that you can set the mixer value symmetrically relati-
ve to the offset point you have just programmed. Press
the
SELECT
button, then set the values in the two high-
lighted left-hand fi elds within the range -150% to +150%.
Remember that the set mixer value always refers to the
control signal! Setting a negative mixer value reverses
the direction of the mixer.
Pressing the
CLEAR
button erases the mixer ratio in the
highlighted fi eld.
The “optimum” value for our purposes will inevitably
need to be established through a fl ight testing program-
me.
Since we previously set the mixer neutral point to -75%
of control travel, the elevator (“ELE”) will already exhibit
a (slight) down-elevator effect at the neutral point of the
landing fl aps, and this, of course, is not wanted. To cor-
rect this we shift the mixer neutral point back to -100%
control travel, as described earlier.
Free mixers
Summary of Contents for MX-16S
Page 1: ...1...
Page 17: ...17...
Page 31: ...31 Fixed wing models Installation and connections...
Page 35: ...35 Program description Reserving a new memory...
Page 47: ...47 Base settings Model helicopter...
Page 83: ...83 Fail safe...
Page 89: ...89 Programming examples Fixed wing model...
Page 109: ...109 Programming examples Model helicopter...
Page 112: ...112 112...
Page 116: ...116...


