20
Description of transmitter – Using the system for the fi rst time
20
Preliminary notes
In its standard form the mx-16s is programmed to PPM
mode, and is therefore suitable for use with receivers of
the “FM-PPM” type. If you have purchased a standard
radio control set on the 35 or 40 / 41 MHz band, you can
immediately operate the supplied R16SCAN receiver in
this transmission mode.
The standard PPM mode of operation is supple-
mented by the SPCM mode, which is suitable for all
GRAUPNER/JR
receivers of the “smc” type.
The ability of the mx-16s transmitter to switch trans-
mission modes enables you to operate the unit with all
GRAUPNER
receiving systems supplied with PPM-FM
and SPCM transmitters on the 35 and 40 / 41 MHz fre-
quency bands.
For example, if you do not wish to use a “PPM” type re-
ceiver, the fi rst step is to change the modulation to suit
the type of receiver you wish to use. If you do not set
the transmitter correctly, the receiver simply will not
work with the transmitter. The transmission mode can be
changed in the »
Base settings
« menu (description: pa-
ges 38 and 42); the set mode only applies to the current
model memory.
Which crystals can you use?
The mx-16s requires no plug-in crystals. The transmissi-
on channel is selected by software: see later.
Battery charged?
When you take receipt of your transmitter, the battery
will be in the discharged state, so you must fi rst charge
it as described on pages 10 … 11. If you do not do this,
the battery will soon fall below the
pre-set threshold voltage, and you
will see and hear a warning signal
to remind you to recharge it.
Aerial fi tted?
Never switch the transmitter on unless the aerial is scre-
wed in. Even for prolonged testing you should always fi t
the aerial and extend it fully, otherwise the transmitter
may malfunction, with possible damage to the RF mo-
dule.
When you wish to control a model it is fundamentally es-
sential to screw the ten-section telescopic aerial into the
transmitter and extend it fully. Transmitter fi eld strength
is at a minimum in an imaginary line extending straight
out from the transmitter aerial. It is therefore fundamen-
tally misguided to “point” the transmitter aerial at the mo-
del with the intention of obtaining good reception.
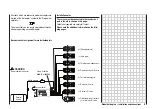
Switching the transmitter on / selecting a channel
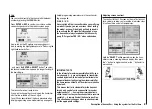
Every time you switch the transmitter on you must fi rst
confi rm to the integral synthesizer system that you wish
to use the set frequency. This takes the form of a secu-
rity query, intended to prevent you switching the system
on accidentally whilst set to the wrong channel. The soft-
ware asks you: “RF off / on”. The last set channel is initi-
ally highlighted (inverse video – black background) and
fl ashes:
If you wish to activate this channel, use the right-hand
rocker button to move the highlighted square to the
“
Yes
” response in the function bar …
… and press the
ENTER
or
SELECT
button.
If not, move to the
symbol at bottom right of the
screen. Press the
ENTER
or
SELECT
button to take
you to the Channel Select screen. The channels availab-
le at that point vary according to the RF module current-
ly fi tted:
Frequency band
Channels
35/35B MHz band
61 … 282, 182 … 191
40/41 MHz band
50 … 95, 400 ... 420
Note:
Channels 281 and 282 in the 35 MHz band, and all
channels in the 41 MHz band, are not approved for
use in Germany. Please refer to the frequency ta-
ble on page 113, which lists the channels valid in the
European continent at time of going to press (infor-
mation not guaranteed).
Use the right-hand rocker button to select the channel
you wish to use. However, please check before you do
this that no other model fl yer is operating a radio control
system on the channel you intend to use.
Using the system for the fi rst time
Channel selection
battery
needs
charging
Summary of Contents for MX-16S
Page 1: ...1...
Page 17: ...17...
Page 31: ...31 Fixed wing models Installation and connections...
Page 35: ...35 Program description Reserving a new memory...
Page 47: ...47 Base settings Model helicopter...
Page 83: ...83 Fail safe...
Page 89: ...89 Programming examples Fixed wing model...
Page 109: ...109 Programming examples Model helicopter...
Page 112: ...112 112...
Page 116: ...116...


