45
Once stopped, both timers can be reset to the initial va-
lue using
CLEAR
.
Switching between “count-up” and “count-down”
Count-up timer (stopwatch function)
If you assign a switch and start the stopwatch with the
initial value of “0:00”, the timer runs up until the maxi-
mum of 999 minutes and 59 seconds, then re-starts at
0:00.
Count-down timer (timer function)
You can use the left-hand
SEL
fi eld to select a starting
time within the range 0 to 180 minutes; using the right-
hand
SEL
fi eld the range is 0 to 59 seconds. Any combi-
nation of times can also be selected.
(
CLEAR
= „0“ or „00“.)
Procedure
1.
Select the
SEL
fi eld with the right-hand rocker button.
2. Press
SELECT.
3. Select the required time in the highlighted minutes
and seconds fi elds using the right-hand rocker but-
ton.
4. Press
SELECT
to conclude the input process.
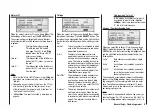
Once you have entered the settings described above,
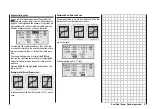
the set value is shown in the basic display (see pictu-
re in right-hand column), e.g. as 10:01 in min : sec. If the
display in the “Stop” line of the basic display does not
agree with your settings, press the
CLEAR
button.
When you operate the assigned switch, the stopwatch
now starts from the set initial value, counting down (“Ti-
mer function”). When the set time has elapsed, the ti-
mer does not stop, but continues to run to allow you to
read off the time elapsed after reaching zero. To make
this clear, the over-run time is shown highlighted (inver-
se video).
Sequence of sounds
30 sec. before zero: triple beep
single beep every two seconds
20 sec. before zero: double beep
single beep every two seconds
10 sec. before zero: single beep
single beep every second
5 sec. before zero: single beep every second at
higher
rate
zero: longer beep; display switches to
inverse video
The “alarm timer” is reset by pressing the
CLEAR
button
after you have halted the timer.
Note:
A count-down timer is indicated in the basic display by a
fl ashing colon (:) between the minutes fi eld and the se-
conds fi eld.
Base settings – Model helicoptert
Phase 2
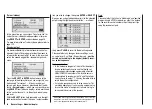
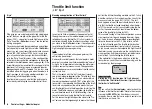
In the »phase 2« line you use the
SEL
fi eld to select
a suitable name from the six default names provided,
using the right-hand rocker button. You can also assign a
switch using the switch symbol at bottom right.
Autorotation
The name “autorotat.” is permanently assigned to Pha-
se 3, and cannot be altered. The only available option is
to assign a switch to it using the switch symbol at bottom
right of the screen.
For more information on programming the fl ight pha-
ses please refer to the »
Heli mixer
« section starting on
page 66.
Note:
The “autorotation” fl ight phase ALWAYS has precedence
over all other fl ight phases.
Summary of Contents for MX-16S
Page 1: ...1...
Page 17: ...17...
Page 31: ...31 Fixed wing models Installation and connections...
Page 35: ...35 Program description Reserving a new memory...
Page 47: ...47 Base settings Model helicopter...
Page 83: ...83 Fail safe...
Page 89: ...89 Programming examples Fixed wing model...
Page 109: ...109 Programming examples Model helicopter...
Page 112: ...112 112...
Page 116: ...116...

