SECTIO N 12
ELECTRICAL—BODY AND CHASSIS
CONTENTS OF THIS SECTION
Page
L ig h tin g S y s t e m ...................................................................................... 12-1
In s tru m e n ts and G auges . . . ..............................................................12-8
D ire c tio n a l S i g n a l s ............................................................................ ....12-16
W in d sh ie ld W ip e r and W a s h e r ....................................................... ... 12-17
LIGHTING SYSTEM
INDEX
Page
Sealed B e am U nit R e p la c e m e n t.................................................... 12-2
P a rk in g L a m p R e p la c e m e n t .......................................................... 12-2
R e a r L i g h t i n g ......................................................................................12-3
Page
M a rk e r, C le aran ce and Id e n tific a tio n ...........................................12-3
D ire c tio n a l Signal L a m p s ............................................................. ...12-3
W ip e r Switch R e p la c e m e n t................................................................12-3
L ig h t Switch R e p la c e m e n t ............................................................. ...12-3
N e u tra l Safety Switch R e p la c e m e n t ..............................................12-3
B acking L a m p Switch R e p l a c e m e n t ..............................................12-7
GENERAL DESCRIPTION
The lighting system includes the main light switch;
stop light, dimmer and backing lamp switches; head and
parking lamps; stop, tail, side marker, clearance and
identification lamps; instrument illumination, directional
signal and indicator lamps and the necessary wiring to
complete the various circuits.
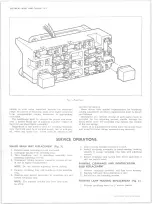
A bulkhead fuse panel (fig. 1) provides convenient power
taps and fuse clips for the appropriate curcuits. The
engine wiring harness and forward lamp harness con
nectors are bolted to the fuse panel.
All wiring systems not protected by fuses incorporate
a fusible link which provides increased overload protec
tion. The starting motor circuit is the exception.
Composite wiring diagrams are included at the end of
this section. The standardized color code is common to
all wiring harnesses. The wire covering color designates
a particular circuit usage.
M AIN TEN AN CE A N D ADJUSTMENTS
Maintenance of the lighting units and wiring system
consists of an occasional check to see that all wiring
connections are tight and clean, that the lighting units are
tightly mounted to provide good ground and that the head
lamps are properly adjusted. Loose or corroded connec
tions may cause a discharged battery, difficult starting,
dim lights, and possible damage to generator and regulator.
Wire harnesses must be replaced if insulation becomes
burned, cracked, or deteriorated. Whenever it is neces
sary to splice a wire or repair one that is broken, always
use solder to bond the splice. Always use rosin flux
solder on electrical connections. Use insulating tape to
cover all splices or bare wires.
When replacing wires, it is important that the correct
size by used. Never replace a wire with one of a smaller
size. Fusible links in the Chevrolet wiring are four
gauge sizes smaller than the cable it is designed to pro
tect. The links are marked on the insulation with wire
gauge size because of the heavy insulation which makes
the link appear a heavier gauge than it actually is.
Each harness and wire must be held securely in place
by clips or other holding devices to prevent chafing or
wearing away the insulation due to vibration.
By referring to the wiring diagrams, circuits may be
tested for continuous circuit or shorts with a conventional
test lamp or low reading volt meter.
HEADLAMP ADJUSTMENT— T-3 HEADLAMP (Fig. 2)
Headlamp Aiming
The headlamps must be properly aimed to obtain maxi
mum road illumination.
10-30 CHEVROLET TRUCK SERVICE MANUAL
Summary of Contents for 10 1971 Series
Page 1: ......
Page 96: ......
Page 100: ...10 30 CHEVROLET TRUCK SERVICE MANUAL Fig 4 10 30 Series Truck Frame FRAME 2 4 ...
Page 120: ......
Page 203: ...ENGINE 6 25 Fig 22L Engine Mounts 10 30 CHEVROLET TRUCK SERVICE MANUAL ...
Page 215: ...ENGINE 6 37 REAR M O U NT Fig 21V Engine Mounts 10 30 CHEVROLET TRUCK SERVICE MANUAL ...
Page 218: ......
Page 249: ......
Page 324: ......
Page 340: ......
Page 365: ...10 30 CHEVROLET TRUCK SERVICE MANUAL Fig 43 Power Steering Pump M ounting STEERING 9 25 ...
Page 368: ......
Page 386: ......
Page 390: ...ELECTRICAL BODY AND CHASSIS 12 4 10 30 CHEVROLET TRUCK SERVICE MANUAL ...
Page 391: ......
Page 428: ......
Page 432: ......
Page 449: ...SPECIFICATIONS 9 10 30 CHEVROLET TRUCK SERVICE MANUAL ...
Page 463: ......
Page 464: ......
Page 465: ......
Page 466: ......


