ELECTRICAL— BODY AND CHASSIS 12-16
Charging Systems under Engine Electrical, Section 6Y.
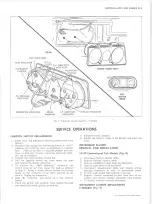
AMMETER G AU G E REPLACEMENT (Figs. 8,11,12,13)
Conventional Cab Models
1. Remove instrument cluster assembly and laminated
circuit as previously described in this section.
2. Remove terminal nuts retaining printed circuit to
gauge unit.
3. Remove three attaching screws, cover and gauge
assembly from cluster housing.
4. Remove terminal attaching nuts and gauge unit from
cover plate.
5. To install, reverse removal procedure and check
operation of unit.
DIRECTIONAL SIGNAL CONTROL
The directional signal switch is a self-contained unit
which incorporates the hazard warning switch and the
lane changing signal. The switch is one complete plastic
assembly and is serviced as a unit except for the spring
detent, yoke assembly and cancelling springs.
The hazard warning circuit is activated by a push-pull
switch which is located on the right side of the mast
jacket, opposite the directional signal lever. The switch
knob must be pulled to cancel circuit.
The lane changing circuit is activated by holding the
directional signal lever in the first detent position; there
is no lock in or cancelling device in this position.
DIRECTIONAL SIGNAL SWITCH REPLACEMENT
(Fig. 15)
1. Disconnect battery ground cable.
2. Remove steering wheel assembly (Refer to Steering
Section 9), preload spring and cancelling cam.
3. Remove shift lever roll pin and shift lever (if
applicable).
4. Remove directional signal lever retaining screw and
lever.
5. Push in hazard warning knob.
NOTE:
Hazard switch knob must be pushed in to
prevent damage to switch when removing from
switch cover.
6. Disconnect switch wiring from chassis harness at
multiple connector under instrument panel.
Fig. 15— Directional Signal Assembly - Conv. Cab & P Series
1. C an cellin g Cam
6. Bearing Support
2. Directional Lever Retaining Screw
7. Switch Cover
3. Switch Mounting Screw
8. Lever Arm
4. Switch
9. Washer
5. Upper Bearing
10. Wiring Connector
10-30 CHEVROLET TRUCK SERVICE MANUAL
Summary of Contents for 10 1971 Series
Page 1: ......
Page 96: ......
Page 100: ...10 30 CHEVROLET TRUCK SERVICE MANUAL Fig 4 10 30 Series Truck Frame FRAME 2 4 ...
Page 120: ......
Page 203: ...ENGINE 6 25 Fig 22L Engine Mounts 10 30 CHEVROLET TRUCK SERVICE MANUAL ...
Page 215: ...ENGINE 6 37 REAR M O U NT Fig 21V Engine Mounts 10 30 CHEVROLET TRUCK SERVICE MANUAL ...
Page 218: ......
Page 249: ......
Page 324: ......
Page 340: ......
Page 365: ...10 30 CHEVROLET TRUCK SERVICE MANUAL Fig 43 Power Steering Pump M ounting STEERING 9 25 ...
Page 368: ......
Page 386: ......
Page 390: ...ELECTRICAL BODY AND CHASSIS 12 4 10 30 CHEVROLET TRUCK SERVICE MANUAL ...
Page 391: ......
Page 428: ......
Page 432: ......
Page 449: ...SPECIFICATIONS 9 10 30 CHEVROLET TRUCK SERVICE MANUAL ...
Page 463: ......
Page 464: ......
Page 465: ......
Page 466: ......


