7
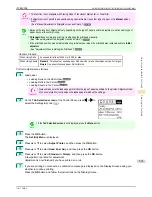
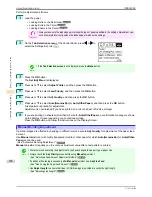
Press
▲
or
▼
to select
Manual
, and then press the
OK
button.
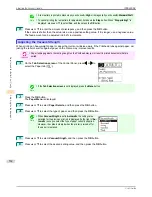
A test pattern is printed for adjustment.
Note
•
Manual
may be unavailable in some cases, even if it is displayed in the menu.
If so, execute
Standard
once.
(See "Automatic Adjustment to Straighten Lines and Colors.")
➔
P.520
8
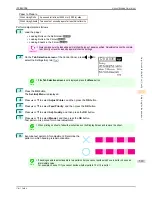
Press
▲
or
▼
to select
D
, and then press the
OK
button.
9
Press
▲
or
▼
to select
D-1
, and then press the
OK
button.
10
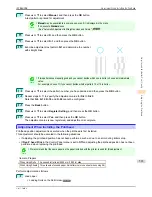
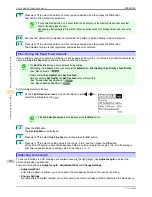
Examine adjustment test pattern
D-1
and determine the number
with straight lines.
Note
•
If two patterns seem equally good and you cannot decide which one is better, choose an intermediate
value.
For example, choose 11 if you cannot decide whether pattern 10 or 12 is better.
11
Press
▲
or
▼
to select the pattern number you have decided, and then press the
OK
button.
12
Repeat steps 9–11 to specify the adjustment value for
D-2
to
D-23
.
Note that
D-6
,
D-12
,
D-18
, and
D-24
cannot be configured.
13
Press the
Back
button.
14
Press
▲
or
▼
to select
Register Setting
, and then press the
OK
button.
15
Press
▲
or
▼
to select
Yes
, and then press the
OK
button.
The adjustment value is now registered, and adjustment is complete.
Adjustment When Installing the Printhead
Adjustment When Installing the Printhead
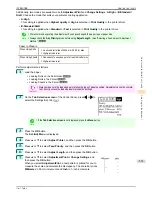
Printhead position adjustment is executed when the printhead is first installed.
This adjustment should be executed in the following situations.
•
If adjusting the printhead position has not been performed such as due to an error during initial setup
•
If
Rep.P.head Print
in the Control Panel menu is set to
Off
and adjusting the printhead position has not been
performed when replacing the printhead
Note
•
We recommend that the same paper as the paper included with the printer is used for this adjustment.
Items to Prepare
When Using Rolls
An unused roll at least 254.0 mm (10.00 in) wide
When Using Sheets Three sheets of unused paper, A4/Letter size (or one sheet when using A3)
Perform adjustment as follows.
1
Load paper.
•
Loading Rolls on the Roll Holder
➔
P.337
iPF8400SE
Adjustment When Installing the Printhead
User's Guide
Adjustments for Better Print Quality
Adjusting the Printhead
523
Summary of Contents for iPF8400SE imagePROGRAF
Page 14: ...14 ...
Page 28: ...iPF8400SE User s Guide 28 ...
Page 246: ...iPF8400SE User s Guide 246 ...
Page 426: ...iPF8400SE User s Guide 426 ...
Page 460: ...iPF8400SE User s Guide 460 ...
Page 518: ...iPF8400SE User s Guide 518 ...
Page 578: ...iPF8400SE User s Guide 578 ...
Page 608: ...iPF8400SE User s Guide 608 ...
Page 641: ...iPF8400SE WEEE Directive User s Guide Appendix Disposal of the product 641 ...
Page 642: ...WEEE Directive iPF8400SE User s Guide Appendix Disposal of the product 642 ...
Page 643: ...iPF8400SE WEEE Directive User s Guide Appendix Disposal of the product 643 ...
Page 644: ...WEEE Directive iPF8400SE User s Guide Appendix Disposal of the product 644 ...
Page 645: ...iPF8400SE WEEE Directive User s Guide Appendix Disposal of the product 645 ...
Page 646: ...WEEE Directive iPF8400SE User s Guide Appendix Disposal of the product 646 ...
Page 647: ...iPF8400SE WEEE Directive User s Guide Appendix Disposal of the product 647 ...
Page 648: ...WEEE Directive iPF8400SE User s Guide Appendix Disposal of the product 648 ...

