Manual for VMP300-based instruments
35
2)
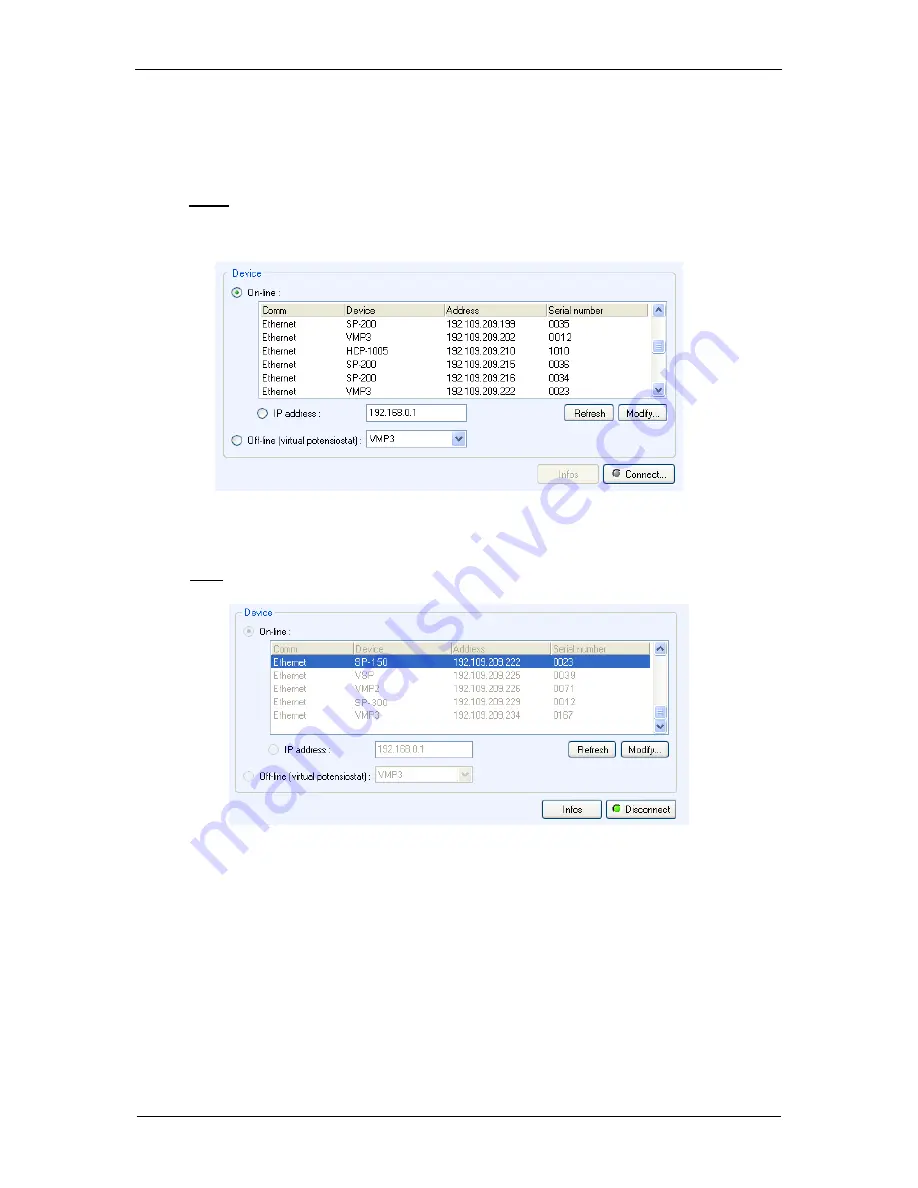
In the “device” frame, all the instruments available (connected by USB, direct Ethernet
or through a LAN) are displayed.
The window shown in Fig. 40
below appears. Click on “
Refresh
” to see the instruments
present on your network.
Note:
The automatic search frame shows the name of the instruments detected with
their serial numbers (#). A MAC address is given to each instrument at the factory. The
MAC address is used to detect the instrument in a LAN even if its IP Address is not
valid in the network. It is also used for the detection of instruments connected by USB.
Fig. 40: Device connection window.
3)
Select the instrument of interest and click on the “
Select
” button.
Note: If the IP address of the instrument is not valid, it has to be changed (see next
section).
Fig. 41: Device connection window (selected instrument).
4)
Click on “
Connec
t”. The “
Connect
” button turns into a “
Disconnect
” button and
becomes green to show the connection has been established.
4.3.1 IP address modification of the instrument
If the Ethernet connection requires changing the instrument’s IP address, select the instrument
and click on “
Modify
”. The following window appears:
Summary of Contents for HCV-3048
Page 2: ......
Page 97: ...Manual for VMP300 based instruments 89...
Page 98: ...Manual for VMP300 based instruments 90 The next steps are similar to the in built boosters...
Page 114: ...Manual for VMP300 based instruments 106 12 EC declaration of conformity 12 1 SP 200...
Page 115: ...Manual for VMP300 based instruments 107 12 2 SP 240 SP 300...
Page 116: ...Manual for VMP300 based instruments 108 12 3 VSP 300 12 3 1 Horizontal VSP 300...
Page 117: ...Manual for VMP300 based instruments 109 12 3 2 Vertical VSP 300...
Page 118: ...Manual for VMP300 based instruments 110 12 4 VMP 300...
Page 119: ...Manual for VMP300 based instruments 111 12 5 HCV 3048...


