10.
Align the tractor holes with the front and rear guide pins.
11.
Move the
Splice Lever
to the "Splice" position to turn on the splicing table
vacuum. You see the 0782
SPLICE LEVER IN SPLICING POSITION
message.
Note:
When the splicing table vacuum is on, you should hear a hissing sound
and feel suction if you put your finger on the tape slot.
12.
If you are splicing fan-fold forms, move the box of fan-fold forms into the
forms input area.
13.
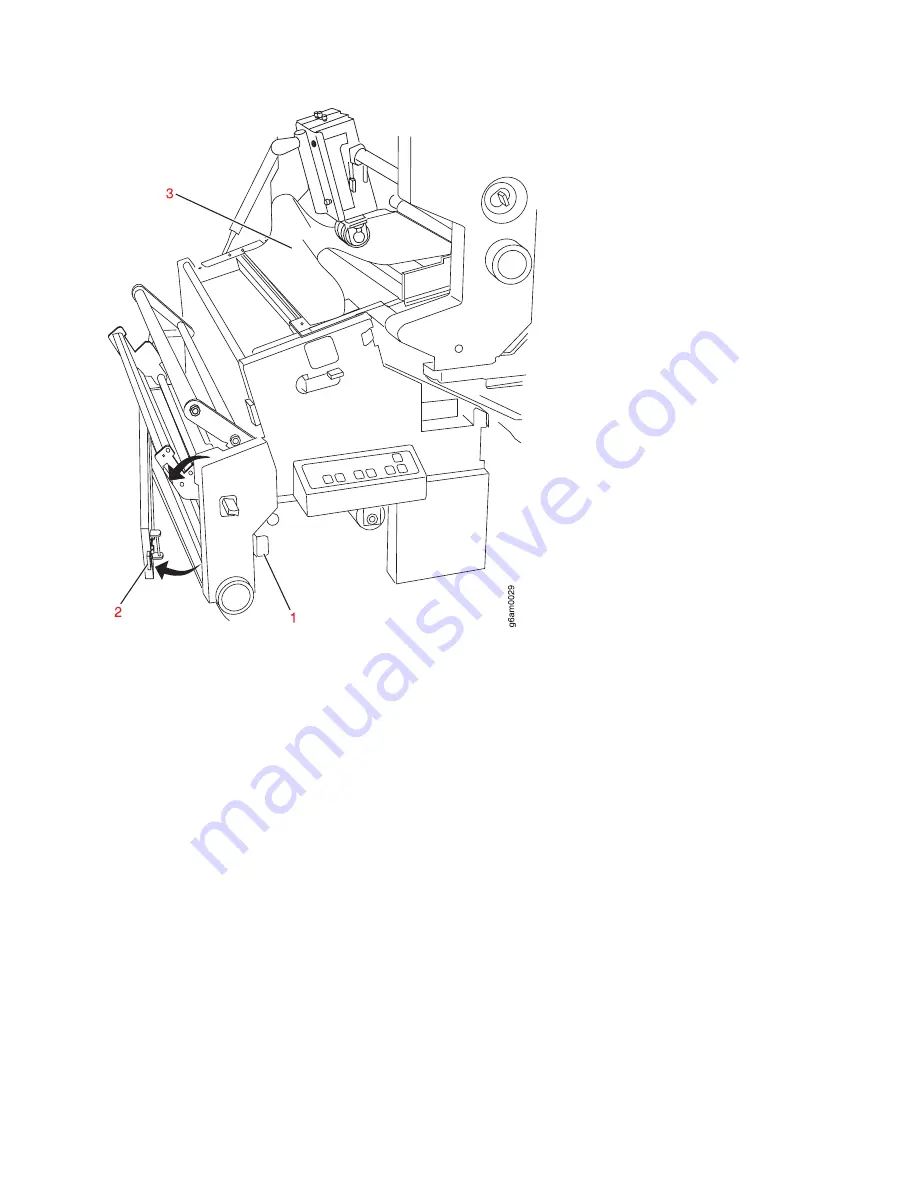
Open the tension gate by pushing in
(1)
and pulling out on
(2)
(see Figure 58).
14.
Thread the new forms to be spliced as shown in the threading diagram on the
printer. See “Paper paths” on page 70 for detailed instructions on threading
forms through the paper path.
Note:
Tractored forms must be spliced at a perforation that is centered
between tractor holes. Ensure that the fold direction of the new forms is the
same as the fold direction of the currently-loaded forms. If necessary, tear off a
page of the new forms.
15.
Move the new forms into position. Align the leading edge of the new forms
with the center of the splicing table tape slot. Align the tractor holes with the
front and rear guide pins.
16.
Close the tension gate.
Figure 58. Tension gate
Chapter 5. Working with forms
153
Содержание InfoPrint 4100 TD3
Страница 1: ...Operating the InfoPrint 4100 InfoPrint 4100 Models TS2 TD3 4 TS3 and TD5 6 S550 1298 02...
Страница 2: ......
Страница 3: ...Operating the InfoPrint 4100 InfoPrint 4100 Models TS2 TD3 4 TS3 and TD5 6 S550 1298 02...
Страница 8: ...vi Operating the InfoPrint 4100...
Страница 12: ...x Operating the InfoPrint 4100...
Страница 14: ...xii Operating the InfoPrint 4100...
Страница 60: ...46 Operating the InfoPrint 4100...
Страница 90: ...6 Open the lower tractor covers on the transfer station g5amc377 1 1 2 3 4 76 Operating the InfoPrint 4100...
Страница 97: ...2 Swing the roller 3 into the open position by pressing down on 1 and 2 Chapter 5 Working with forms 83...
Страница 107: ...4 Open the lower tractor covers on the transfer station ic3mc335 2 4 3 1 Chapter 5 Working with forms 93...
Страница 127: ...2 Swing the roller 3 into the open position by pressing down on 1 and 2 Chapter 5 Working with forms 113...
Страница 140: ...2 Swing the roller 3 into the open position by pressing down on 1 and 2 126 Operating the InfoPrint 4100...
Страница 268: ...254 Operating the InfoPrint 4100...
Страница 360: ...346 Operating the InfoPrint 4100...
Страница 407: ...Administrator panel Chapter 8 Help topics for the InfoPrint 4100 operator console 393...
Страница 408: ...394 Operating the InfoPrint 4100...
Страница 461: ......
Страница 462: ...Program Number 5765 G79 5765 G74 Printed in USA S550 1298 02...


