Hotline: +49 5251 688865-99
Hotline: +49 5251 688865-99
Hotline: +49 5251 688865-99
Hotline: +49 5251 688865-99
Hotline: +49 5251 688865-99
. Operating Manual grandMA Version 5.4
39
39
39
39
39
2.9.5 P
2.9.5 P
2.9.5 P
2.9.5 P
2.9.5 PathP
athP
athP
athP
athPort DMX-ETHERNET
ort DMX-ETHERNET
ort DMX-ETHERNET
ort DMX-ETHERNET
ort DMX-ETHERNET-CONFIGURA
-CONFIGURA
-CONFIGURA
-CONFIGURA
-CONFIGURATION
TION
TION
TION
TION
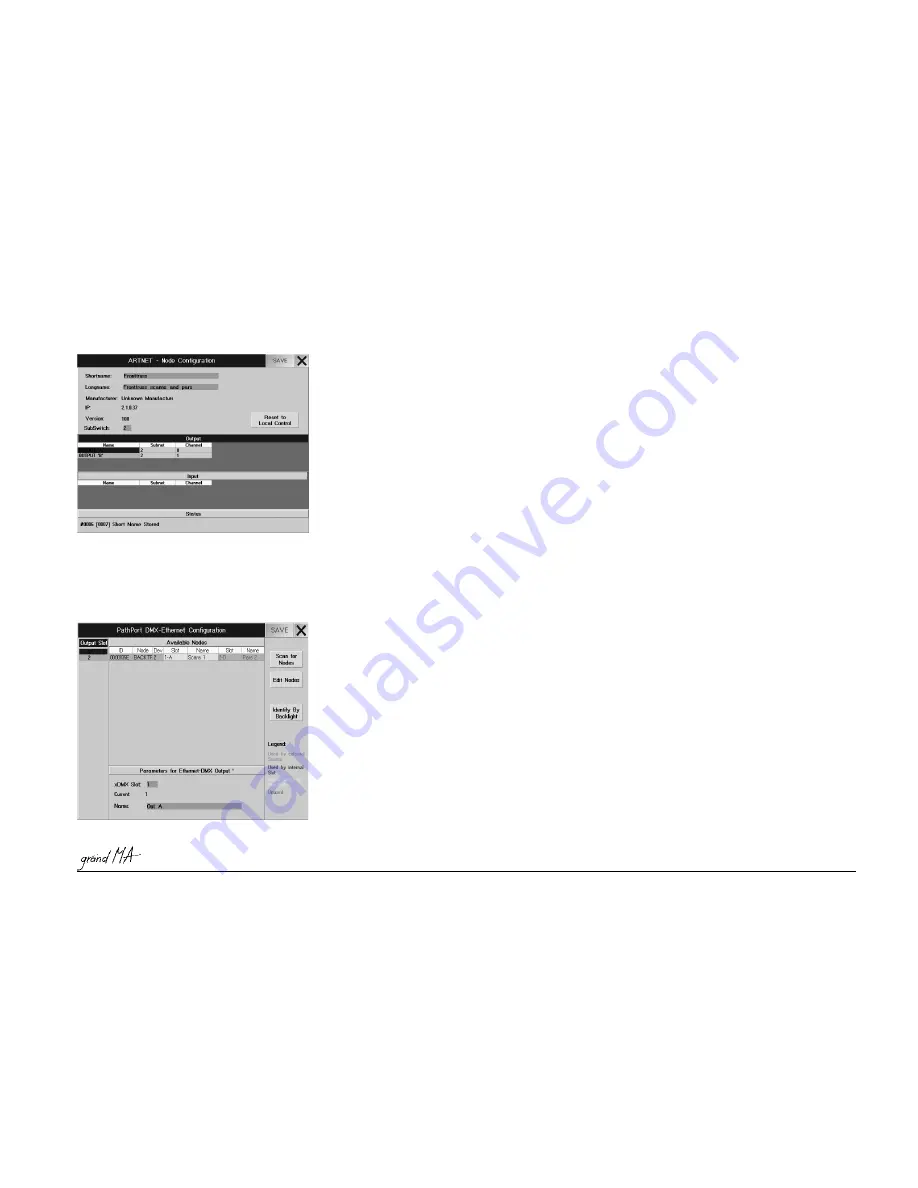
You can call up this menu by pressing a button in the CONFIGURATION column, if the PathPort protocol has been
selected.
Up to 64 DMX outputs can be triggered via the PathPort nodes. The IP address has to be adapted to
the PathPorts Ethernet-DMX converter, something you can also do via the grandMA. PATHPORT - Node
Configuration, next page
If PathPort Ethernet-DMX converter s are connected, they will be looked for when you call up this menu, and they
are displayed in the table (only, if the first 3 digits of the IP address of grandMA and PathPort Ethernet-DMX
the
Scan for Nodes
Scan for Nodes
Scan for Nodes
Scan for Nodes
Scan for Nodes
key to insert the converter in the chart, if one is found.
In the left chart, all converters found will be displayed with the respectively set address for each DMX OUTPUT. The
number in front of the colon is the SUBNET address, the number following is the address for the DMX OUTPUT.
Choose an address for the DMX OUTPUT.
In the right chart, one line is displayed for each converter. The selected DMX OUTPUT will be displayed on a green
background.
If an output is displayed on a red background, this indicates that it is already being assigned and can not be used.
Pressing the
Save
Save
Save
Save
Save
button will save all modifications.
Press the key X. Now, the converter for this DMX port is configured and the menu will be closed.
For the „DMX Hub“ from the Artistic Licence Company, this button must be on „Delayed Output“, for all other units,
this setting is not relevant.
If further ports are to be assigned, repeat all steps. When all settings are completed, press the SAVE key in the
DMX-OUTPUT CONFIGURATION menu. The modified settings are now stored. Now, the blue ACTIVE LED at the
assigned DMX converter is on and the DMX outputs can be used. When at the node data is received, the red LED is
on.
Artnet - Node Configuration:
First, choose a DMX converter to be edited in the table.
Pressing the
Edit Nodes
Edit Nodes
Edit Nodes
Edit Nodes
Edit Nodes
button for this Ethernet-DMX converter will open the menu.
As Shortname and Longname, you can enter any name for this converter.
The IP address of the grandMAs does not have to be adapted to this IP address here.
For Manufacturer, IP and version, only internal data from the converter will be displayed.
For SubSwitch, the DMX converter SubNet number can be changed. This change will overwrite the settings in the
converter.
In the
Output
Output
Output
Output
Output
table, the available DMX outputs of the Ethernet-DMX converters will be displayed.
In the
Input
Input
Input
Input
Input
table, the available DMX inputs of the Ethernet-DMX converters will be displayed (DMX input
two
pages earlier).
In the tables, you can adjust the SubNet and Channel addresses for every DMX output or input. This change will
overwrite the settings in the Ethernet-DMX converter.
By pressing the
Reset to Local Control
Reset to Local Control
Reset to Local Control
Reset to Local Control
Reset to Local Control
button, the Ethernet-DMX converter will be reset to its standard
setting (Defaults).
Pressing the
Save
Save
Save
Save
Save
button will save the modifications.
By pressing the
XXXXX
button, you will leave this menu.


