


© 2016 MA Lighting T e chno lo gy Gm bH | Da chde ck e rstr. 16 | D-97297 W a ldbütte lbrunn | Ge rm a ny
P ho ne +49 5251 688865-27 | suppo rt (a t) m a -do t2.co m | www.m a lighting.co m
1 of 1
But the selection order is also important. Press
Clear
once and then do the following:
1
Thru
1
2
At
1
0
Thru
1
0
0
Please
, this will do a nice spread of values with fixture one on
10% and fixture 12 at 100%. But let's try something else. Press
Clear
two times and then do the following:
1
2
Thru
1
At
1
0
Thru
1
0
0
Please
, then the spread is reversed. Now fixture 12 is at 10% and
fixture one in on 100%.
We selected the fixtures in the reverse order and then applied the same range of values.
If you use the screen to select the fixtures in a random order (you might need to press
Clear
first) and then do the
At
1
0
Thru
1
0
0
Please
, you'll see how the values are distributed.
So, selection order matters.
Attribute control
There's two more ways to change the value, that I want to tell you about.
If you have pressed clear, then please select fixture 1 to 10 again.
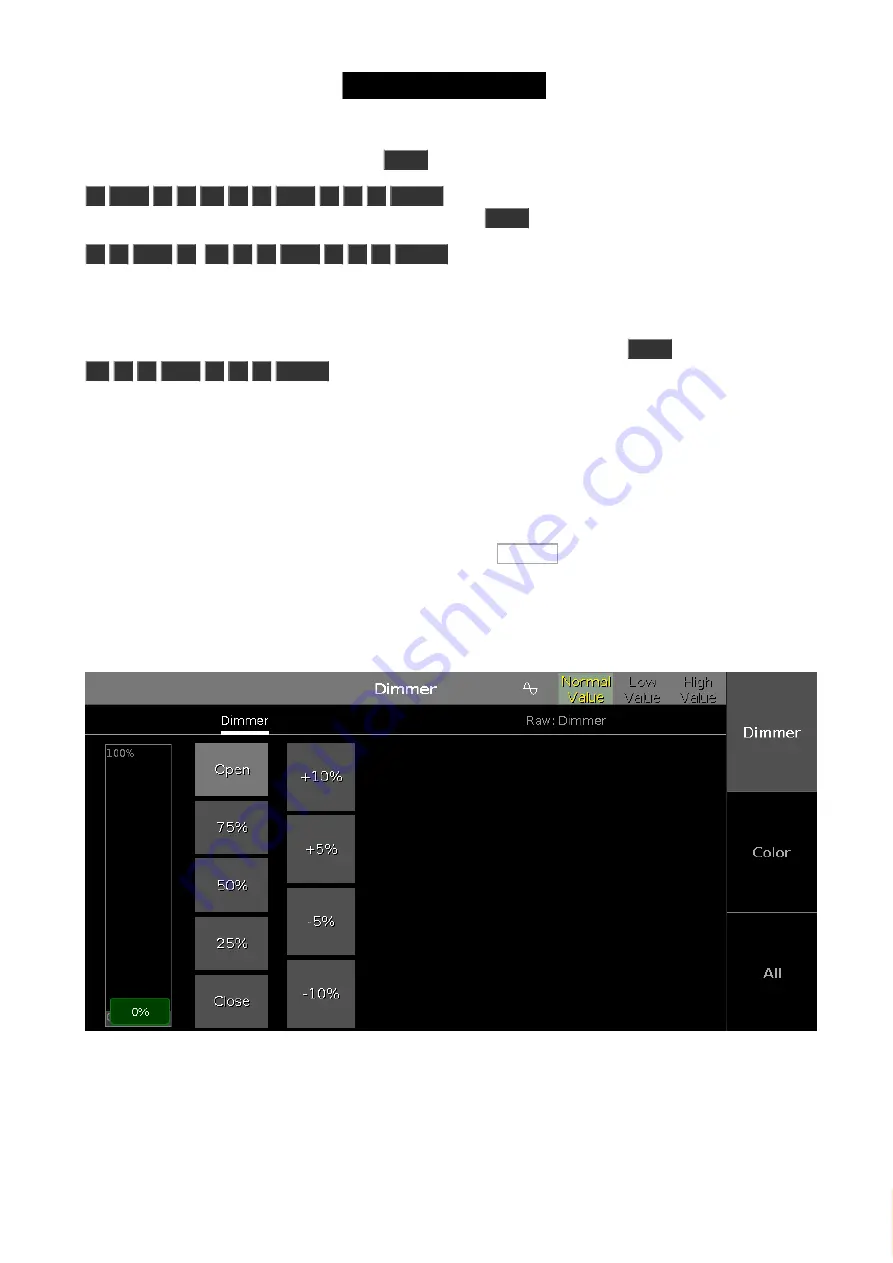
Now on the right side of screen 1 you need to press where it says Dimmer .
This opens a view that allows us to do more. This becomes very useful in the future when we add more complex
fixtures. This is called Preset Type view. We'll talk more about preset types later.
This is how it looks for the dimmer:
Figure 3: Attribute control
Here you'll have some predefined dimmer values that you can select and change the values in plus and minus 5%
and 10% intervals. You can see that the slider follows the values, and you can use the slider to set a value.
Notice that you can now also use the leftmost encoder to change the dimmer value.
27
Содержание dot2 XL-F
Страница 1: ...Version 1 2 2016 05 25 English...


