


© 2016 MA Lighting T e chno lo gy Gm bH | Da chde ck e rstr. 16 | D-97297 W a ldbütte lbrunn | Ge rm a ny
P ho ne +49 5251 688865-27 | suppo rt (a t) m a -do t2.co m | www.m a lighting.co m
1 of 1
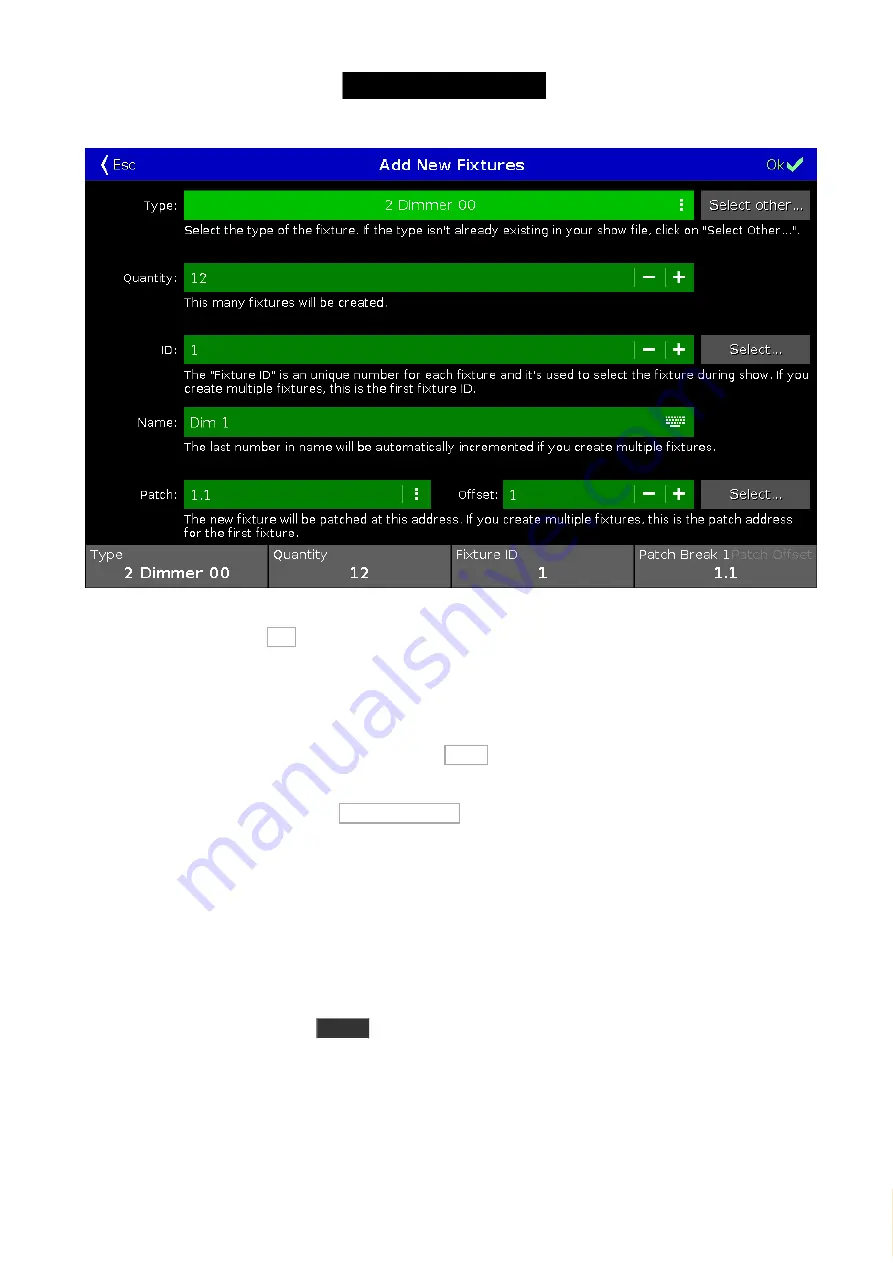
Figure 2: The dimmer settings.
OK, we are happy. Press the OK in the upper right corner.
This will now displays the
Fixture Setup view
(and now with fixtures in it). You can use the rightmost encoder to
scroll through the list. If you done it right, then you'll have 12 dimmers with ID numbers '1' to '12' and patched from
address '1.001' to '1.012'.
Now press the upper right corner again - this time it says Done .
You are now asked to confirm that you are leaving the patch and fixture schedule and you are asked what should
happen. We want to press where it says Apply All Changes .
That's it, we have added 12 dimmers to our show - please save your show. In the next chapter we are going to look
at ways to control these dimmers.
3.5. Getting Started Guide - Selecting and controlling dimmers
So, we got our 12 dimmers patched and ready. In the console they are identified as fixtures. All fixtures should have
a unique fixture ID that allows you to select each of them individually.
Let's have a look at them. Press the
Fixture
key on the console.
Your screen 1 should now have a Fixtures view that looks like this:
24
Содержание dot2 XL-F
Страница 1: ...Version 1 2 2016 05 25 English...


