3-25
Preparation before Use > Registering Destinations in the Address Book
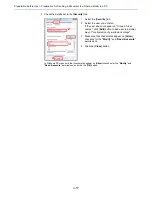
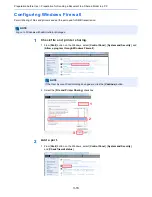
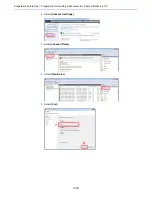
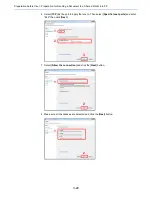
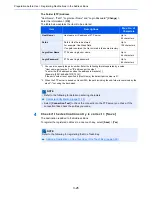
The Folder (FTP) Address
"Host Name", "Path", "Login User Name" and "Login Password" [
Change
] >
Enter the information > [
OK
]
The table below explains the items to be entered.
4
Check if the destination entry is correct > [Save]
The destination is added to the Address Book.
To register the registered address in a one-touch key, select [
Save
] > [
Yes
]
Item
Descriptions
Max. No. of
Characters
Host Name
*1
*1 You can also specify the port number. Enter the following format separated by a colon.
"Host name: port number" or "IP address: port number"
To enter the IPv6 address, enclose the address in brackets [ ].
(Example: [2001:db8:a0b:12f0::10]:21)
If the port number is not specified in [Host Name], the default port number is 21.
Host name or IP address of FTP server
Up to
64 characters
Path
*2
*2 When the FTP server is based on Linux/UNIX, the path including the sub-folder is combined by the
slash "/" not using the back-slash.
Path for the file to be stored
For example: User\ScanData
If no path is entered, the file is stored in the home directory.
Up to
128 characters
Login User Name
FTP server login user name
Up to
64 characters
Login Password
FTP server login password
Up to
64 characters
NOTE
• Refer to the following for details on entering characters.
Character Entry Method (page 11-10)
• Select [
Connection Test
] to check the connection to the FTP server you chose. If the
connection fails, check the entries you made.
NOTE
Refer to the following for registering the One Touch Key.
Adding a Destination on One Touch Key (One Touch Key) (page 3-29)
Содержание TASKalfa 356ci
Страница 1: ...OPERATION GUIDE q PRINT q COPY q SCAN q FAX TASKalfa 356ci TASKalfa 406ci ...
Страница 461: ...10 20 Troubleshooting Regular Maintenance 3 Empty the Punch Waste Box 4 Install the Punch Waste Box 5 Close the cover ...
Страница 463: ...10 22 Troubleshooting Regular Maintenance 4 Install the Punch Waste Box 5 Close the cover ...
Страница 498: ...10 57 Troubleshooting Clearing Paper Jams 4 Remove any jammed paper 5 Push Right Cover 2 and Cassette 3 back in ...
Страница 504: ...10 63 Troubleshooting Clearing Paper Jams 8 Remove any jammed paper 9 Push Right Cover 1 ...
Страница 564: ......

