3-22
Preparation before Use > Registering Destinations in the Address Book
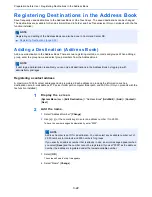
Registering Destinations in the Address Book
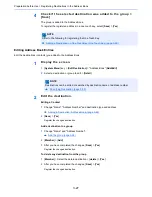
Save frequently used destinations to the Address Book or One Touch Keys. The saved destinations can be changed.
The destinations are available for Send as E-mail, Send to Folder, and Fax Transmission (Only on products with the fax
function installed).
Adding a Destination (Address Book)
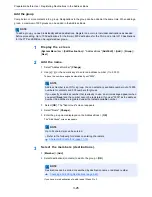
Add a new destination to the Address Book. There are two registering methods, contacts and groups. When adding a
group, enter the group name and select group members from the Address Book.
Registering a contact address
A maximum of 2,000 contact addresses can be registered. Each address can include the information such as
destination name, E-mail address, FTP server folder path, computer folder path, and FAX No. (Only on products with the
fax function installed).
1
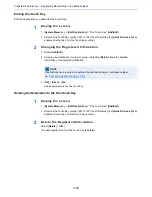
Display the screen.
[
System Menu
] key > [
Edit Destination
] > "Address Book" [
Add/Edit
] > [
Add
] > [
Contact
] >
[
Next
]
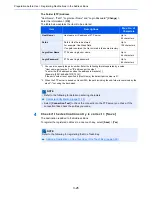
2
Add the name.
1
Select "Address Number" [
Change
].
2
Use [
+
] / [
-
] or the numeric keys to enter an address number (1 to 2500).
To have the number assigned automatically, enter "0000".
3
Select [
OK
].
The screen shown in step 1 reappears.
4
Select "Name" [
Change
].
NOTE
Registering and editing of the Address Book can also be done in Command Center RX.
Registering Destinations (page 2-59)
NOTE
If user login administration is enabled, you can only edit destinations in the Address Book by logging in with
administrator privileges.
NOTE
Address Number is an ID for a destination. You can select any available number out of
2,000 numbers for contacts and 500 numbers for groups.
If you specify an address number that is already in use, an error message appears when
you select [
Save
] and the number cannot be registered. If you set "0000" as the address
number, the address is registered under the lowest available number.
Содержание TASKalfa 356ci
Страница 1: ...OPERATION GUIDE q PRINT q COPY q SCAN q FAX TASKalfa 356ci TASKalfa 406ci ...
Страница 461: ...10 20 Troubleshooting Regular Maintenance 3 Empty the Punch Waste Box 4 Install the Punch Waste Box 5 Close the cover ...
Страница 463: ...10 22 Troubleshooting Regular Maintenance 4 Install the Punch Waste Box 5 Close the cover ...
Страница 498: ...10 57 Troubleshooting Clearing Paper Jams 4 Remove any jammed paper 5 Push Right Cover 2 and Cassette 3 back in ...
Страница 504: ...10 63 Troubleshooting Clearing Paper Jams 8 Remove any jammed paper 9 Push Right Cover 1 ...
Страница 564: ......


