


7.
On the
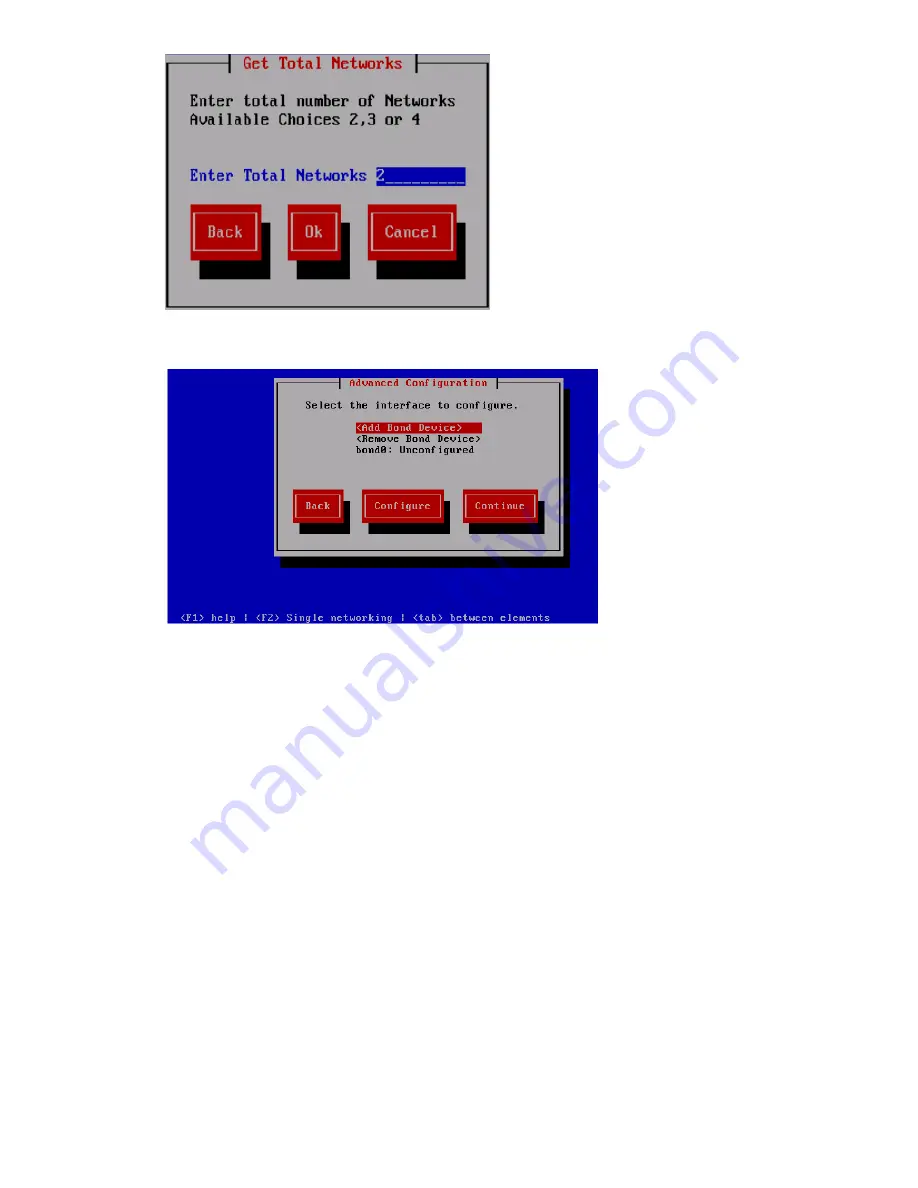
Advanced Configuration
screen, select a bond interface.
8.
On the
Advanced Configuration
screen, do one of the following:
•
To change the number of networks, select
Back
to return to
Step 6
.
•
To configure bond mode, select
Configure
, and then go to
Step 9
.
•
To add a bonded interface, select
Continue
, and then go to
Step 10
•
To return to the
Network Configuration
screen, press
F2
, and then return to
Step 5
.
9.
Select the appropriate bond mode from the
Edit Bond Mode
screen by using the
UP
and
DOWN
arrow keys or the
Tab
key on your keyboard, and then select
Ok
.
•
Mode=1 (Default)
: Use this mode to direct all network traffic to one port. Remaining ports
act as a backup, if the designated port fails. Use this option if only a few ports exist in
the network, and the primary intent is to avoid configuration conflicts.
•
Mode=4 (Recommended)
: Use this option to balance network traffic across multiple ports.
To use this option, an Ethernet switch configuration is required.
•
Mode=6 (Optional)
: Use this option to balance network traffic across all ports and cause
traffic to a given client to be directed to one port. This option is recommended if the switch
cannot be configured.
210
Expanding an existing HP StoreAll Storage system using the Setup Wizard
Содержание StoreAll 8200
Страница 40: ...40 Setting up and installing HP StoreAll hardware ...
Страница 80: ...Procedure 2 80 Installing the HP StoreAll OS Software and configuring the HP StoreAll Storage system ...
Страница 206: ...206 Creating an IMG file from an ISO in Windows ...
Страница 219: ...Expanding an HP StoreAll Storage 8800 9320 10 GbE cluster with an HP StoreAll 9730 module 219 ...