


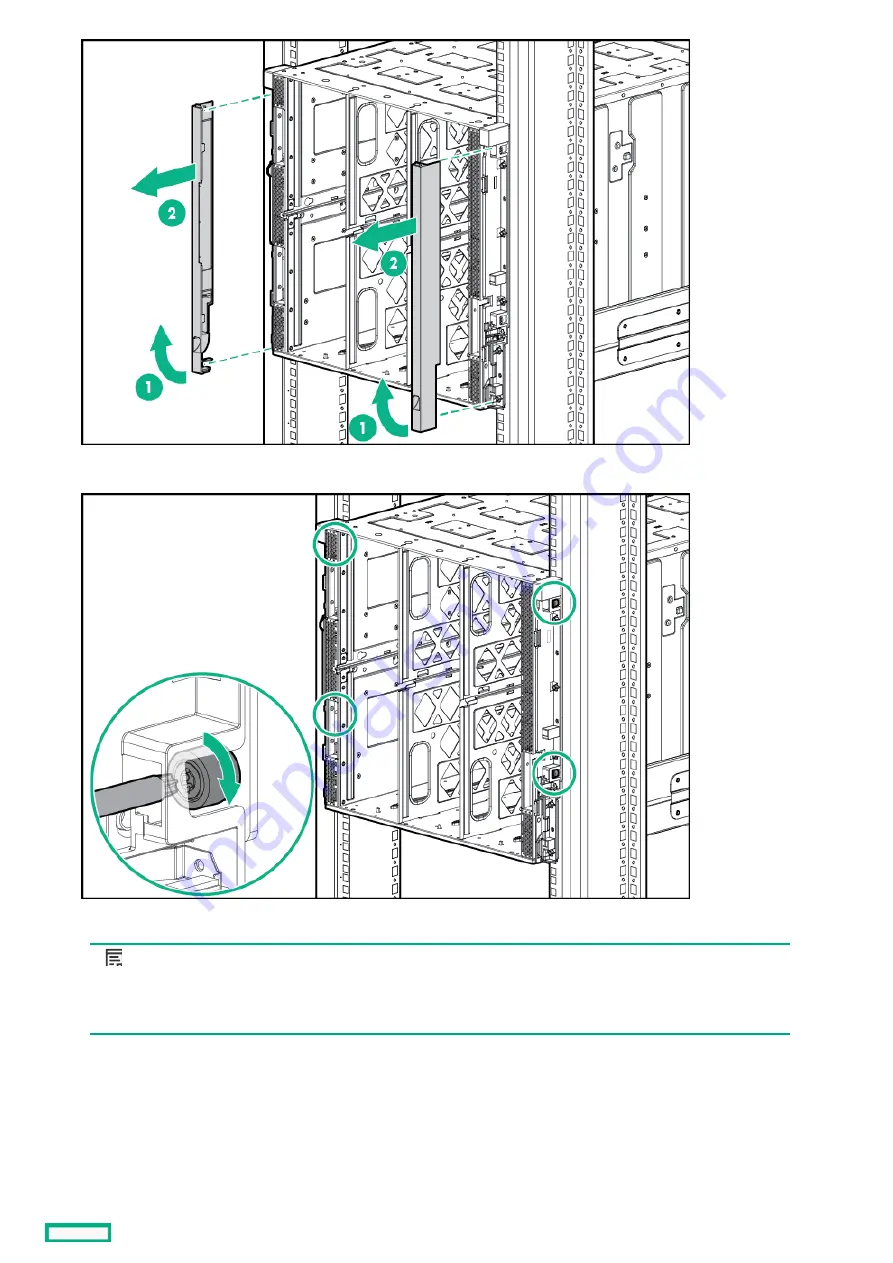
6. Tighten the thumbscrews with a T-25 Torx screwdriver to secure the frame to the rack.
7. Repeat the procedure for the remaining frames.
NOTE:
NOTE: Up to four 10U frames can be installed in a 42U rack. If you are installing more than one frame, install the
first frame in the bottom of the rack, and then install additional frames by moving up the rack with each subsequent
frame. Plan rack installation carefully because it is difficult to change the location of components after they are
installed.
Installing the frame into the rack
78
Содержание HPE Synergy 12000 Frame
Страница 7: ...Planning the installation Planning the installation 7 ...
Страница 23: ...Component and LED identification Component and LED identification 23 ...
Страница 25: ...Information pull tabs 25 ...
Страница 29: ...Figure 5 Optional horizontal half shelf Device bay partitions 29 ...
Страница 33: ...Appliance bay numbering Appliance bay numbering 33 ...
Страница 67: ...Installation Installation 67 ...
Страница 85: ...Installing a device bay shelf 85 ...
Страница 98: ...Installing drives in the storage module 98 ...
Страница 101: ...Installing interconnect modules 101 ...
Страница 119: ...Installing the DC power grounding kit with bracket 119 ...
Страница 122: ...Configuring HPE Synergy Configuring HPE Synergy 122 ...
Страница 124: ...HPE Synergy Console connections HPE Synergy Console connections 124 ...
Страница 149: ...Troubleshooting Troubleshooting 149 ...
Страница 157: ...Shift Insert Paste selected text Keyboard shortcut Action HPE Synergy Console icons 157 ...
Страница 175: ...Support and other resources Support and other resources 175 ...


