Troubleshooting
Phaser 6121MFP Multifunction Printer
User Guide
197
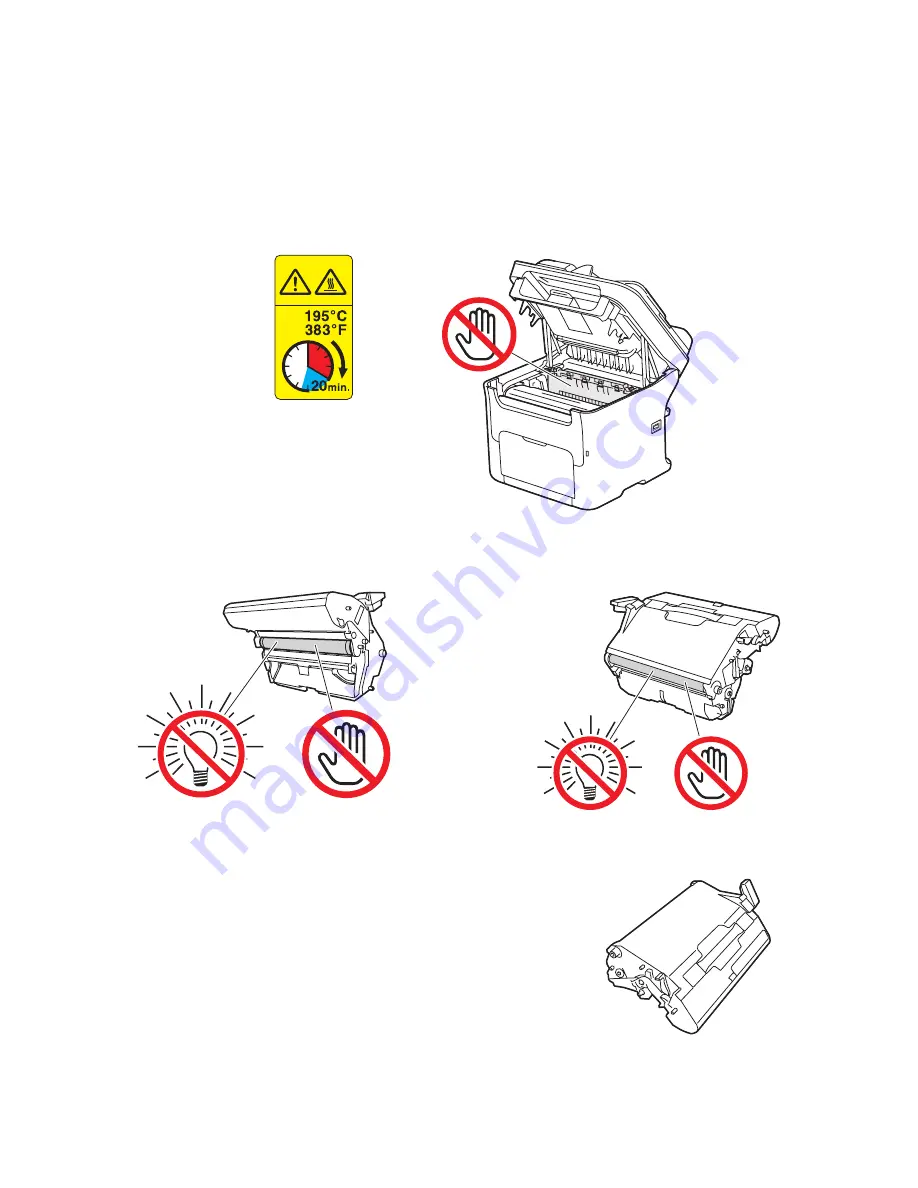
2. Grab the handle of the imaging unit and lift it up and slightly to the back and then slowly pull the
imaging unit up and out (see the picture above right).
Warning:
Never touch a labeled area found on or near the heat roller in the fuser when hot. You
can get burned. If a sheet of paper is wrapped around the heat roller, do not try to remove it until
the printer has cooled down sufficiently. To avoid injury, switch off the printer and wait 20 minutes
for the fuser to cool.
Caution:
Do not touch the PC drum and the transfer belt on the imaging unit (see pictures below).
3. Place the removed imaging unit aside, laying it horizontally
as shown in the picture at right. Be sure to keep the imaging
unit horizontal and place it where it will not become dirty.
Do not leave the imaging unit removed for more than 15
minutes, and do not place it in a location where it would be
exposed to direct light, such as sunlight.
6121-184
6121-211
6121-182
6121-186
6121-187
Summary of Contents for PHASER 6121MFP
Page 16: ...Safety Phaser 6121MFP Multifunction Printer User Guide 16...
Page 114: ...Scanning Phaser 6121MFP Multifunction Printer User Guide 114...
Page 138: ...Faxing Phaser 6121MFP Multifunction Printer User Guide 138...
Page 158: ...Control Panel Menus Phaser 6121MFP Multifunction Printer User Guide 158...
Page 214: ...Printer Specifications Phaser 6121MFP Multifunction Printer User Guide 214...
Page 226: ...Regulatory Information Phaser 6121MFP Multifunction Printer User Guide 226...
Page 237: ...Index Phaser 6121MFP Multifunction Printer User Guide 237 Z zoom ratio See scale...
Page 238: ...Index Phaser 6121MFP Multifunction Printer User Guide 238...


